Securing large 3D charms isn’t about hope or more glue; it’s about applying structural engineering principles to your nail art.
- Combine rigid clear acrylic to create a solid, form-fitting foundation with flexible jewelry gel for shock absorption and edge sealing.
- Placement is paramount: use the nail’s strongest point (the apex) as your anchor and avoid the high-stress “cantilever” zone at the free edge.
Recommendation: Stop simply “gluing” charms on and start engineering them into the nail structure for indestructible, snag-free results.
There’s a sinking feeling every nail artist knows. It’s the notification from a client a few days after an appointment, showing a photo of a stunning, complex 3D nail set, now missing its centerpiece. Or worse, the complaint that a large, beautiful charm snagged on their sweater, or ripped out a chunk of their hair. For too long, the common advice has been simplistic and ineffective: “just use more gel,” “try a different brand of glue,” or “put a thick top coat over it.” These are the equivalent of using tape to fix a cracked foundation. For heavy, high-profile charms, these are temporary patches, not permanent solutions.
The problem is rarely the adhesive itself; it’s the architecture of the entire design. The true failure point lies in our approach. What if the key to longevity isn’t in adhesion chemistry, but in structural engineering? This guide reframes the entire challenge of 3D nail art. We will stop thinking like decorators and start thinking like structural engineers. By analyzing material science, understanding stress distribution, and mastering mechanical locking techniques, you can build 3D art that is as durable as it is beautiful. This is about creating designs with inherent structural integrity from the base up, ensuring your intricate work withstands the rigors of daily life.
This article will deconstruct the process of creating durable 3D nail art. We will analyze the fundamental properties of core bonding materials, master the critical technique for sealing edges, identify the scientifically optimal placement zones to minimize stress, and even cover the methodologies for safe deconstruction and profitable pricing. Get ready to transform your 3D sets from fragile adornments into feats of miniature engineering.
Summary: A Structural Engineer’s Guide to Securing Heavy 3D Charms That Never Snag
- Jewelry Gel vs. Clear Acrylic: Which Bonds Large Charms Better?
- The “Caulking” Method: How to Seal Edges Around 3D Art?
- Where to Place High-Profile Charms to Minimize Impact Stress?
- How to Remove Huge 3D Clusters Without Ripping the Natural Nail?
- Flat Rate or Per Item: How to Charge for Complex 3D Sets?
- Gold or Silver: How to Match Your Hardware to Your Nail Art?
- Resin or Gel: What Keeps Crystals on for 4+ Weeks?
- How to Create Deep Aquarium Effects in Clear Acrylic?
Jewelry Gel vs. Clear Acrylic: Which Bonds Large Charms Better?
The choice between jewelry gel and clear acrylic is not a matter of preference but a calculated decision in material science. Each material possesses distinct properties that serve a different structural purpose. Thinking one is universally “better” is a fundamental error. The engineering approach is to leverage the strengths of both. Clear acrylic provides a rigid, unyielding structure. When cured, it creates an incredibly strong, hard base that will not flex. This is perfect for creating a solid anchor point that conforms perfectly to the underside of a large, irregular charm, eliminating any micro-gaps that could lead to rocking or shearing forces.
Conversely, jewelry gel is characterized by its flexibility. While it offers a strong chemical bond, its primary advantage is its ability to absorb shock and impact without cracking. A rigid system can be brittle; a minor knock can transfer the full force of the impact to the bond, causing a catastrophic failure. A flexible gel system dampens that force, distributing it across the surface. This property makes it the ideal material for sealing and shock-proofing the perimeter of a charm. The table below outlines the key engineering trade-offs.
| Factor | Jewelry Gel | Clear Acrylic |
|---|---|---|
| Flexibility | More flexible, absorbs shock better | Rigid, can cause breaks on natural nails |
| Curing Method | UV/LED light required (can cause heat spikes) | Air-dry chemical cure (no equipment needed) |
| Application Control | Self-leveling, easier for beginners | Requires skill to sculpt and shape |
| Bond Strength | Strong but flexible bond | Extremely strong rigid bond |
The ultimate solution is not to choose one over the other, but to create a hybrid system. This advanced technique leverages the best properties of both materials for maximum structural integrity, creating a bond that is both rigid at its core and flexible at its edges.
- Step 1: Apply a small bead of acrylic to the nail to create a solid anchor base that perfectly conforms to the charm’s shape.
- Step 2: Allow the acrylic base to fully cure until it is completely hard.
- Step 3: Apply jewelry gel around the edges of the cured acrylic base, acting as a flexible “caulking.”
- Step 4: Place the charm onto the gel and flash cure for 10 seconds to lock it in position.
- Step 5: Apply a final layer of gel meticulously around the charm’s edges to create a complete, seamless seal.
- Step 6: Perform a full cure under an LED lamp for 60-120 seconds to ensure complete polymerization.
The “Caulking” Method: How to Seal Edges Around 3D Art?
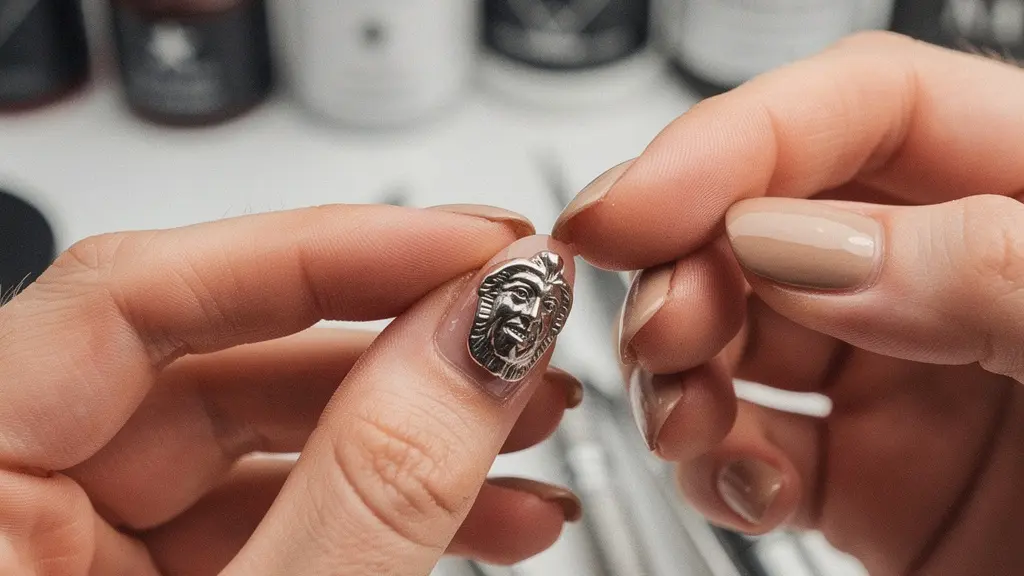
Simply placing a charm on a bead of gel and curing it leaves a microscopic, yet critical, point of failure: the seam. This tiny ledge, where the edge of the charm meets the nail surface, is the primary culprit for snagging hair, catching on fabric, and allowing moisture to slowly weaken the bond. A simple layer of top coat is insufficient; it’s too thin and lacks the structural body to fill this gap effectively. The professional solution is the “Caulking Method,” an engineering technique that creates a smooth, reinforced fillet, much like a weld in construction, to eliminate this seam entirely.
This method involves using a high-viscosity builder gel or a dedicated jewelry gel and a fine liner brush to meticulously “caulk” the perimeter of the charm. The goal is to build a gradual, concave ramp of gel that transitions seamlessly from the nail plate up to the side of the charm. This not only creates a snag-free surface but also adds a significant degree of lateral support, bracing the charm against side impacts. It transforms the charm from something sitting *on* the nail to something integrated *into* the nail’s structure.

As the image demonstrates, this technique requires precision. The key is to apply the gel with a steady hand, using a fine-tipped brush to push the product right up against the charm’s base. You are not painting a layer over the top; you are sculpting a structural support. After applying the “caulk,” a full cure is essential to ensure this new support structure is fully hardened. This single step is often the difference between a design that lasts one week and one that lasts four or more, providing the flawless, smooth finish that clients expect from high-end nail art.
Where to Place High-Profile Charms to Minimize Impact Stress?
Charm placement is a problem of physics, specifically stress distribution. Many artists place charms based on aesthetics alone, often near the free edge for dramatic effect. From an engineering perspective, this is the most vulnerable position possible. It creates a cantilever effect, where the charm hangs off the end of the nail with minimal support, magnifying the force of any impact and placing extreme stress on the bond and the natural nail underneath. A snag or bump in this zone is exponentially more likely to cause a complete failure.
The strongest point on the nail is the apex, the highest point of the nail enhancement’s structure, typically located in the center of the nail bed. Placing a heavy charm on or very near the apex anchors it to the most reinforced and structurally sound part of the nail. This position distributes the weight and any impact forces evenly across the entire nail bed, rather than concentrating them on a weak point. High-profile charms should be centralized, while lower-profile, smaller elements can be placed more peripherally. Visualizing the nail as a bridge, the apex is the central support pillar; it’s where you should place the heaviest load.
However, optimal placement isn’t just about physics; it’s about the client’s lifestyle. A charm placed safely for an office worker might be a hazard for a hairdresser. Conducting a quick “lifestyle audit” before beginning a 3D set is a crucial step in proactive, client-specific engineering.
Action Plan: Auditing Charm Placement for Client Durability
- Identify Vocation: Determine the client’s profession and daily activities (e.g., typist, healthcare worker, stylist).
- Map Impact Zones: Identify which parts of the nail will experience the most contact. For a typist, this is the free edge and tips. For a stylist, the sidewalls are high-risk for hair snagging.
- Locate Safe Zones: Pinpoint the nail’s apex and central areas, which are structurally the strongest and least likely to suffer direct impact. The thumb and pinky often see less action.
- Assess Risk vs. Reward: Evaluate the chosen charm’s profile and shape against the client’s impact zones. Is the aesthetic desire for free-edge placement worth the high risk of failure?
- Finalize Placement Blueprint: Create a final design plan that places the largest, highest-profile charms in the safest zones, reserving more delicate placements for special-occasion wear only.
How to Remove Huge 3D Clusters Without Ripping the Natural Nail?
The removal of a large, securely bonded 3D cluster is not a brute-force task; it is a controlled deconstruction. Attempting to pry, clip, or rip off a well-engineered charm is the fastest way to cause significant damage to the natural nail plate. The bond is designed to be stronger than the nail’s layers, meaning the nail will delaminate and break before the bond does. The process must focus on systematically weakening and dismantling the adhesive structure without transferring stress to the natural nail.
A particularly insightful technique, especially for rigid bonds, involves applying a controlled fracture force. As described by experts, this method uses tools in an unconventional way to break the adhesive’s internal structure.
The ‘Fracture’ technique using old nippers not to cut the charm, but to gently squeeze the base of the adhesive can ‘crack’ a rigid bond, especially acrylic or strong gel, making the charm pop off cleanly
– Professional Nail Technician Guide, DTK Nail Supply Tutorial
This approach cleverly targets the brittleness of the cured material. For a more systematic deconstruction, especially with encapsulated charms, a precise e-file workflow is required. The goal is to debulk the adhesive around the charm first, isolating it from the rest of the nail structure before attempting to dislodge it. This minimizes heat, vibration, and torque on the nail plate.
Follow a safe, step-by-step e-file removal protocol:
- Initial Debulking: Start with a coarse carbide bit at a low RPM (5,000-8,000) to carefully remove the bulk of the gel or acrylic surrounding the charm. Do not touch the charm itself.
- Reduce Thickness: Switch to a medium-grit sanding band to thin the adhesive layer down to approximately 1mm. The goal is to get close to the base without touching the natural nail.
- Break the Seal: If the charm is encapsulated, try to gently slide dental floss or a thin, strong wire underneath an edge to “saw” through the base layer of adhesive and break the seal.
- Targeted Debonding: Apply a targeted debonding agent or pure acetone with a micro-brush only at the adhesive line. Let it sit for a minute to soften the bond.
- Final Removal: Use a gentle ceramic bit at a very low RPM (3,000-5,000) or a hand file to carefully remove the remaining softened adhesive until the charm lifts away with minimal force.
Flat Rate or Per Item: How to Charge for Complex 3D Sets?
Pricing complex 3D nail art requires a shift from a “per item” mindset to a “project-based” engineering fee. Charging a simple flat rate per charm fails to account for the vast differences in complexity, material cost, and, most importantly, the specialized skill and time involved. A single, large, encapsulated charm can take more time and technical expertise than ten small, surface-bonded crystals. A “per item” model undervalues your most advanced work and overcharges for simple additions.
The professional standard is to adopt a tiered pricing model based on complexity. This structure acknowledges that you are not just selling a product (the charm) but a service: the structural engineering required to make it durable. Market data provides a baseline for what clients expect to pay for such advanced work; for example, deluxe nail art with 3D elements costs between $35-$50 per design in addition to the base service price. Your pricing should reflect this value and be broken down into logical levels of effort.
Implementing a tiered model provides clarity for both you and your client. It allows you to accurately quote a project based on its structural requirements and ensures you are compensated fairly for your time and expertise. This is a far more professional system than adding a vague “art fee” at the end. Consider this framework:
- Level 1 (Basic): A single, medium-sized charm with standard jewelry gel application. (Base Price + $5-10)
- Level 2 (Moderate): A small cluster of 2-3 charms or one large charm requiring a hybrid acrylic/gel base. (Base Price + $15-25)
- Level 3 (Complex): A multi-charm design involving the “caulking” method and precise placement considerations. (Base Price + $30-50)
- Level 4 (Extreme): Full 3D sculpture, partial or full encapsulation (e.g., aquarium nails), or oversized statement pieces requiring extensive structural work. (Base Price + $50-100+)
The most accurate method is to calculate your price using a formula: (Total Material Cost + (Your Desired Hourly Rate x Time Spent)). This ensures every project is profitable and fairly valued.
Gold or Silver: How to Match Your Hardware to Your Nail Art?
While structural integrity is paramount, the aesthetic engineering of a design cannot be ignored. The choice between gold, silver, and other metallic hardware is a key finishing detail that can harmonize or clash with the overall look. The most reliable method for matching metal tones is to consider the client’s skin undertone, a classic principle from color theory and jewelry styling. This ensures the hardware complements the client’s natural palette, making the entire design look more cohesive and expensive.
A simple guide can help you and your client make the best choice:
- Cool Undertones (skin has pink/blue hints, veins appear blue): Opt for silver, white gold, or platinum-toned hardware. These cool metals will pop against the skin.
- Warm Undertones (skin has golden/peach hints, veins appear green): Select classic gold, copper, or brass-toned charms. These warm metals will create a rich, harmonious look.
- Neutral Undertones (a mix of both cool and warm): This is the most versatile palette. Both gold and silver work well, but rose gold is often seen as a universally flattering choice that bridges the gap.
Beyond simple matching, there’s a crucial preparation step for metal charms that directly impacts structural integrity. The smooth, plated surface of many metal charms is naturally resistant to adhesion. To create a superior bond, you must introduce a physical texture for the adhesive to grip onto. This is a core principle of creating a mechanical lock. Professionals have found that lightly buffing the back of a metal charm with a fine-grit file or sanding band creates microscopic grooves. This dramatically increases the surface area and provides a physical texture for acrylic or gel to flow into, creating a much stronger and more durable bond than a simple chemical adhesion on a slick surface.
Resin or Gel: What Keeps Crystals on for 4+ Weeks?
When dealing with small, faceted elements like crystals, the challenge shifts from managing weight to creating an unshakeable mechanical lock. A simple drop of adhesive (resin or gel) underneath a crystal relies on a very small surface area for its bond, making it prone to failure from shearing forces. The professional solution is not to “glue” the crystal down, but to build a custom “bezel setting” for it using a high-viscosity builder gel. This technique, borrowed from jewelry making, involves physically cupping the base of the crystal in gel, creating “prongs” that lock it in place mechanically.
The gel doesn’t just stick the crystal to the nail; it encases the crystal’s lower perimeter, making it impossible for it to pop off from a side impact. This mechanical lock is far more secure than any simple adhesive bond. This technique is often combined with a flash cure to ensure perfect placement. According to nail technician Eunice Park, this advanced method can result in crystal adhesion that lasts anywhere from two to four weeks.
The professional workflow for creating a secure bezel setting is a multi-step, precision process:
- Step 1: Apply a bead of medium-viscosity builder gel to the nail surface where the crystal will sit.
- Step 2: Use tweezers to place the crystal and press it gently into the gel bead to seat it firmly.
- Step 3: Flash cure for exactly 10 seconds. This crucial step locks the crystal’s position and prevents it from sliding during the more detailed work.
- Step 4: With a detail brush, carefully build up gel “prongs” around the base of the crystal, ensuring the gel rises slightly up its sides.
- Step 5: Use additional gel to create a smooth, seamless transition from the nail surface to the base of the setting, eliminating any snag-points.
- Step 6: Perform a final, full cure for at least 120 seconds to ensure the entire structure, including the deep parts of the gel, is completely polymerized and hardened.
This method requires more time and skill, but it delivers the longevity that clients paying for intricate crystal work expect and deserve.
Key Takeaways
- The Hybrid Method: Use a rigid acrylic base for a solid anchor and a flexible jewelry gel to seal the edges and absorb shock.
- Apex Placement: Always anchor the heaviest charms on or near the nail’s apex, its strongest structural point, to avoid the high-stress cantilever effect at the free edge.
- The “Caulking” or “Bezel” Technique: Eliminate snagging and create a mechanical lock by building a seamless ramp of gel from the nail plate up to the charm’s edges.
How to Create Deep Aquarium Effects in Clear Acrylic?
Creating deep, clear “aquarium” nails or fully encapsulating large charms represents the pinnacle of structural integration. In this technique, the charm is no longer an attachment but a fully integrated component of the nail’s structure, making it virtually indestructible and completely snag-free. While full encapsulation offers maximum security, professionals often use a partial encapsulation technique. This involves encasing the base and sides of the charm in clear acrylic or gel while leaving the top faceted surface exposed. This provides nearly all the security of a full encapsulation while preserving 100% of the charm’s sparkle and reflective quality.
The primary technical challenge during encapsulation is managing the exothermic reaction—the heat generated as acrylic or thick layers of gel cure. Too much heat can be uncomfortable or even painful for the client, and it can also cause clouding or yellowing in the clear product, ruining the “glass-like” effect. Controlling this reaction is a matter of disciplined layering and patience.
To manage heat and maintain perfect clarity during encapsulation, follow these engineering best practices:
- Work in thin, controlled layers, applying no more than 2mm of product per application to minimize the volume of curing material at any one time.
- When using acrylic, allow 2-3 minutes of cooling time between layers for the exothermic heat to dissipate. Since acrylics cure when they contact air, they will be completely dry in 10-15 minutes without a UV light.
- Always use high-quality, non-yellowing monomers and polymers specifically rated for encapsulation work.
- For gel encapsulation, cure each thin layer for only 30 seconds to prevent heat spikes and potential product clouding before adding the next layer.
- A clever trick for large metal charms is to pre-chill them in a freezer for a few minutes before application; the cold metal will act as a heat sink, absorbing some of the reaction’s energy.
By mastering these advanced techniques, you can offer clients truly breathtaking and exceptionally durable nail art that sets your services apart from the competition.
By applying these structural principles to your next 3D set, you can elevate your artistry. You will not only create beautiful designs but also build a reputation for exceptionally durable, high-quality work that clients will trust and value. Begin engineering your nail art today.