Acetone is brutally effective but infamously damaging; the solution is not to abandon it, but to re-engineer it into a smarter solvent system.
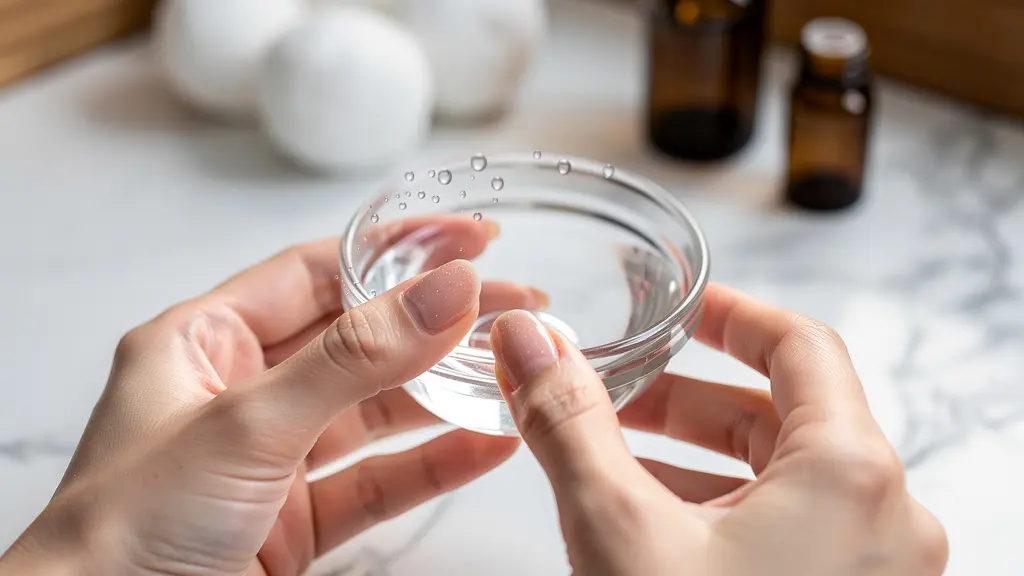
- Adding a few drops of glycerin to pure acetone creates a moisturizing buffer that significantly reduces its harsh, drying effects on skin and nails.
- Optimizing your removal technique with controlled heat, physical barriers, and precise cotton application is just as crucial as modifying the formula itself.
Recommendation: Adopt a full protocol—from formula prep to post-removal “slugging”—to eliminate damage and maintain nail health without sacrificing acetone’s power.
The sharp, chemical scent of acetone is familiar to anyone who’s ever tackled a stubborn glitter manicure or a set of gel nails. It’s the undisputed champion of solvents, dissolving polish in minutes where other removers struggle. But this power comes at a cost: dry, white-streaked skin, brittle nails, and peeling cuticles. The conventional advice is often a reactive, two-step process: endure the damage, then slather on moisturizer and hope for the best. This approach treats the symptom, not the cause, leaving sensitive skin in a perpetual cycle of damage and repair.
Many users, frustrated with the harshness, turn to gentler, often less effective alternatives or simply accept nail damage as an unavoidable price. But what if the problem isn’t acetone itself, but how we use it? What if we could hack the chemistry of the removal process to keep the power while eliminating the pain? This is where the mindset of a cosmetic chemistry hacker comes in. It’s not about finding a weaker substitute; it’s about upgrading the solvent system you already have.
The secret lies in a simple, inexpensive additive: glycerin. By incorporating this powerful humectant into your acetone, you fundamentally change its interaction with your skin. This guide will deconstruct the entire removal process, transforming it from a brute-force attack into a strategic, damage-proof protocol. We will explore why temperature matters, how physical barriers can be optimized, and why the “less is more” principle applies to your cotton pads. Forget everything you thought you knew about taking off your polish; it’s time to build a better, safer system from the ground up.
This comprehensive guide will walk you through each element of a protective removal strategy. By understanding the science behind each step, you can customize a routine that delivers powerful results without compromising the health of your skin and nails.
Summary: The Ultimate Guide to Damage-Free Acetone Removal
- Soy-Based Removers: Do They Actually Work on Glitter Polish?
- Why Placing Acetone in a Warm Water Bowl Speeds Up Removal Safely?
- Vaseline Barrier: Does Coating the Finger Affect Removal Efficiency?
- Why Using Less Cotton Reduces Skin Exposure to Acetone?
- The “Slugging” Method for Nails After Harsh Removal
- 100% Acetone vs. Remover with Oils: Which Is Faster?
- Why Is the “Tickle” Feeling After Curing a Sign of Barrier Breach?
- Jojoba vs. Almond Oil: Which Molecule Is Small Enough to Penetrate the Matrix?
Soy-Based Removers: Do They Actually Work on Glitter Polish?
In the quest for a gentler alternative to acetone, soy-based removers have emerged as a popular “non-toxic” option. These formulas, typically derived from farm crops, work by dissolving the polish binders more slowly and less aggressively. For standard crème polishes, they can be a fantastic, moisturizing alternative that leaves nails feeling conditioned rather than stripped. The growing interest in these products is clear, as market research shows the non-toxic remover segment will reach a projected USD 780 million by 2033.
However, their effectiveness dramatically decreases when faced with more robust formulas like gel or glitter polish. These polishes contain larger, more resilient particles and stronger polymers that soy-based solvents struggle to break down. Users report that while it’s possible to remove glitter polish with a soy remover, it requires significantly more product, more time, and a lot more physical effort (i.e., scrubbing). This can inadvertently lead to mechanical damage to the nail plate, defeating the purpose of choosing a “gentler” product.
According to user experiences, a soy-based remover may take several minutes of continuous rubbing per nail to tackle glitter, whereas acetone can dissolve it with a simple soak. While consistent use of soy removers can lead to stronger, healthier nails over time by avoiding dehydration, they are not an efficient tool for heavy-duty removal jobs. They shine as a daily driver for regular polish but fall short when you need industrial-strength solvent power, making the glycerin-acetone hack a more practical solution for those who wear gels or glitters.
Why Placing Acetone in a Warm Water Bowl Speeds Up Removal Safely?
One of the most effective hacks for improving acetone’s efficiency is leveraging thermal dynamics. Acetone’s effectiveness as a solvent increases with temperature. By gently warming it, you accelerate the chemical reaction that dissolves the polish, significantly cutting down the required soak time. Less soak time means less overall exposure of your skin and nails to the harsh solvent. The key is to do this safely. Acetone is highly flammable, so it should never be heated directly or in a microwave. The safest method is the double-boiler or “bain-marie” technique: placing your bowl of acetone inside a larger bowl of warm water.
This method provides gentle, indirect heat, raising the acetone’s temperature just enough to boost its power without creating a fire hazard. The ideal water temperature should not exceed 50°C (122°F), warm to the touch but not hot. This small change can reduce the removal time for gel polish from 15-20 minutes to under 10. Combining this with the glycerin hack is a winning strategy: the glycerin protects your skin, while the warmth makes the process faster, further minimizing contact time.
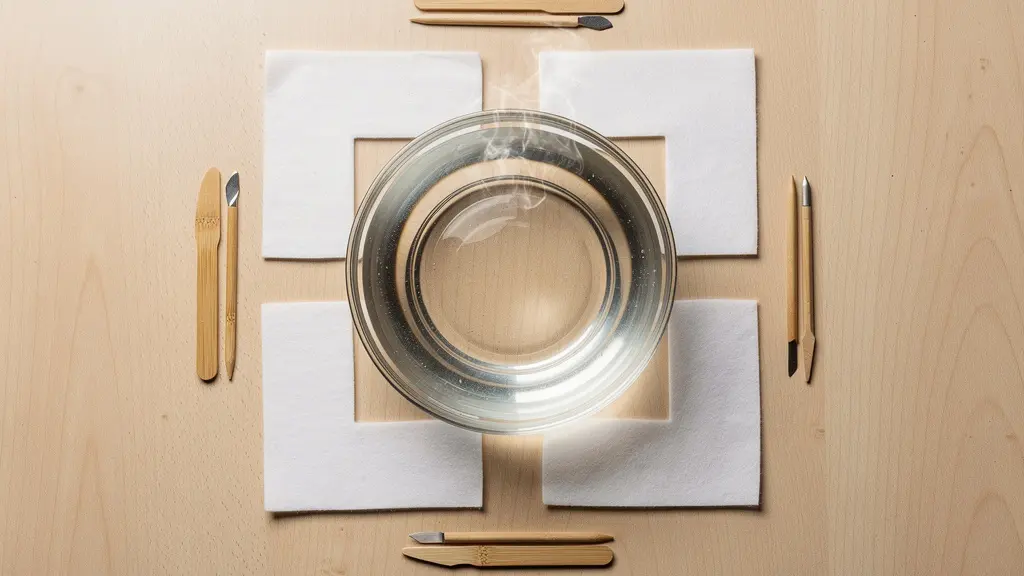
This professional setup illustrates the simplicity and elegance of the warm water bath method. To maximize safety and effectiveness, always work in a well-ventilated space to disperse the increased fumes that result from warming the acetone. The combination of a chemically-buffered solvent (with glycerin) and a physically-accelerated process (with heat) is a core tenet of the cosmetic hacker’s approach to nail care.
Your Action Plan: Safe Warm Water Acetone Removal
- Set the environment: Ensure your room is at a comfortable temperature of 22-24°C (71-75°F) and is well-ventilated to avoid fume concentration.
- Prepare the bowls: Pour your glycerin-acetone mixture into a small glass or ceramic bowl. Place this bowl inside a larger bowl filled with warm water, ensuring the water temperature never exceeds 50°C (122°F).
- Add protective elements: Before warming, ensure your glycerin is already added to the acetone to help reduce evaporation and add a moisturizing buffer.
- Soak and remove: Proceed with your soak-off method, noticing the significantly reduced time needed to soften the polish.
- Post-removal care: Once finished, properly dispose of the acetone and immediately wash your hands and apply a quality cuticle oil and moisturizer.
Vaseline Barrier: Does Coating the Finger Affect Removal Efficiency?
Creating a physical barrier between your skin and the acetone is a cornerstone of protective removal. Petroleum jelly (like Vaseline) is the most common and accessible material for this job. When applied to the cuticles and the skin surrounding the nail, it forms an occlusive, non-polar layer that repels the acetone, preventing it from making contact and causing dehydration. The primary concern users have is whether this greasy barrier will seep under the cotton and interfere with the polish removal itself. The answer lies in precision application.
As long as the petroleum jelly is applied carefully to the skin, leaving a tiny 1mm margin around the edge of the nail polish, it will not affect removal efficiency. Its thick, viscous nature keeps it from migrating onto the nail plate. For an even more foolproof method, some professionals use liquid latex guards, which are painted on the skin and peel off in one piece after removal, creating a perfect shield with zero chance of interference.
This table from an analysis by the American Academy of Dermatology compares common barrier methods.
| Method | Application | Protection Level | Removal Impact |
|---|---|---|---|
| Petroleum Jelly | A thin layer on cuticles and surrounding skin | High barrier | Minimal if kept 1mm from polish |
| Liquid Latex Guards | Painted around nail | Complete shield | No impact – peels off |
| Thick Balms (Aquaphor) | Applied to skin only | Moderate-High | Low impact if precise |
Dr. Shari Lipner, a board-certified dermatologist, also offers a clever hack to enhance the process. As she noted for the American Academy of Dermatology, using plastic food wrap can be more effective than foil:
Plastic food wrap rather than foil when removing gel nail polish at home creates a tighter seal than foil, so the acetone is less likely to drip
– Dr. Shari Lipner, American Academy of Dermatology
This tighter seal not only prevents drips but also traps the acetone fumes and body heat, further speeding up the removal process. The combination of a precise Vaseline barrier and a tight plastic wrap seal creates a highly effective and controlled removal environment.
Why Using Less Cotton Reduces Skin Exposure to Acetone?
The conventional method of using a full or half cotton ball to soak off polish is incredibly wasteful and damaging. A large, fluffy piece of cotton holds far more acetone than necessary and, more importantly, covers a much larger surface area than the nail itself. This means a significant portion of your fingertip is unnecessarily saturated with a harsh solvent for 10-15 minutes. The goal of an optimized removal process is to target only the nail plate, minimizing skin contact at all costs.
The solution is the “cotton shred” method. Instead of using a whole cotton ball, you tear off a small piece that is just large enough to cover the surface of your nail polish. This simple change has a massive impact; using precisely cut or torn cotton pieces instead of full cotton balls can achieve an 80% reduction in skin contact with the acetone. This dramatically lowers the risk of dryness, irritation, and over-exposure.
To be effective, this smaller piece of cotton must be fully saturated. Using too little acetone will cause it to evaporate quickly and result in an uneven, slow removal process, which ultimately increases the total time your nail is exposed to the solvent. The technique involves a few key steps:
- First, apply your petroleum jelly barrier to the surrounding skin.
- Next, tear a cotton ball or pad into ten nail-sized pieces.
- Saturate one small piece with your glycerin-acetone mixture and place it directly on the nail plate.
- Finally, wrap the fingertip tightly with foil or plastic wrap. Ensure a tight seal by folding the top down, wrapping the sides, and pinching the top firmly.
This methodical approach ensures the potent solvent is concentrated exclusively where it’s needed, protecting the surrounding skin and making the entire process cleaner and more efficient. Removing the wraps one finger at a time also prevents the acetone on other nails from evaporating while you work.
Key Takeaways
- The Glycerin Hack: Adding a few drops of glycerin to pure acetone transforms it into a moisturizing remover, preventing the drying effects on skin and nails.
- Technique is Everything: A damage-proof removal isn’t just about the formula. Controlled heat, precise physical barriers, and minimal cotton size are equally crucial for protecting your skin.
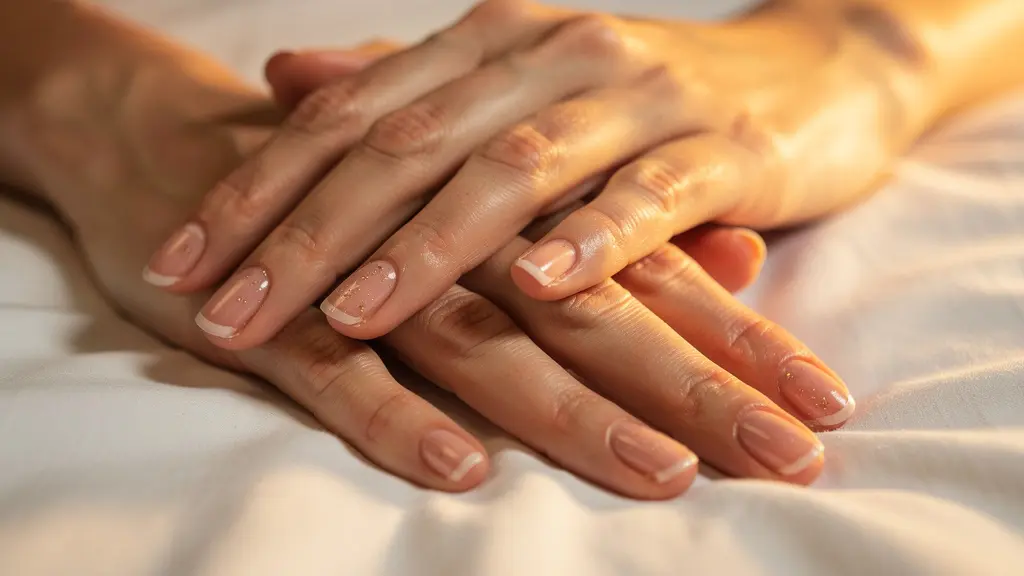
- Prioritize Recovery: Post-removal care is non-negotiable. A “nail slugging” routine with cuticle oil and an occlusive balm is essential for restoring the nail’s barrier function immediately.
The “Slugging” Method for Nails After Harsh Removal
After any acetone-based removal, even one buffered with glycerin, your nails and cuticles are in a vulnerable state. The solvent strips away natural oils and lipids, leaving the nail plate porous and the skin barrier compromised. “Nail slugging” is a post-removal recovery protocol adapted from skincare that works to intensely rehydrate and restore this barrier. The principle is simple: layer hydrating products and then seal them in with an occlusive barrier to prevent moisture loss and promote deep absorption overnight.
Dermatologists confirm that this method is highly effective. By trapping moisture with a product like petroleum jelly, you prevent transepidermal water loss and give the underlying hydrating ingredients hours to work. This not only restores moisture but also protects the compromised cuticle area from external irritants and potential infections. It’s an especially powerful technique during dry winter months when skin is already prone to dehydration.
The most effective nail slugging protocol is a “three-layer sandwich” applied before bed. This method ensures both deep penetration into the nail matrix and surface conditioning of the surrounding skin.
The process is as follows:
- Layer 1: Penetrating Oil. Start by applying a cuticle oil rich in jojoba oil. Its molecular structure is very similar to our skin’s natural sebum, allowing it to penetrate the porous nail plate.
- Layer 2: Hydrating Cream. Next, massage a thick hand cream containing ingredients like shea butter into the cuticles and surrounding skin to deliver hydration.
- Layer 3: Occlusive Seal. Finally, apply a generous layer of a petroleum-based product like Vaseline, Aquaphor, or CeraVe Healing Ointment over the entire nail and cuticle area. This is the “slugging” step that seals everything in.
For maximum effect, wear cotton gloves overnight to keep the products on your hands and off your sheets. Repeating this for a few nights after a gel removal can dramatically accelerate the recovery process, leaving you with resilient, hydrated nails instead of brittle, peeling ones.
100% Acetone vs. Remover with Oils: Which Is Faster?
When it comes to removal speed, 100% pure acetone is the undisputed king. Its powerful solvent properties break down gel polish in as little as 10-12 minutes. However, this speed comes at the high cost of extreme dehydration. Commercial “conditioning” removers attempt to solve this by pre-mixing acetone with various oils and moisturizing agents. While gentler, this dilution significantly reduces the acetone’s efficiency, often extending removal times to 20 minutes or more. This creates a frustrating trade-off: speed or safety?
The DIY glycerin-acetone hack offers the perfect middle ground. By adding a small amount of glycerin (a humectant that draws moisture into the skin) to 100% acetone, you create a custom-blended remover that retains most of its speed while adding a crucial protective element. A 10:1 ratio of acetone to glycerin is a great starting point. This mixture might take a couple of minutes longer than pure acetone (around 14-15 minutes for a full gel soak-off), but it is vastly superior in preventing dehydration and far faster than commercial oil-infused removers.
This approach isn’t just more effective; it’s also more economical. A large bottle of pure acetone and a bottle of vegetable glycerin are inexpensive and will last for dozens of removals. Compared to pre-made conditioning removers, creating your own mixture can result in up to 75% savings. This puts you in complete control of your solvent system, allowing you to adjust the glycerin ratio based on your skin’s sensitivity and the type of polish you’re removing.
The following table breaks down the performance differences between the most common remover types.
| Remover Type | Time for 3-coat gel | Effectiveness | Nail damage risk |
|---|---|---|---|
| 100% Acetone | 10-12 minutes | Highest | High drying effect |
| DIY 10:1 Acetone-Glycerin | 14-15 minutes | High | Moderate – moisturizing |
| Commercial Oil Remover | 19-20 minutes | Moderate | Low – contains moisturizers |
| Soy-Based Remover | 30-45 seconds soak needed | Low for gel/glitter | Minimal – natural formula |
Why Is the “Tickle” Feeling After Curing a Sign of Barrier Breach?
That strange “tickle,” itch, or slight burning sensation you sometimes feel on your skin after gel application or during acetone removal is not a good sign. It’s your nerves responding to a chemical interaction, indicating that a barrier has been breached. During removal, it signals that the acetone has seeped past your protective Vaseline layer and is beginning to strip the natural lipids from your epidermis. It’s a low-grade chemical irritation and an early warning sign of impending dryness and damage. Paying attention to this sensation allows you to react quickly, either by repositioning the cotton or adding more of a protective barrier.
The goal is to complete the removal process as quickly as possible to minimize the duration of this barrier breach. This is where temperature once again becomes a critical factor. As professional nail technician Paola Ponce notes, temperature directly impacts efficiency. Cold hands and cold acetone will significantly slow down the process, prolonging your skin’s exposure to the solvent and increasing the risk of irritation. Keeping your hands and your removal products warm is essential for a fast, effective soak-off.
If your hands are cold, using terry-cloth mittens or wrapping a warm blanket around them during the soak can help maintain the optimal temperature for the acetone to work quickly. This synergy between managing the solvent’s environment (temperature) and protecting your skin’s environment (barriers) is key. The “tickle” is your body’s alarm system; listening to it and accelerating the process through warmth is a smart, protective strategy that prevents minor irritation from escalating into major damage.
Jojoba vs. Almond Oil: Which Molecule Is Small Enough to Penetrate the Matrix?
After the removal process, rehydrating the nail is paramount. But not all oils are created equal. Their effectiveness depends on their molecular structure and ability to penetrate the nail plate, known as the nail matrix. The nail is made of layers of keratin, and while it feels hard, it is porous. For an oil to be truly restorative, it must have molecules small enough to seep into these layers, rather than just sitting on the surface.
Jojoba oil is the undisputed champion for this task. Its chemical composition is remarkably similar to that of human sebum, the natural oil produced by our skin. This makes it highly biocompatible. Its small molecular size allows it to be readily absorbed through the nail plate, delivering moisture deep within the matrix to restore flexibility and prevent brittleness. Almond oil, while an excellent conditioner rich in Vitamin E, has a larger molecular structure. It is fantastic for moisturizing the cuticles and the surface of the nail, but it is less effective at deep penetration.
For optimal recovery, a blend is often best. Dermatologists recommend using oils enriched with vitamin E, jojoba, or almond oil to support the regeneration of both the nail and cuticle. A smart “hacker” approach is to create a custom blend: use a higher concentration of jojoba oil (around 70%) for deep penetration, mixed with almond oil (30%) for surface nourishment and its vitamin E benefits. This combination provides a comprehensive, multi-layered approach to rehydration. This recovery step is crucial, as complete nail regrowth takes approximately 6 months for fingernails and up to 18 months for toenails, so protecting and nourishing existing nail is vital.
Now that you are equipped with a complete, science-backed protocol, you can confidently use acetone to remove even the most stubborn polish without fear of damaging your skin and nails. Start building your damage-proof removal system today for a future of stronger, healthier nails.
Frequently Asked Questions About Nail Recovery Oils
Why is jojoba oil preferred for nail treatment?
Jojoba oil’s molecular structure is the most similar to our skin’s natural sebum. This makes it light, non-greasy, and, most importantly, allows it to easily penetrate the porous layers of the nail plate for deep hydration.
Can almond oil be used instead of jojoba?
Yes, almond oil is an excellent choice for conditioning the surface of the nail and the surrounding skin. It is rich in Vitamin E and provides great nourishment, though its larger molecules mean it penetrates less deeply into the nail matrix compared to jojoba oil.
What’s the best oil blend ratio?
For a comprehensive treatment, experts often recommend a blend. A mix of approximately 70% jojoba oil for deep penetration and 30% almond oil for surface conditioning and vitamin E nourishment offers the best of both worlds.