In summary:
- Acetone strips your skin’s protective barrier, leading to dryness, cracking, and irritation.
- True healing involves a clinical layering method at night: humectants to hydrate, emollients to soften, and occlusives to seal.
- Protecting your hands from daily aggressors like UV light, harsh soaps, and even the wrong glove fabric is just as crucial as treatment.
- You can make the removal process less damaging by adding glycerin to your acetone as a protective buffer.
That familiar sight after removing a soak-off manicure can be disheartening: the skin around your nails looks white, feels tight, and is prone to cracking and peeling. It’s a common frustration for anyone who loves gel polish. You’ve likely tried slathering on cuticle oils or hand creams, only to find the relief is temporary and the problem returns after the next removal. This cycle happens because the issue is deeper than simple dryness; it’s a sign of a compromised skin barrier, the delicate, living ecosystem responsible for protecting your skin.
Most advice focuses only on moisturizing, but it fails to address the root cause of the damage or the hidden daily aggressors that prevent healing. The truth is, restoring this barrier isn’t just about applying a single product. It’s about adopting a restorative, multi-step approach that actively rebuilds your skin’s defenses. It requires understanding the science behind the damage—from the way acetone strips natural lipids to how common dish soap disrupts your skin’s pH balance.
But what if the key wasn’t just to repair the damage after it’s done, but to build a resilient skin barrier ecosystem that can better withstand the process? This guide will shift your focus from temporary fixes to a holistic, clinical strategy. We’ll explore the science of your skin’s barrier, provide an emergency protocol for inflammation, and introduce advanced techniques like “slugging” for nails. Most importantly, you will learn how to treat, protect, and fortify the skin around your nails for long-term health and resilience.
This article provides a complete, restorative plan. By exploring each step, you will gain the knowledge to not only heal your current irritation but also prevent future damage, ensuring your hands remain healthy and beautiful.
Summary: A Restorative Plan for Your Nail’s Skin Barrier
- Why Is the “Tickle” Feeling After Curing a Sign of Barrier Breach?
- Do UV Protection Gloves Protect the Skin Barrier from Aging?
- Occlusives vs. Humectants: What Does Your Cuticle Area Need at Night?
- How Does Dish Soap Disrupt the Acid Mantle of Your Hands?
- Winter Gloves: Why Fabric Choice Matters for Skin Barrier Retention?
- What to Apply Immediately on Red Cuticles to Reduce Swelling?
- The “Slugging” Method for Nails After Harsh Removal
- How to Add Glycerin to Acetone to Protect Your Skin During Removal?
Why Is the “Tickle” Feeling After Curing a Sign of Barrier Breach?
That slight “tickle,” itch, or excessive heat spike you feel under the UV/LED lamp isn’t just a normal part of the curing process; it’s a critical warning signal from your body. This sensation indicates a barrier breach, where the protective outer layer of your skin is compromised. Acetone and mechanical buffing during manicure prep strip away the essential lipids and proteins that form this barrier. This leaves microscopic tears in the skin around your nail and cuticle area, creating pathways for the monomers in the gel polish to penetrate deeper than they should. When these monomers cure, the chemical reaction happening on sensitive, exposed tissue is what you perceive as a tickle or burn.
Ignoring this sign can lead to more significant issues. A compromised barrier is not just about dryness; it’s an open door for irritants and allergens. As one nail technician observed in a case study, repeated damage can lead to red, hot, and painful nail beds that are harboring a low-grade infection. This happens because the skin’s natural defense system is offline, unable to protect against environmental microbes. Understanding whether your barrier is intact is the first step toward healing it.
Case Study: From Acetone Damage to Infection
A nail technician reported that several clients who frequently had gel polish removed with acetone developed severely damaged nails. The tips became lumpy and thin, while the skin at the nail ends turned red, felt hot, and was painful to the touch. An examination revealed that the constant chemical-induced barrier damage had allowed an infection to develop in the nail beds. The situation was resolved within a week by using a diluted apple cider vinegar soak (a 1:20 ratio with water) to restore pH balance and combat the infection, allowing the nails to grow out normally.
Your Action Plan: Test Your Nail Barrier Integrity
- The Washcloth Test: After a shower when your skin is soft, gently push back your cuticles with a soft washcloth. A healthy barrier will show no redness or irritation.
- The Oil Absorption Test: Apply a single drop of cuticle oil. A compromised barrier, thirsty for lipids, will absorb it almost instantly. A healthy one will take 30-60 seconds.
- The Sensation Check: During your next gel application, pay close attention to the curing process. Any sensation beyond a mild, brief warmth, especially a “tickle” or sharp heat, indicates that monomers are penetrating through micro-tears in your skin.
Do UV Protection Gloves Protect the Skin Barrier from Aging?
While we focus on the immediate damage from acetone, we often overlook another aggressor in the manicure process: ultraviolet (UV) radiation from curing lamps. These lamps primarily emit UVA rays, the same type of radiation responsible for photo-aging—the development of wrinkles, fine lines, and sunspots. While the risk of skin cancer from lamps is debated, the cosmetic impact on the skin barrier is clear. UVA exposure degrades collagen and elastin, weakening the skin’s structure and its ability to retain moisture and defend itself over time. This makes your already-sensitized skin even more vulnerable.
The most effective way to mitigate this is by using a physical shield. UPF (Ultraviolet Protection Factor) 50+ fingerless gloves are the gold standard, blocking over 98% of UV rays. Yet, it’s a step few people take; according to a recent survey from UC Berkeley researchers, only 2% of those getting gel manicures use any form of protection. While applying a broad-spectrum SPF 50 sunscreen 20 minutes before your appointment is another option, it can be greasy, may interfere with the manicure, and needs to be applied diligently to be effective. Gloves offer consistent, mess-free protection for the delicate skin on your hands, preserving its long-term health and appearance.
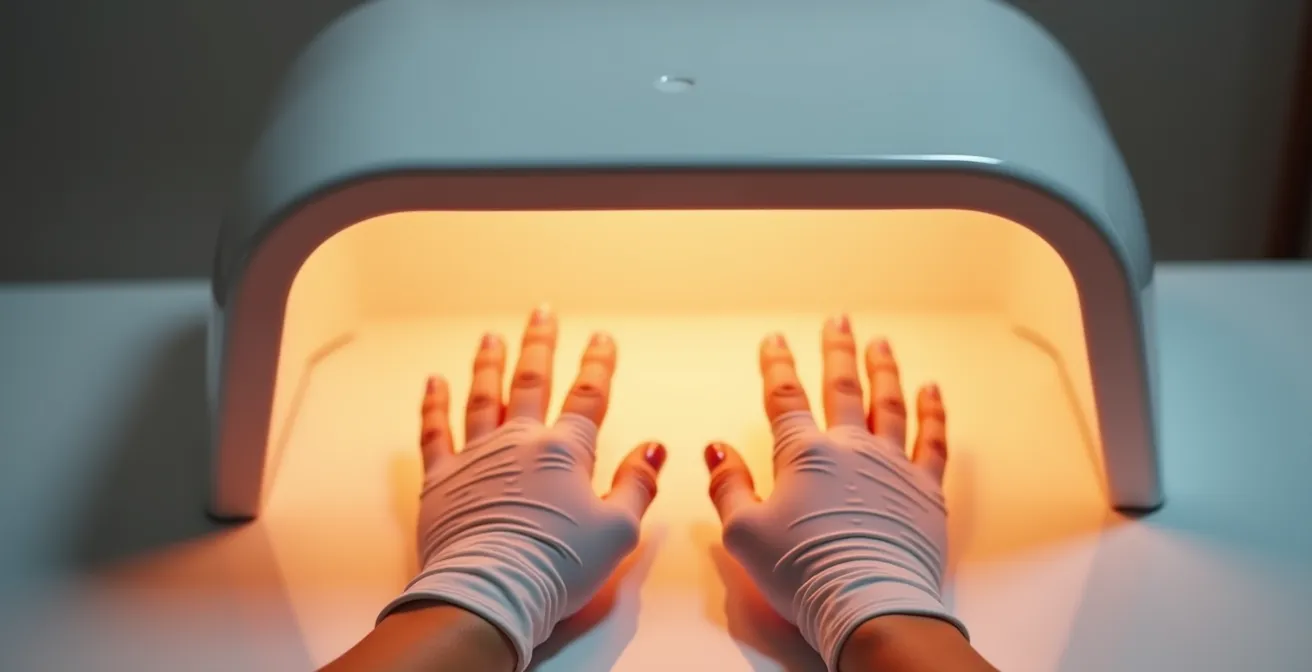
The following table breaks down the effectiveness of different protection methods, making it clear why physical barriers like gloves are a superior choice for preserving your skin barrier’s integrity against premature aging.
| Protection Method | UV Blocking Rate | Advantages | Disadvantages |
|---|---|---|---|
| UPF 50+ Gloves | 98-99% UV blocking | Consistent protection, no reapplication needed, protects from heat | Initial cost ($20-50), may not work for pedicures |
| SPF 50 Sunscreen | 98% UVB (variable UVA) | Affordable, widely available | Needs reapplication, can be greasy, may interfere with nail work |
| No Protection | 0% | No cost, no preparation needed | Full UV exposure, increased aging and potential cancer risk |
Occlusives vs. Humectants: What Does Your Cuticle Area Need at Night?
To truly repair a damaged skin barrier, you need to think like a dermatologist and employ a strategy of clinical layering. It’s not about just one product, but the right combination of ingredients in the right order. The two most important players in this process are humectants and occlusives. Humectants (like glycerin and hyaluronic acid) are moisture magnets; they draw water from the air and deeper layers of your skin to hydrate the surface. However, on their own, this moisture can quickly evaporate, especially from a compromised barrier. This is where occlusives come in.
Occlusives (like petroleum jelly, shea butter, and lanolin) are sealants. They form a physical barrier on the skin that locks moisture in and prevents what’s known as Transepidermal Water Loss (TEWL). After being stripped by acetone, your skin’s ability to hold onto water is severely diminished. Applying an occlusive is like putting a lid on a pot of water, preventing it from boiling away. As nail care expert Titilayo Bankole notes, the skin around the nails loses moisture ” every time they’re exposed to water,” so sealing it at night is paramount. For intensive repair, a three-step H.E.O. (Humectant, Emollient, Occlusive) method is the most effective approach.
This nighttime ritual ensures your skin gets the deep hydration it needs and, crucially, keeps it there for the entire night, allowing the barrier to rebuild itself without interruption. Follow this layering method for maximum repair:
- Step 1 (Humectant): Immediately after washing your hands for the night, while your skin is still slightly damp, apply a serum containing hyaluronic acid or glycerin to the cuticle area. This traps the initial surface water.
- Step 2 (Emollient): Next, layer on an emollient like squalane or jojoba oil. Emollients are lipids that fill in the cracks in the skin barrier, making it feel smooth and replenishing lost oils.
- Step 3 (Occlusive): Finally, seal everything in with a thick layer of an occlusive like petroleum jelly or a rich shea butter balm. This is the most critical step for preventing overnight moisture loss.
- Step 4 (Enhancement): For an extra boost, put on a pair of cotton gloves after applying all the products. This traps your body heat, which gently increases the penetration of the active ingredients.
How Does Dish Soap Disrupt the Acid Mantle of Your Hands?
You can have the most intensive nighttime repair routine, but if you’re sabotaging it during the day, you’ll be stuck in a cycle of damage and recovery. One of the biggest hidden culprits is ordinary dish soap. Your skin’s outermost layer, the acid mantle, is a very fine, slightly acidic film (pH of about 5.5) that acts as the first line of defense against bacteria, viruses, and other contaminants. This acidity is crucial for healthy skin function. However, most dish soaps and household cleaners are highly alkaline, with a pH ranging from 9 to 11.
This stark pH difference is a chemical shock to your skin. When you wash dishes without gloves, the alkaline soap completely strips away your acid mantle. As research shows, the dramatic pH clash leaves your skin’s defenses neutralized for hours, making it dry, tight, and extremely susceptible to water loss and further irritation. This is why people in professions that involve frequent hand washing, like housekeeping or dishwashing, commonly suffer from chronic cuticle damage. Each exposure is a step backward in your healing journey.
The solution is simple but non-negotiable: wear waterproof gloves for all wet household chores. This isn’t just about keeping your hands dry; it’s about protecting your skin’s delicate acid mantle from chemical disruption. By creating a physical barrier between your hands and the alkaline soap, you preserve the acidic environment your skin needs to heal and defend itself. Without this crucial step, any moisturizers or treatments you apply are merely a temporary fix against a constant chemical assault.
Winter Gloves: Why Fabric Choice Matters for Skin Barrier Retention?
As temperatures drop, we intuitively reach for gloves to protect our hands from the cold, dry air. But while you may think you’re protecting your vulnerable skin, the wrong type of glove can paradoxically make things worse. Many common winter gloves, especially those made from rough materials like wool or certain synthetics, can create friction-induced keratin damage. The constant rubbing of these coarse fibers against your delicate cuticles can cause micro-abrasions, further weakening an already compromised skin barrier and leading to peeling and snagging.
Furthermore, non-breathable materials like basic polyester or vinyl can trap moisture from sweat against your skin. This prolonged dampness can disrupt the skin barrier in a process similar to soaking in water, leading to what is known as maceration, where the skin becomes overly soft, white, and prone to breaking down. The key is to choose materials that protect from the cold while also respecting the delicate nature of your skin’s ecosystem. Breathable fabrics that wick moisture away are ideal.
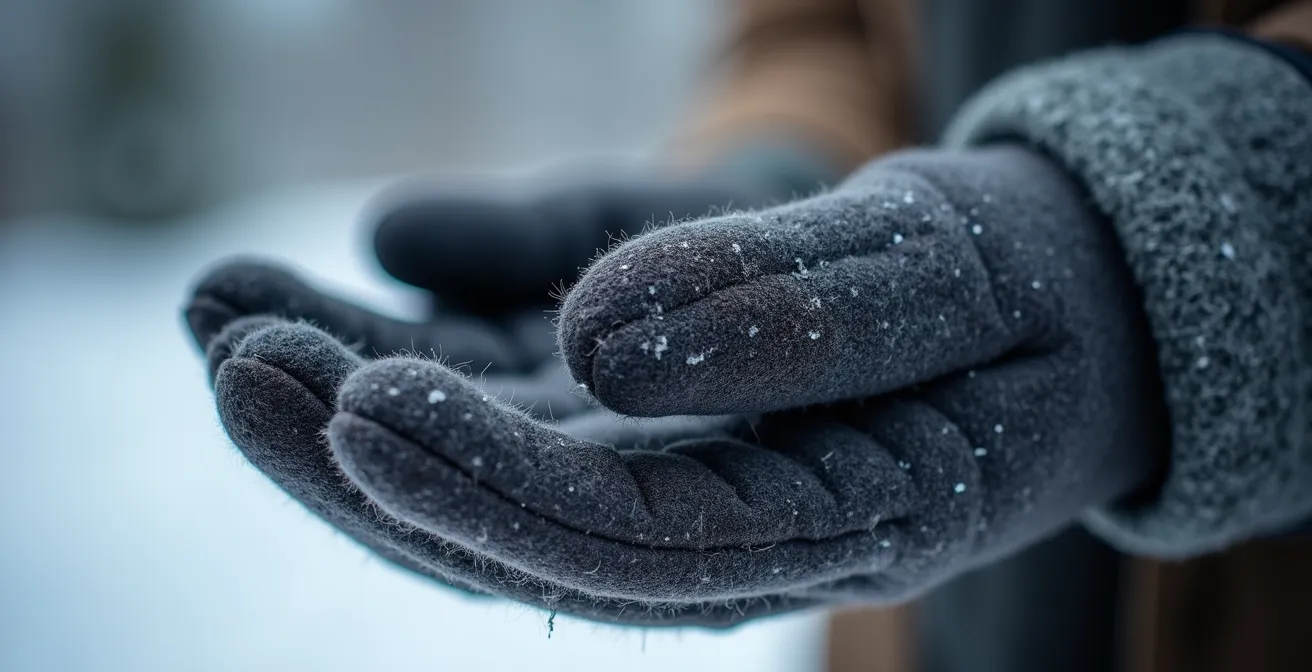
For optimal barrier retention in winter, a strategic approach to your gloves is essential. Think in layers and prioritize smooth, breathable fabrics that won’t cause mechanical stress. Consider these guidelines when selecting your winter handwear:
- Prioritize Smooth Linings: Look for gloves with a smooth inner lining made of silk or bamboo. These materials glide over the skin, preventing friction and protecting your cuticles from the rough outer shell.
- Choose Breathable Materials: Opt for natural fibers like leather or wool (with a liner) or advanced moisture-wicking synthetics. These allow sweat to evaporate, keeping your skin dry and healthy.
- Layer for Success: A powerful strategy is to wear a pair of thin, pure silk or bamboo liner gloves underneath your heavy-duty winter gloves. The liner provides a soft, protective barrier while the outer glove provides insulation.
What to Apply Immediately on Red Cuticles to Reduce Swelling?
Sometimes, despite our best efforts, the damage is acute. After a particularly harsh removal or an accidental cut, the skin around your nails can become red, swollen, and painful. In this state of active inflammation, your immediate response should be different from your regular moisturizing routine. The primary goal is to reduce inflammation and constrict blood vessels to calm the area down. Piling on a thick, heavy occlusive balm at this stage can be counterproductive, as it can trap heat and potentially worsen the inflammation.
Your first-aid approach should focus on cooling and soothing. Cold therapy is the fastest way to reduce swelling. Soaking your fingertips in a bowl of ice water for a few minutes or applying a cold compress will immediately constrict the blood vessels, reducing redness and throbbing. Following this, you should apply a lightweight, anti-inflammatory product. Look for gel-based serums containing ingredients like Centella Asiatica (Cica), niacinamide, or green tea extract. These ingredients are known for their calming properties and won’t trap heat. Only after the initial redness and swelling have subsided should you move on to your richer repair creams and occlusives.
While topical treatments handle the immediate symptoms, supporting nail health from within can also aid recovery. According to Harvard’s Women’s Health Watch, the B vitamin biotin helps reduce splitting and increase the thickness of brittle nails, providing a stronger foundation for recovery. For acute inflammation, follow this emergency protocol:
- Step 1 – Cold Therapy: Immediately soak your fingers in ice water for 3-5 minutes or apply a cold compress to the affected area to reduce swelling.
- Step 2 – Anti-Inflammatory Serum: Gently pat the area dry and apply a lightweight gel serum with calming ingredients like Centella Asiatica, niacinamide, or green tea.
- Step 3 – Wait Before Sealing: Avoid heavy creams or balms initially. Let the inflammation subside for an hour or two before applying thicker products.
- Step 4 – Follow-up Care: Once the redness has visibly reduced, you can proceed with applying a ceramide-rich cream followed by a thin occlusive layer to protect the area as it heals.
Key takeaways
- Healing is a process of clinical layering: hydrate with humectants, then seal with occlusives.
- Protection is paramount: shield your skin from UV rays, harsh soaps, and rough fabrics.
- Prevention is the best cure: modify your acetone with glycerin to reduce its drying effects from the start.
The “Slugging” Method for Nails After Harsh Removal
For an intensive, overnight rescue treatment after a particularly harsh acetone soak, the “slugging” method is an incredibly effective technique borrowed from skincare. Slugging is the process of applying an occlusive, most commonly petroleum jelly, as the final step in your routine to create an ultra-protective seal. This seal dramatically reduces Transepidermal Water Loss (TEWL) overnight, giving your skin an uninterrupted 8-hour window to repair itself. For nails and cuticles stripped bare by acetone, this method provides a powerful healing environment.
The key to effective slugging is what you put on *before* the occlusive layer. You first want to load the skin with beneficial, barrier-repairing ingredients. Start with clean, slightly damp hands to lock in some initial hydration. Then, apply a generous amount of a ceramide- and panthenol-rich repair cream to the entire nail and surrounding skin. Ceramides are lipids that are naturally part of your skin barrier, so you are essentially replenishing the “mortar” between your skin cell “bricks.” Panthenol (Pro-Vitamin B5) is a fantastic humectant and has anti-inflammatory properties.
Immediately after applying the cream, seal everything in with a thick layer of petroleum jelly or medical-grade lanolin. The final, crucial step is to wear cotton gloves to bed. This not only prevents a greasy mess but also traps body heat, which enhances the absorption of the products underneath. As nail care professionals recommend, making this a consistent part of your routine, especially on removal days, will yield the most dramatic results in restoring a soft, healthy cuticle line.
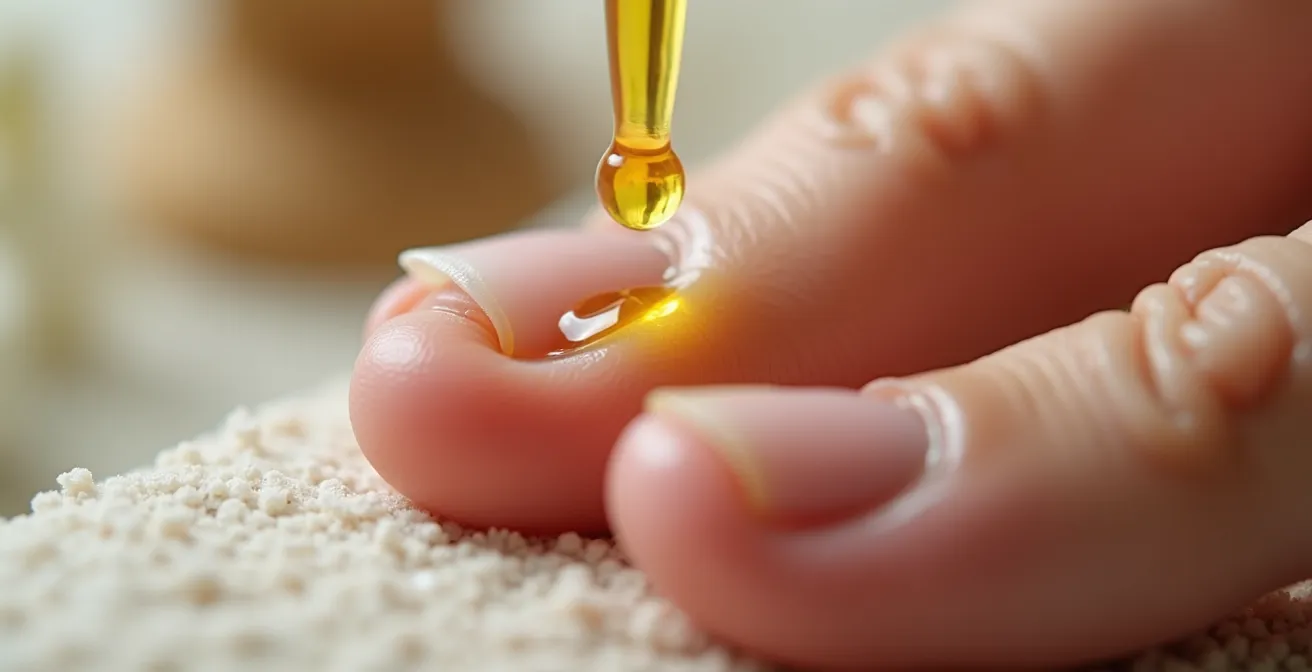
How to Add Glycerin to Acetone to Protect Your Skin During Removal?
While repair is crucial, the ultimate goal is prevention. If you could make the removal process itself less damaging, you’d be miles ahead in maintaining your skin barrier’s health. As dermatologist Dr. Dana Stern, a specialist in nail health, emphasizes:
A major source of nail damage is actually the removal process. Harsh solvents like acetone are known to cause damage to both nails and cuticles by stripping them of essential moisture.
– Dr. Dana Stern, Dermatologist specializing in nail health
A simple and highly effective way to counteract this is by creating a “buffered” acetone solution. You can do this at home by adding a small amount of pure vegetable glycerin to your bottle of 100% acetone. Glycerin is a powerful humectant, meaning it attracts and holds onto water molecules. When mixed with acetone, it acts as a hydrating agent that helps to offset the intense stripping effect of the solvent. It won’t reduce the acetone’s effectiveness at dissolving gel polish, but it will leave the skin around your nails feeling significantly less dry and tight afterward.
Creating this mixture is straightforward, but precision is key to ensuring it’s both safe and effective. It’s best to mix in small batches to maintain freshness.
- Use a Glass Container: Measure 100ml of pure acetone in a glass bottle or jar. Avoid plastic, as acetone can dissolve it over time.
- Add Glycerin: Add 5-10ml of vegetable glycerin. Use 5ml (about 1 teaspoon) for a light protective effect, or up to 10ml (about 2 teaspoons) for a maximum hydration buffer.
- Shake Vigorously: Secure the lid and shake the bottle vigorously before each use. The two liquids can separate slightly over time, so mixing is essential.
- Store Properly: Keep the container tightly sealed in a cool, dark place, and make sure it is clearly labeled. For best results, use your mixture within 3 months.
By adopting this holistic view—treating, protecting, and preventing—you can break the cycle of damage and enjoy your manicures without compromising the health of your skin. The next logical step is to gather your supplies and begin implementing these restorative protocols in your own routine.