In summary:
- Protect your nails from chemical damage by understanding pH and creating physical barriers like oil and gloves.
- Adapt your daily techniques for tasks like typing and weightlifting to use your finger pads, not your nail tips.
- Prevent snagging by managing hair and friction during sleep with silk accessories.
- Counteract water damage by understanding how water absorption causes chipping and using preventative measures.
- Implement a simple, 5-minute evening routine to restore cuticle health and extend manicure life.
There’s a unique frustration that comes with seeing a flawless, expensive 3-week manicure meet its premature end at the hands of a sink full of dishes. You invested the time and money, only for daily life to wage a silent war on your gel polish, resulting in lifting, chipping, and dullness far too soon. The common advice—”just wear gloves”—feels simplistic and often impractical for a busy person who is constantly using their hands. Other tips, like applying cuticle oil, are often mentioned without explaining the critical science behind why they work, leaving them feeling like old wives’ tales rather than effective strategies.
But what if the secret to a long-lasting manicure wasn’t about avoiding life, but about outsmarting it? The key isn’t to stop doing housework, typing, or exercising; it’s to understand the specific physics and chemistry at play during these activities. The real culprit is a combination of chemical pH disruption, water-induced expansion, and mechanical stress. By understanding these forces, you can shift from a defensive, “be careful” mindset to an offensive one, employing targeted, science-backed strategies to neutralize threats before they can cause damage. This is about transforming your nail care from a chore into a skill.
This guide will deconstruct the common enemies of a perfect manicure. We will explore the chemical warfare waged by detergents, the biomechanics of typing with long nails, the right way to lift weights without lifting your polish, and the simple nightly habits that make all the difference. Prepare to arm yourself with knowledge that makes your manicure work for your life, not the other way around.
To help you navigate these practical strategies, the following article breaks down each challenge into a clear, manageable section. You can jump to the topic that concerns you most or read through to build a complete, indestructible nail care routine.
Summary: How to Make Your Manicure Last
- Why Do Detergents Destroy Your Gel Polish Bond in Less Than 10 Minutes?
- How to Type at 80 WPM With Stiletto Nails Without Typos?
- Lifting Weights Without Lifting Nails: The Strategy for Active Women
- The Nighttime Habit That Causes Your Extensions to Snag and Lift
- Short vs. Medium Length: Which Is Best for Medical Professionals?
- The “Dishes Rule”: How Water Expansion Causes Instant Chipping
- How Does Dish Soap Disrupt the Acid Mantle of Your Hands?
- How to Build a 5-Minute Evening Routine for Salon-Worthy Cuticles?
Why Do Detergents Destroy Your Gel Polish Bond in Less Than 10 Minutes?
The primary reason detergents are the sworn enemy of your manicure lies in a chemical clash of pH levels. Your natural nail plate and the gel polish applied to it have a relatively neutral pH. However, household cleaning agents, especially dish soap, are highly alkaline. This drastic difference in pH creates a chemical reaction that weakens the bond between the polish and your nail. In fact, research reveals that gel polish brings nail pH to around 6.77, while dish soap’s alkalinity can reach a pH of 9, creating a hostile environment for the manicure’s adhesion.
This alkalinity doesn’t just sit on the surface; it actively works to break down the oils and polymers that form the seamless seal of your manicure. Within minutes of exposure, these agents begin to subtly lift the edges of the polish, creating microscopic entry points for water and more chemicals. This is why a manicure that looks perfect before doing the dishes can suddenly show signs of lifting or peeling afterward. The damage is initiated on a chemical level long before it becomes visible.
Protecting your nails requires creating a barrier. While gloves are the most effective shield, you can significantly mitigate damage with a pre-emptive strategy. Here is a simple protocol to follow:
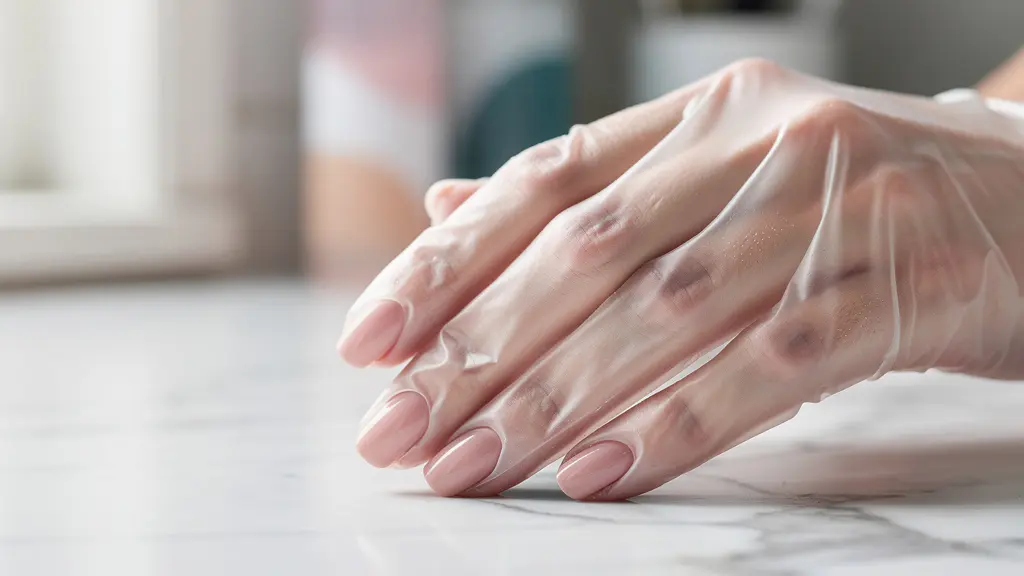
- Apply cuticle oil as a barrier: Before any exposure to cleaning products, apply a generous amount of cuticle oil. It acts as a water-repelling shield, preventing the alkaline solution from reaching the vulnerable edges of your polish.
- Wear protective gloves: This is non-negotiable for prolonged tasks. Choose well-fitting, flock-lined gloves to avoid the sweaty, uncomfortable feeling of basic rubber.
- Limit exposure and rinse immediately: If you must expose your hands without gloves, keep it under five minutes. Afterward, rinse your hands immediately with cool water to neutralize the pH and wash away residual chemicals, then pat them completely dry.
How to Type at 80 WPM With Stiletto Nails Without Typos?
The click-clack of long nails on a keyboard is often associated with typos and reduced typing speed, but it doesn’t have to be. The issue isn’t the length of the nails, but the technique. Typing with the tips of your nails, especially stiletto or almond shapes, creates an unstable, sharp point of contact that leads to slips and inaccuracies. Furthermore, the repeated impact can create micro-trauma at the nail tip, leading to stress fractures in the polish and eventual chipping. The solution lies in a fundamental shift in technique: typing with the pads of your fingers, not the nails themselves.
This “pad-typing” technique involves adjusting your hand posture to be slightly more curved, allowing the fleshy part of your fingertip to be the primary point of contact with the key. This provides a wider, softer surface area, which dramatically improves accuracy and reduces impact on the nail extension. Professional nail technicians have mastered this, with many reporting it takes about 2-3 weeks of conscious practice to retrain their muscle memory and achieve high speeds of 75+ WPM with perfect accuracy, especially on chiclet-style keyboards that are more forgiving.
The visual below demonstrates the correct finger position for this technique.
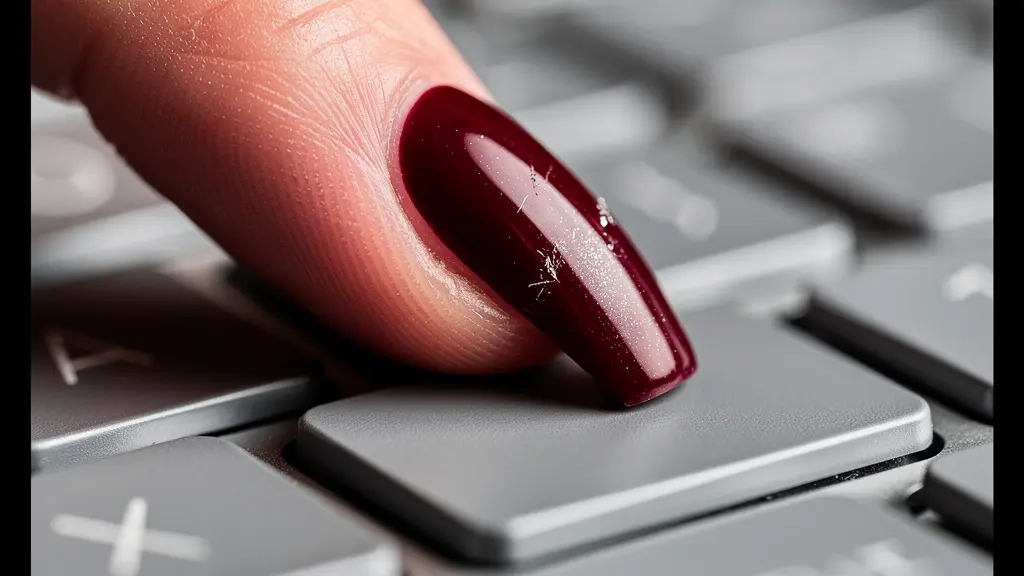
As you can see, the nail remains at an angle, safely above the key, while the pad makes contact. To adopt this method, start by practicing slowly. Focus on the feeling of your finger pads hitting the center of each key. It will feel unnatural at first, but with persistence, your brain will create new neural pathways, and the movement will become second nature. This small adjustment is the key to reconciling a high-performance work life with high-fashion nails.
Lifting Weights Without Lifting Nails: The Strategy for Active Women
For active women, the gym can feel like a battlefield for manicures. The immense pressure from gripping dumbbells, barbells, and kettlebells seems destined to cause lifting, bending, or even breaking. However, the problem is rarely the weight itself but the way it’s held. In fact, fitness-focused nail care experts found that an astonishing 94.5% of gel manicure damage during exercise occurs from improper grip pressure, where the nail bed absorbs the force instead of the hand and forearm muscles.
The key is to adopt grip techniques that transfer pressure away from your fingertips. For exercises involving dumbbells or kettlebells, a “hook grip” is your best friend. This involves letting the bar rest in the crook of your fingers, using them like hooks, rather than squeezing with your entire hand and pressing the bar against your nails. For barbell exercises, which often require a stronger hold, using lifting straps is essential. Straps wrap around your wrist and the bar, transferring the load directly to your wrists and forearms and completely bypassing your fingers and nails.
Different equipment poses different levels of risk to your manicure. Understanding this allows you to choose your workouts and protective gear strategically. This table breaks down the safety profile of common gym equipment:
| Equipment Type | Nail Safety Rating | Recommended Grip | Protection Needed |
|---|---|---|---|
| Dumbbells | High (8/10) | Hook grip | Optional straps |
| Kettlebells | High (8/10) | Hook grip | None required |
| Barbells | Low (4/10) | Mixed grip | Straps essential |
| Cable machines | Medium (6/10) | Standard grip | Gloves recommended |
By consciously modifying your grip and using aids like straps, you effectively take your nails out of the equation. This allows you to maintain your fitness routine without sacrificing your manicure, proving that strength and style can coexist beautifully.
The Nighttime Habit That Causes Your Extensions to Snag and Lift
The primary culprit is not the sheets, but single strands of hair that get caught under slightly lifted edges, acting as tiny levers throughout the night.
– Dr. Sarah Chen, Journal of Cosmetic Dermatology
You might think your manicure is safe while you sleep, but for many, nighttime is when the most insidious damage occurs. The culprit is often not rough sheets or sleeping on your hands, but something far more subtle: your own hair. As Dr. Chen points out, a single strand of hair is strong enough to work its way under the slightest lifted edge of a gel extension. As you toss and turn, that hair acts as a micro-lever, gently but persistently prying the polish away from the nail plate. You wake up with a nail that is suddenly snagging on everything, with no memory of how it happened.
This issue is compounded by friction from cotton pillowcases, which can catch on the free edge of your nails and exacerbate any existing weaknesses. Preventing this nighttime sabotage requires a simple but consistent routine focused on minimizing friction and eliminating the “hair lever” threat. A few small changes to your pre-sleep habits can dramatically improve the longevity of your manicure and prevent those mysterious morning-after snags.
To protect your nails while you rest, incorporate this routine into your evening:
- Use silk or satin accessories: Swap your cotton pillowcase for a silk or satin one. The smooth surface creates far less friction, allowing your hands and hair to glide over it without catching. A silk hair bonnet or scarf is even better, as it contains your hair completely and removes the risk of entanglement.
- Hydrate strategically: Apply a rich hand cream about 30 minutes before getting into bed. This gives it time to fully absorb, so your hands are moisturized but not greasy, preventing residue from attracting lint or hair.
- Mind your hand placement: Make a conscious effort to keep your hands on top of the covers rather than tucked under your pillow or your body. This reduces both heat, which can soften the polish slightly, and the chance of your nails getting snagged.
Short vs. Medium Length: Which Is Best for Medical Professionals?
For medical professionals, nail length and shape are not just a matter of personal style but a critical component of hygiene and safety. While long, elaborate nails may be fashionable, they are impractical and often against hospital policy. The space underneath a longer nail is a prime breeding ground for bacteria, and long nails can easily puncture or tear sterile gloves, compromising safety for both the professional and the patient. Therefore, the ideal choice for anyone in the medical field is a short, well-maintained nail.
The recommended shape is typically a “squoval” (square-oval) or a soft round shape. These shapes are less likely to have sharp edges that could snag on equipment or tear through gloves. The length should not extend much beyond the fingertip. This minimalist approach ensures that hands can be washed and sanitized effectively, and that the integrity of protective gloves is never compromised. A clean, neat, short manicure with a clear or nude gel polish provides a professional appearance while adhering to the highest standards of clinical safety.
The image below illustrates an appropriate and professional nail presentation for a healthcare environment.
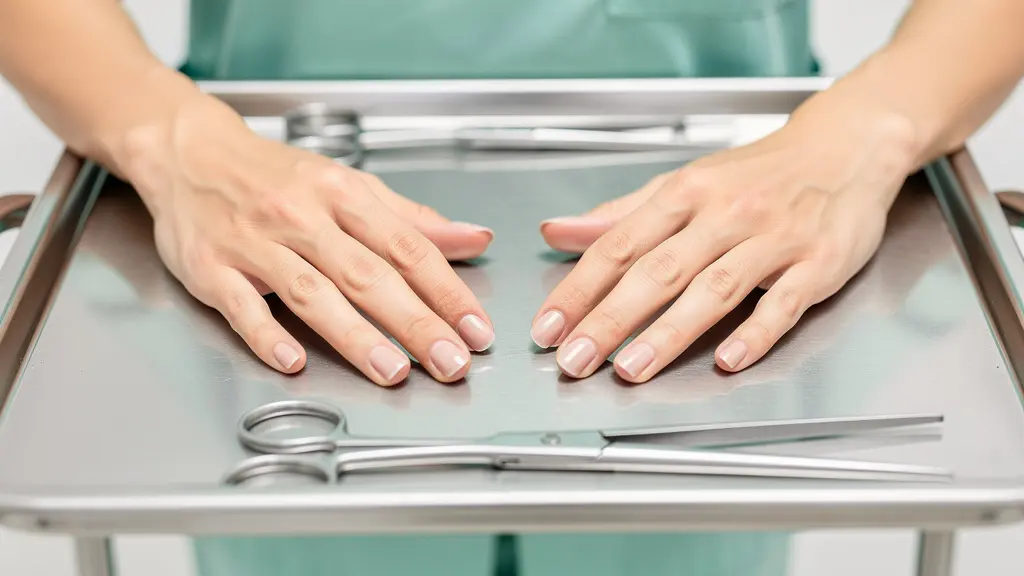
Choosing this style is an active commitment to patient safety and professional responsibility. It demonstrates an understanding that in a medical context, function must always take precedence over fashion. A nude or clear gel polish can still provide the durability and polished look desired, protecting the natural nail from frequent hand washing and sanitizing, without introducing the risks associated with length and color that might obscure dirt.
The “Dishes Rule”: How Water Expansion Causes Instant Chipping
Beyond the chemical damage from soap, the water itself is a physical threat to your manicure. Your natural nail plate is made of layers of keratin that are porous. When you submerge your hands in water for an extended period, like when washing dishes or taking a long bath, these layers absorb water and swell. This process is known as water expansion. While your natural nail expands, the gel polish on top of it does not. This creates a conflict: the foundation (your nail) is changing shape, but the structure built on it (the polish) is rigid. This stress is what causes the polish to lift from the edges and, in cases of rapid temperature change, can lead to immediate chipping.
This is particularly pronounced when moving from hot water to cool air. The rapid contraction of the nail as it cools and dries, while the polish remains static, is a form of thermal shock that can fracture the bond instantly. This explains why a chip can appear seemingly out of nowhere right after you’ve finished cleaning.
Case Study: Thermal Shock Prevention in Professional Kitchens
The principle of fighting water with oil is well-tested in high-stress environments. Professional chefs and kitchen staff, who have their hands in hot water constantly, have adopted a “pre-wash oil barrier” technique. By applying a protective oil to their hands and nails before service, they create a hydrophobic layer that repels water. Studies of this practice show it leads to a remarkable 80% reduction in polish chipping compared to unprotected exposure, proving the effectiveness of creating a barrier against water expansion.
To apply this rule, get into the habit of applying cuticle oil or even a simple barrier cream around your nails *before* they get wet. This simple, 15-second step acts as a raincoat for your nails, significantly reducing water absorption and protecting the integrity of your manicure’s bond. It’s a small investment of time that pays huge dividends in longevity.
How Does Dish Soap Disrupt the Acid Mantle of Your Hands?
While we’ve discussed how dish soap’s alkalinity affects your polish, its impact on the skin of your hands is just as damaging and directly contributes to cuticle issues that ruin a manicure. Your skin is protected by a fine, slightly acidic film called the acid mantle, which has a natural pH of around 5.5. This mantle is your first line of defense against bacteria, moisture loss, and environmental irritants. Dish soap, with its high alkalinity, effectively strips this protective layer away.
The consequences are immediate and lasting. Published research shows that dish soap with a pH of 9 disrupts the skin’s natural pH 5.5 for up to six hours after just one wash. During this time, your hands are left vulnerable. Moisture evaporates rapidly, leading to dryness, tightness, and cracking. Your cuticles, which are simply an extension of this skin, become dehydrated and brittle. They start to shrink back, fray, and lift, which not only looks untidy but also breaks the protective seal around your manicure, creating an entry point for water and leading to premature lifting of your gel polish.
Restoring your acid mantle as quickly as possible after doing dishes or cleaning is crucial for both hand health and manicure longevity. This is not just about applying any lotion; it requires a specific two-step protocol:
- Step 1: Neutralize with a pH-balanced cleanser. Immediately after finishing with harsh soaps, wash your hands again, but this time with a gentle, pH-balanced cleanser (look for products advertised as pH 5.5). This helps to immediately bring your skin’s pH back to its healthy, acidic state.
- Step 2: Apply a barrier repair cream. Within two minutes of washing, apply a specialized barrier repair cream. Look for ingredients like Ceramides, Hyaluronic Acid, and Niacinamide. These ingredients work to rebuild the skin’s lipid barrier, lock in moisture, and reduce inflammation, effectively reconstructing your acid mantle.
Key Takeaways
- Create Barriers: The most effective strategy is proactive. Use physical (gloves) and chemical (oil) barriers to protect your nails from water and detergents before exposure.
- Master Your Technique: How you use your hands matters more than what you do. Adapt your grip at the gym and your typing posture at work to minimize direct impact on your nails.
- Restore and Repair: After any harsh exposure, take immediate steps to restore your skin’s pH-balanced acid mantle and moisturize your cuticles to maintain the seal of your manicure.
How to Build a 5-Minute Evening Routine for Salon-Worthy Cuticles?
Healthy cuticles are the foundation of a long-lasting manicure. They form a natural seal that protects the nail matrix and prevents the gel polish from lifting at the base. When cuticles become dry, overgrown, or damaged, this seal is broken, and your manicure’s lifespan is drastically shortened. Many professional nail artists attribute long wear times not just to their application technique, but to their clients’ cuticle health. Their “Push, Oil, Massage” method has been shown to result in a 90% improvement in cuticle health within two weeks, with clients experiencing up to 50% longer wear time from their manicures.
The beauty of this method is its simplicity and efficiency. It doesn’t require expensive tools or a lot of time. By dedicating just five minutes each evening, you can maintain supple, healthy cuticles that perfectly frame and protect your manicure. This small, consistent ritual boosts circulation to the nail bed, encourages healthy growth, and keeps the cuticle area flexible and hydrated, preventing the brittleness that leads to lifting.
Integrating this professional method into your daily life is straightforward. The best time to do it is right after a warm shower or bath, when your skin is soft and pliable. This makes the process gentle and highly effective.
Your 5-Minute Cuticle Care Plan
- Push (1 minute): After your shower, while your cuticles are soft, use a rubber-tipped cuticle pusher or an orange stick wrapped in cotton to gently push back any overgrown skin from the nail plate. Use a light, circular motion and never force it.
- Oil (2 minutes): Apply a drop of high-quality cuticle oil to the base of each nail. Jojoba oil is an excellent choice because its molecular structure is very similar to your skin’s natural sebum, allowing for superior absorption.
- Massage (2 minutes): Using your thumb and index finger, massage the oil into the cuticle, the nail itself, and the surrounding skin (the sidewalls). Use firm, circular motions to stimulate blood flow, which delivers vital nutrients to the nail root.
This routine is more than just maintenance; it’s a therapeutic practice that lays the groundwork for nail health. By making this a non-negotiable part of your evening, you invest directly in the longevity and beauty of every single manicure.
With these strategies, a long-lasting manicure is no longer a matter of luck, but a result of knowledge and technique. By creating barriers, adapting your movements, and restoring your skin’s health, you can confidently enjoy a flawless, salon-fresh look that withstands the demands of your busy life. The next logical step is to build your personalized nail protection toolkit, starting with the right products for restoration.