A gel manicure’s success or failure depends on achieving a specific dose of UV energy, not the lamp’s wattage or brand.
- High wattage is an electrical rating, while irradiance (mW/cm²) is the true measure of a lamp’s curing power at the nail surface.
- Incomplete curing (undercuring) is the primary cause of gel polish allergies, as it allows unreacted monomers to contact the skin.
Recommendation: Instead of relying on wattage, you must verify your lamp’s effectiveness by testing for dead zones and adjusting cure times based on polish pigmentation and thickness to ensure full photopolymerization.
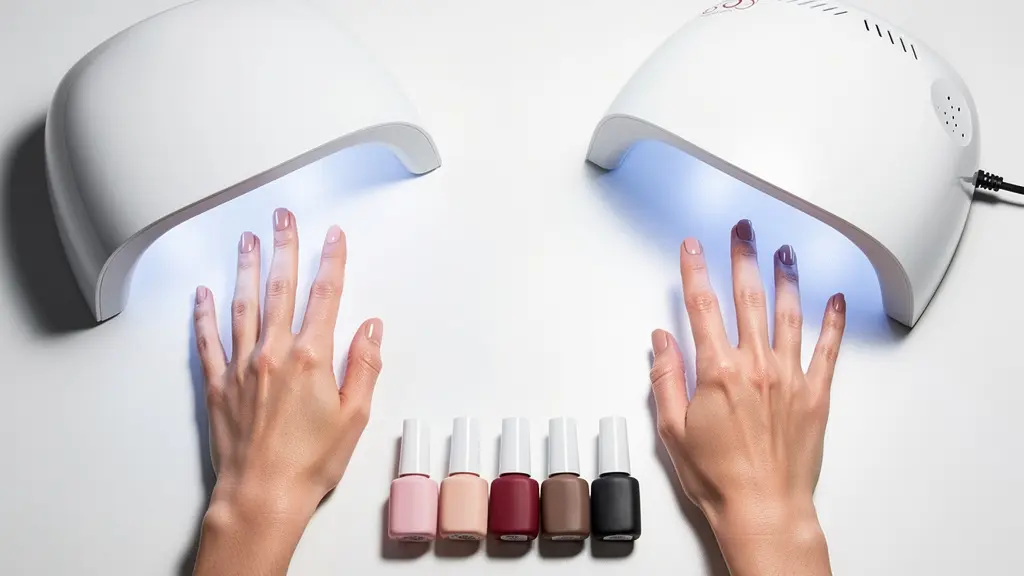
You’ve purchased an affordable LED lamp online, eager to achieve salon-quality results at home. Yet, you’re faced with a nagging uncertainty: will this generic device properly cure the collection of gel polishes you own from various brands? The common advice is often a frustrating dead end: “use the lamp from the same brand as your polish” or “get a higher wattage lamp.” These suggestions treat the curing process like a black box, ignoring the fundamental science at play and leaving you guessing.
This approach overlooks the critical interaction between light and chemistry. The real issue isn’t about matching logos or chasing the highest number on the box. True mastery over gel polish application comes from understanding the physics of light and the chemistry of the polish itself. The process, known as photopolymerization, is a precise science. It’s not magic; it’s a reaction that demands a specific dose of energy at a specific wavelength to succeed.
But what if the key wasn’t the lamp’s brand, but its actual light output—its irradiance? What if understanding the role of pigment, the cause of heat spikes, and the signs of a failing lamp could empower you to get a perfect, safe cure from almost any device? This guide abandons the brand-matching myth and dives into the scientific principles of light polymerization. We will deconstruct the process, enabling you to diagnose issues and make informed decisions, ensuring every manicure is not only beautiful but also durable and, most importantly, safe.
This article will guide you through the essential physics and chemistry of gel curing. By exploring each critical factor, you will gain the knowledge to troubleshoot your equipment and technique with the precision of a professional.
Summary: The Physics of a Perfect Cure
- Why High Wattage Doesn’t Always Mean Better Curing?
- Dead Zones in Lamps: Why Are Your Thumbs Always Undercured?
- How Undercured Gel Leads to Lifelong Acrylate Allergies?
- Why Is the Inhibition Layer There and When Should You Wipe It?
- When to Replace Your Lamp: Signs the Bulbs Are Losing Power
- Why Does Your Gel Burn in the Lamp and How to Stop It?
- Clear vs. Pigmented: Why Does Black Gel Need Longer to Cure?
- Why Does Your Polish Chip at the Tips Within 24 Hours?
Why High Wattage Doesn’t Always Mean Better Curing?
One of the most persistent myths in the nail industry is that a higher wattage lamp guarantees a faster or better cure. This is a fundamental misunderstanding of the physics involved. A lamp’s wattage rating refers to its electrical power consumption, not its ultraviolet (UV) light output. It tells you how much electricity the device draws from the wall, which has no direct correlation with the energy delivered to the nail plate. The crucial metric for curing gel is irradiance, measured in milliwatts per square centimeter (mW/cm²).
Irradiance describes the intensity of UV light energy hitting a specific surface area. It is the true measure of a lamp’s curing power. Two lamps with the same 48W rating can have wildly different irradiance levels due to factors like the efficiency of the LEDs, the quality of the reflectors, and the distance of the bulbs from the nails. In fact, independent research shows nail lamp UV-A irradiance can vary dramatically from 0.6 mW/cm² to 15.7 mW/cm² across different devices. A well-engineered 24W lamp with high-quality, focused LEDs can easily outperform a poorly designed 72W lamp with inefficient or scattered bulbs.
The goal of curing is to deliver a sufficient “dose” of energy to the gel, which is a product of irradiance and time (Dose = Irradiance × Time). A lamp with lower irradiance will simply require a longer cure time to achieve the same total energy dose needed for full photopolymerization. Therefore, focusing on wattage is misleading. You must instead consider the actual performance and proven cure times for your specific polish and lamp combination.
Dead Zones in Lamps: Why Are Your Thumbs Always Undercured?
Have you ever noticed that your thumbs or the sides of your pinky fingers seem to cure poorly, remaining tacky or wrinkling? This common frustration is caused by “dead zones” within the lamp. These are areas that receive significantly lower UV irradiance due to the physical layout of the LED bulbs and the principles of light travel. Light travels in straight lines, and the diodes in most consumer-grade lamps are positioned to optimally cover the four fingers when laid flat.
The thumb, however, naturally rests at a different angle, often perpendicular to the other fingers. This means its surface isn’t facing the light source directly, leading to a much lower dose of UV energy and, consequently, an incomplete cure. The visual below demonstrates how the thumb’s orientation can place it in a shadow or at the periphery of the lamp’s most effective light field.
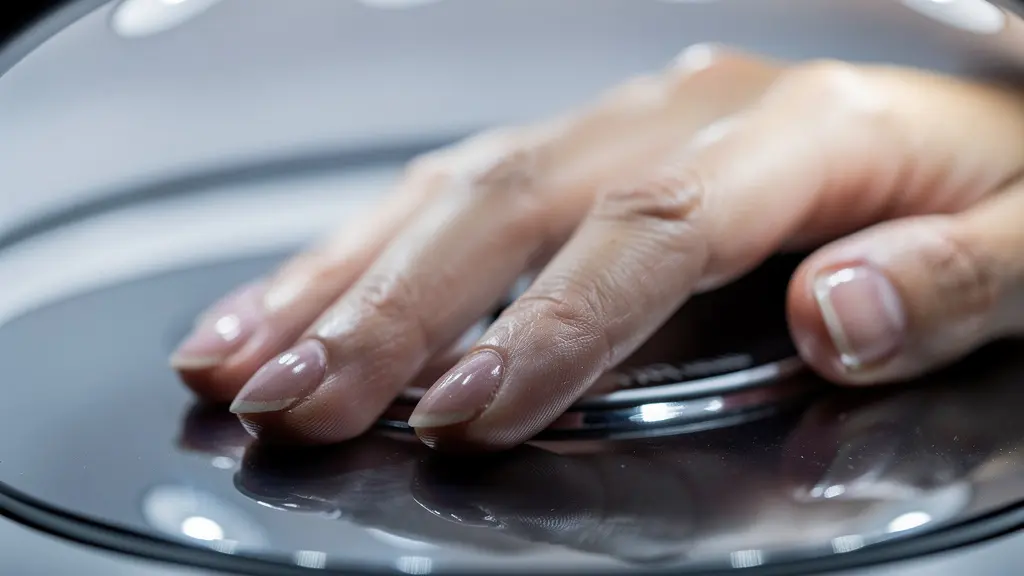
These dead zones are not just limited to the thumb. The corners of the lamp and the areas between bulbs can also exhibit lower irradiance. To combat this, many professionals cure the four fingers first and then cure the thumbs separately, laid flat and centered under the lights. This ensures the thumb’s nail plate receives the same direct, optimal exposure as the other nails. For any user of a new or inexpensive lamp, identifying these zones is a critical step in achieving consistent results.
How Undercured Gel Leads to Lifelong Acrylate Allergies?
The single greatest safety risk in at-home gel manicures is the development of a lifelong contact allergy to acrylates. This serious issue is almost always caused by repeated skin contact with uncured or undercured gel polish. When gel is not fully polymerized, its chemical components, specifically acrylate monomers, remain free and un-bonded. If this uncured gel touches the surrounding skin, the immune system can identify these monomers as a threat, triggering a sensitization process.
Once sensitized, any future exposure—even to trace amounts in dental materials or medical adhesives—can cause a severe allergic reaction, including blistering, itching, and onycholysis (nail plate separation). A recent analysis of TikTok videos tagged #gelallergy revealed a troubling trend, with over 100 million views and dozens of users documenting severe reactions directly linked to at-home gel kits. This is not a rare occurrence; a recent Amsterdam study found that allergic contact dermatitis from nail cosmetics affected 2.3% of women who underwent patch testing. The danger is real and the consequences are permanent.
The primary culprit is often a specific chemical used to promote adhesion and flexibility in many gel formulas. As leading dermatological researchers have pointed out:
97% of patients diagnosed with allergic contact dermatitis from nail cosmetics tested positive for 2-hydroxyethyl methacrylate (HEMA).
– Steunebrink et al., Contact Dermatitis journal
This underscores the absolute necessity of achieving a full cure. Using a lamp with insufficient irradiance, curing for too short a time, or applying coats that are too thick all contribute to undercuring, leaving free monomers on the nail and dramatically increasing the risk of developing a life-altering allergy.
Why Is the Inhibition Layer There and When Should You Wipe It?
After curing a layer of gel polish, you’ll notice a sticky, tacky residue on the surface. This is the inhibition layer, and contrary to popular belief, it is not a sign that the gel is uncured. In fact, it is a normal and essential part of the photopolymerization process. This layer forms because the oxygen in the air prevents the very top surface of the gel from fully curing. While the gel beneath this thin layer is properly hardened, the surface remains in a semi-liquid state.
This sticky layer serves a crucial purpose: it acts as a molecular glue. When you apply the next coat of gel polish or a top coat, the inhibition layer helps it adhere chemically to the layer below, creating a stronger, more unified bond between all layers of the manicure. This is why you should never wipe the inhibition layer between color coats. Removing it would be like sanding a surface before painting and then wiping away all the dust—it defeats the purpose of creating a surface with good adhesion.
There are, however, specific times when you should remove the inhibition layer. It must be cleansed with an isopropyl alcohol solution after the final top coat is cured to reveal the hard, glossy finish. Additionally, you would wipe it away before applying certain types of nail art, such as chrome powders or fine-line details, which require a smooth, non-tacky surface to work on. A very thick, gooey, or wet inhibition layer is a major red flag, indicating significant undercuring throughout the entire gel layer, not just at the surface.
When to Replace Your Lamp: Signs the Bulbs Are Losing Power
Unlike traditional light bulbs that burn out suddenly, the LEDs in a nail lamp die a slow death. They experience a phenomenon called luminous decay, where their light output gradually diminishes over their lifespan. Your lamp might still light up and look perfectly fine, but its irradiance—its actual curing power—could be a fraction of what it once was. This gradual power loss is a primary cause of unexpected service breakdown, such as chipping, peeling, and undercuring-related allergies.
One of the first signs of luminous decay is the need to extend curing times. Many professional nail technicians report having to add an extra 15-30 seconds of cure time to achieve the same hardness that was once possible with a 60-second cure. This is a clear indicator that the lamp is no longer delivering the required dose of energy in the standard time frame. Gels may also start to feel slightly tacky or soft after the recommended curing time, even after cleansing the inhibition layer.
For a more structured diagnosis, you can monitor your lamp’s performance over time. A brand-new lamp should be your benchmark, and any deviation from its initial performance is a sign of aging. The following table provides a general guideline for identifying performance degradation.
| Lamp Age | Visual Signs | Performance Impact | Action Needed |
|---|---|---|---|
| 0-6 months | Bright, consistent light | Full cure in standard time | Benchmark test |
| 6-12 months | Slight dimming | May need 5-10 extra seconds | Monitor closely |
| 12-18 months | Noticeable dimming | 15-30 seconds extra needed | Consider replacement |
| 18+ months | Significant dimming | Inconsistent curing | Replace immediately |
As a rule of thumb, for heavy at-home use, you should consider replacing your lamp every 12 to 24 months to ensure consistent and safe photopolymerization. Relying on an aging lamp is a direct path to service failure and potential health risks.
Why Does Your Gel Burn in the Lamp and How to Stop It?
The intense, sharp burning sensation you sometimes feel moments after placing your hand in a lamp is known as a “heat spike.” This is not the lamp “cooking” your nail; it’s the result of an exothermic chemical reaction. The process of photopolymerization, where liquid monomers and oligomers link together to form solid polymers, releases energy in the form of heat. The more bonds that are formed in a short period, the more heat is generated.
Several factors can increase the intensity of a heat spike. A lamp with very high irradiance will trigger the reaction more rapidly, causing a surge of heat. Thicker applications of gel also contribute, as there are more molecules reacting at once. Builder gels, which are applied more thickly to create structure, are notorious for causing heat spikes. Finally, nail damage is a key factor. A thin, weak, or damaged nail plate offers less insulation between the reacting gel and the sensitive nerve endings in the nail bed, making any heat spike feel much more intense.
Fortunately, you can easily manage and prevent this discomfort using a technique called “flash curing.” This method controls the rate of the reaction, allowing the heat to dissipate gradually. The process is simple:
- Apply a thin, even layer of gel polish.
- Insert your hand into the lamp for only 5-10 seconds for an initial partial cure.
- Remove your hand for 5 seconds, allowing the initial burst of heat to dissipate.
- Re-insert your hand for the remainder of the recommended cure time to complete the polymerization.
- Repeat this process for each coat to prevent a large buildup of heat.
This technique is especially crucial for clients with sensitive nails or when using highly reactive products like builder gels. It allows you to achieve a full, hard cure without causing any pain.
Clear vs. Pigmented: Why Does Black Gel Need Longer to Cure?
Not all gel polishes are created equal when it comes to curing. You may have noticed that sheer pinks cure quickly, while opaque blacks or deep reds require significantly longer in the lamp. This difference is due to the pigment particles within the polish. The chemistry of photopolymerization relies on UV light photons reaching and activating the photoinitiators scattered throughout the gel. Once activated, these photoinitiators kickstart the chain reaction that hardens the polish.
In highly pigmented gels, especially dark colors like black, white, and navy blue, the pigment particles act as millions of tiny umbrellas, physically blocking the light from penetrating deep into the gel layer. As experts in gel chemistry explain, this is a simple matter of physics.
Pigment particles physically block and scatter light photons, preventing photoinitiators at the bottom layer near the nail plate from receiving enough energy to activate.
– Glitterbels Professional Training, Ultimate Guide to Curing Gel Polish
This means the top surface of the gel might feel hard to the touch, but the bottom layer remains a liquid, leading to wrinkling, peeling, and the risk of allergic reaction. To overcome this, you must adjust your application technique. Professional nail technicians recommend applying highly pigmented colors in two to three extremely thin coats instead of one or two thicker ones. Each thin layer must be fully cured before applying the next. This ensures that the UV light can penetrate all the way to the nail plate for each layer, guaranteeing a complete and stable photopolymerization from the bottom up.
Key Takeaways
- Curing is a chemical reaction (photopolymerization) that requires a specific dose of UV energy (irradiance × time), not just high wattage.
- Undercuring is the primary cause of gel allergies, chipping, and peeling. It’s caused by low irradiance, incorrect cure times, or polish that is too thick/pigmented.
- All lamps have dead zones and lose power over time. Testing your lamp and replacing it every 1-2 years is essential for safety and performance.
Why Does Your Polish Chip at the Tips Within 24 Hours?
There is nothing more frustrating than a fresh manicure chipping at the free edge within a day. This premature failure, often called “tip wear” or “shrink-back,” is typically a direct result of two interconnected factors: incomplete curing and polymerization shrinkage. As gel polish cures, the molecules link together into a tight polymer network. This process causes the gel to contract slightly, a phenomenon known as polymerization shrinkage. While the effect is small, gel polish undergoes polymerization shrinkage of about 2-3%, which is enough to create tension at the edges of the nail.
If the gel is not fully cured and bonded to the nail plate, this shrinkage will cause it to pull away from the free edge, breaking the seal you created when you “capped” the tip. This tiny, invisible gap allows water and oils to get underneath the polish, leading to lifting and chipping. This problem is exacerbated by all the issues we’ve discussed: a weak, aging lamp; dead zones that undercure the tips; or polish coats that are too thick or pigmented for the light to penetrate fully.
Properly capping the free edge is a critical application step, but it’s useless if the gel doesn’t cure hard enough to withstand the shrinkage forces. The bond at the tip is the most vulnerable part of the manicure, and it requires a perfect cure to hold fast. If you’re experiencing premature chipping, a comprehensive audit of your technique and equipment is necessary to identify the root cause.
Action Plan: Troubleshooting Premature Tip Chipping
- Check Hand Position: Was the hand placed deep inside the lamp with fingers flat, ensuring the free edge was directly exposed to the light and not angled away in a dead zone?
- Evaluate Polish Opacity: Was the gel polish highly pigmented (e.g., black, white, dark red)? If so, were the coats applied thinly enough for full light penetration, or was the standard cure time insufficient?
- Test Lamp Age & Power: Is the lamp over 12 months old or showing signs of power loss (e.g., requiring longer cure times)? A weak lamp is a primary cause of undercured tips.
- Verify Application Technique: Was the free edge of the nail properly and thoroughly capped with each layer of gel, from base coat to top coat, before curing?
- Assess Coat Thickness: Were the gel coats applied in thin, even layers? A thick application, especially at the tip, can prevent the UV light from reaching the bottom-most layer, causing it to remain soft.
Frequently Asked Questions About The Curing Process
Should I wipe between gel polish coats?
No, you should not wipe the sticky inhibition layer between coats. This layer helps the next coat of gel adhere more effectively, creating a stronger overall bond.
When should I wipe the inhibition layer?
You should only wipe the inhibition layer after the final top coat has been fully cured. It should also be wiped before applying certain nail art like chrome powders or for detailed painting that requires a clean, non-sticky surface.
Is a thick inhibition layer normal?
No. A normal inhibition layer is a slightly tacky film. An extremely thick, wet, or gooey inhibition layer is a major warning sign that indicates significant undercuring throughout the entire gel layer, not just at the surface.