The perception of a home manicure as a simple beauty task is a dangerous illusion; it is a minor medical procedure where invisible microbial threats are the primary danger.
- Improperly cleaned tools do not just harbor dirt; they cultivate drug-resistant bacterial biofilms that a simple alcohol wipe cannot penetrate.
- The most common mistakes, like cutting living tissue or using porous tools, create microscopic entry points for severe infections like Paronychia.
Recommendation: Shift your focus from the cosmetic outcome to the sterilization process. The only safe manicure is one that prioritizes medical-grade hygiene over aesthetics.
The question isn’t meant to alarm, but to awaken. That “70%” figure represents a pervasive, under-reported reality I witness daily in my dermatology practice: the painful, swollen, and sometimes chronic infections that begin in the comfort of a living room. Enthusiasts purchase beautiful polishes and shiny tools, believing they have everything needed for a salon-quality result. They follow online tutorials, focusing on shaping, polishing, and perhaps adding intricate nail art like gem clusters or decals. Yet, they overlook the most critical aspect, the one that separates a safe cosmetic enhancement from a trip to my office: the invisible battle against a microscopic world of bacteria, fungi, and chemical allergens.
The common advice to “clean your tools” or “be gentle with cuticles” is dangerously inadequate. It fails to convey the fundamental principles of infection control. An alcohol wipe over a used nail file is not sterilization; it’s a futile gesture. Pushing back the delicate seal at the base of your nail with aggressive force isn’t grooming; it’s creating a micro-trauma, an open wound for pathogens like Staphylococcus aureus to invade. These are not mere possibilities; they are predictable outcomes when the principles of skin barrier function and microbial control are ignored.
This is where we must shift the paradigm. Forget the platitudes. The key to a safe home manicure is not in the brand of your polish but in adopting a clinical mindset. It’s about understanding *why* alcohol isn’t enough, what the difference is between dead and living tissue, and how the very chemicals in your favorite gel polish can trigger a cascade of allergic reactions that mimic infection. The true artistry of a manicure lies not in the final design, but in the sterile, methodical process that precedes it.
This guide will deconstruct the process from a medical standpoint. We will move beyond superficial tips to provide the foundational knowledge you need to protect yourself. By understanding the science behind the risks, you can finally perform a home manicure that is not only beautiful but, most importantly, fundamentally safe.
Summary: A Dermatologist’s Guide to Preventing Manicure Infections
- The Infection Risk Hidden in Your Drawer: Why Alcohol Isn’t Enough?
- How to Sterilize Your Metal Tools in 4 Steps Without an Autoclave?
- Allergy or Infection: How to Interpret Redness Around the Cuticle?
- The Common Cutting Mistake That Leads to Chronic Inflammation
- 3 Toxic Ingredients to Avoid in Your Polish for Long-Term Safety
- The Blue Liquid Myth: Is Barbicide Actually Effective If Not Changed?
- Pumice Stones and Buffers: Why You Must Throw Them Away?
- Why Do Your Cuticles Turn Red and Itchy After Gel Application?
The Infection Risk Hidden in Your Drawer: Why Alcohol Isn’t Enough?
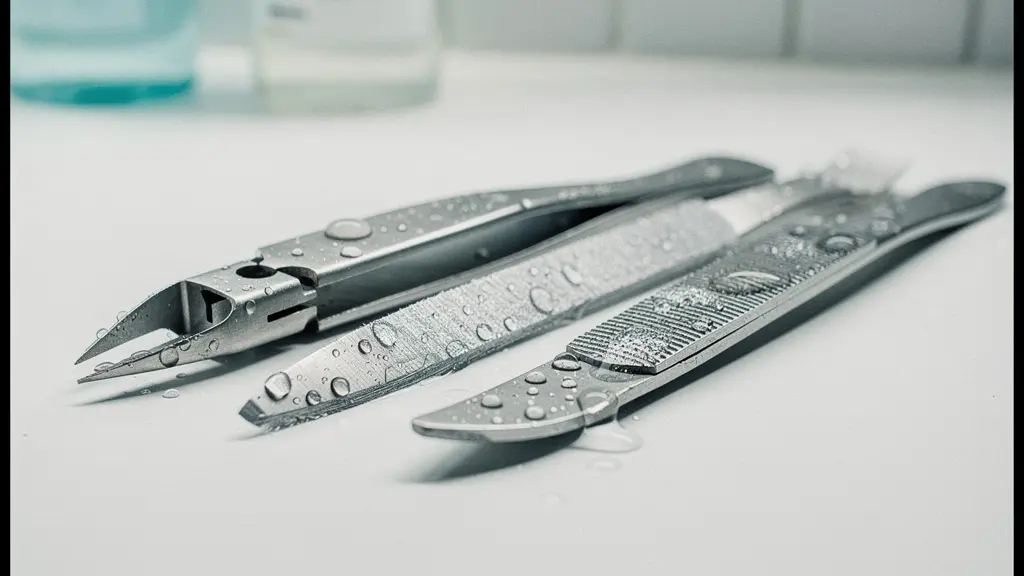
In my practice, the most common source of nail infections, or paronychia, is the misguided belief that a simple wipe with rubbing alcohol constitutes “cleaning.” This is a critical failure to understand the enemy. Your used nail tools are not just dirty; they are colonized. Bacteria like Staphylococcus aureus, the leading cause of bacterial nail infections, form protective communities called biofilms. An alcohol wipe might kill surface-level germs, but it does little to penetrate this hardened, glue-like matrix, leaving the underlying colony intact and ready to invade any small break in your skin.
For a disinfectant to be effective, it requires a specific duration of contact. Isopropyl alcohol, for instance, must keep a surface visibly wet for at least 30-60 seconds to achieve even minimal sanitization, a time rarely observed in a quick wipe. True disinfection requires a more robust approach. For example, EPA-registered disinfectants like Barbicide require a full 10-minute soak to effectively kill pathogens. Anything less is a gamble.
The consequences of this gamble are predictable. A case of acute paronychia often develops within 24 to 72 hours after a manicure creates a micro-trauma. The area becomes red, swollen, warm, and painful, sometimes forming an abscess filled with pus that requires medical drainage. When this exposure to bacteria is repeated due to poor hygiene—especially on hands frequently exposed to water—it can lead to chronic paronychia, a persistent, low-grade inflammation lasting six weeks or more. This isn’t just bad luck; it’s the direct result of underestimating the resilience of microorganisms and the inadequacy of “good enough” cleaning methods.
How to Sterilize Your Metal Tools in 4 Steps Without an Autoclave?
While an autoclave offers the gold standard of sterilization by using pressurized steam, it’s not a practical device for home use. However, you can achieve a medically acceptable level of safety for your non-porous metal tools (like stainless steel clippers, nippers, and pushers) by following a strict, multi-step protocol. This process is not about a quick rinse; it’s a deliberate decontamination sequence designed to physically remove and chemically destroy harmful pathogens. Skipping any step renders the entire process ineffective.
The following protocol assumes you are starting with tools that have visible debris on them. This first physical cleaning step is non-negotiable, as no disinfectant can work effectively through a layer of organic matter. Here is the minimum safe process to follow after every single use:
- Mechanical Decontamination: Before any chemical action, you must physically scrub your tools. Use a stiff, dedicated brush with warm, soapy water to thoroughly remove all visible debris, skin cells, and oil. This step breaks down the biofilm that protects bacteria and is crucial for the disinfectant to work.
- High-Level Disinfection: Once physically clean and dry, tools must be fully submerged in a proper disinfectant. According to a protocol from the Katie Barnes Academy, a hospital-grade, EPA-registered disinfectant should be used at the correct dilution (e.g., 2oz of Barbicide concentrate in 32oz of water). The tools must remain completely submerged for the full contact time specified by the manufacturer—typically 10 minutes.
- Rinsing and Drying: After the disinfection soak, remove the tools with clean tongs (not your hands), rinse them thoroughly with clean water to remove the chemical residue, and let them air-dry completely on a fresh, clean paper towel. Trapped moisture can encourage new bacterial growth.
- Sterile Storage: Immediately place your dry, disinfected tools into a sealed, sanitized container or a new, unused Ziploc bag. Storing them loose in a drawer or a cosmetic bag will instantly re-contaminate them.
Allergy or Infection: How to Interpret Redness Around the Cuticle?
One of the most frequent concerns patients bring to me is red, swollen, or irritated skin around the nail after a manicure. The immediate assumption is often infection, but it is vital to differentiate between a microbial invasion (infection) and a chemical reaction (allergy), as their causes and treatments are entirely different. Misinterpreting the signs can lead to ineffective remedies and worsening symptoms.
An infection, like acute paronychia, is caused by bacteria or fungi entering the skin. Its key characteristics include:
- Pain and Tenderness: The area is typically very sore to the touch. The pain is often described as throbbing.
- Warmth and Swelling: The skin feels hot compared to surrounding areas and appears visibly puffy.
- Pus Formation: A key indicator is the development of a white or yellow pocket of pus (an abscess) under the skin, usually within a day or two.
- Sudden Onset: Symptoms usually appear rapidly, within 24-72 hours of the initial skin trauma.
An allergic reaction, or contact dermatitis, is your immune system’s response to a substance it identifies as a threat, such as acrylates in gel polish or fragrances in lotions. Its hallmarks are different:
- Intense Itching: This is the primary and most defining symptom. While some discomfort may be present, the overwhelming sensation is a persistent, sometimes unbearable itch.
- Blistering or Weeping: The skin may develop tiny, fluid-filled blisters or begin to “weep” a clear fluid.
- Spreading Redness: The rash may not be confined to the initial contact area and can spread up the finger.
- Delayed Onset: The reaction typically takes longer to appear, from several hours to a few days after exposure, and can worsen over time.
While the most common infections are microbial, understanding these distinctions is key. An infection requires antibacterial or antifungal treatment, and potentially drainage. An allergic reaction requires immediate removal of the offending product and treatment with corticosteroids or antihistamines to calm the immune response. Treating an allergy with antibiotic cream will do nothing, and ignoring an infection can lead to serious complications.
The Common Cutting Mistake That Leads to Chronic Inflammation
The most pervasive and damaging myth in nail care is the need to “cut the cuticles.” This single act is responsible for a significant number of the chronic infections and inflammations I treat. The issue stems from a fundamental misunderstanding of nail anatomy. What most people identify and cut as the “cuticle” is actually the eponychium—a living band of tissue that forms a vital protective seal between your nail plate and your skin.
The true cuticle is a thin, non-living layer of tissue that adheres to the nail plate as it grows. It can be safely and gently removed. The eponychium, however, is the guardian of your nail matrix. As the Association for Professionals in Infection Control (APIC) aptly states:
Our cuticles are what separate us from the rest of the world.
– APIC (Association for Professionals in Infection Control), Nail Salon Infection Prevention Guidelines
When you cut or aggressively push this living eponychium with a metal tool, you are breaking that seal. You are creating thousands of micro-traumas, invisible tears that serve as perfect entry points for bacteria. This is especially true for individuals whose hands are frequently wet, as repeated moisture softens and compromises this barrier, making it even more susceptible to invasion. The result is often chronic paronychia, a persistent state of redness, swelling, and tenderness at the nail base that can last for months.
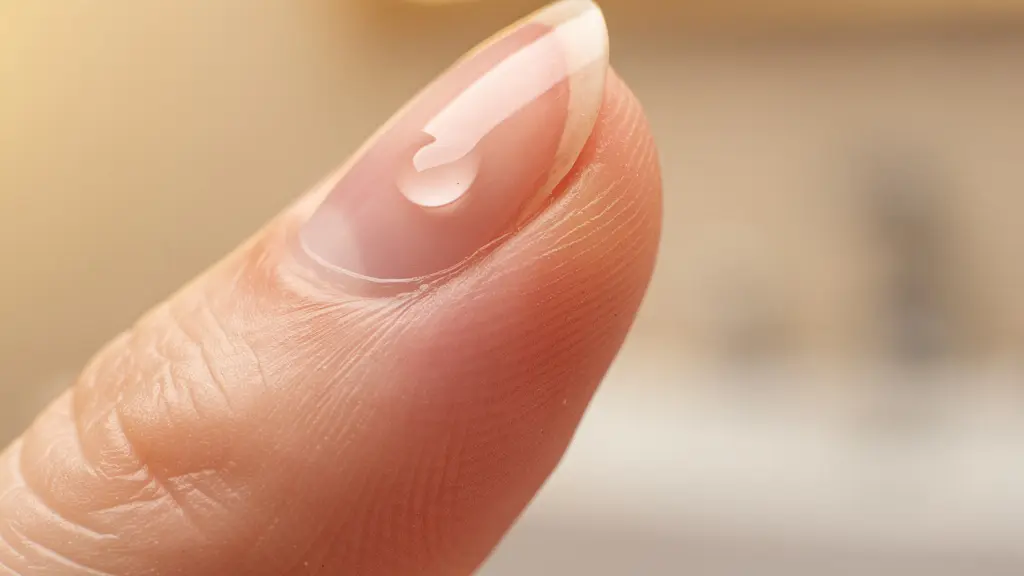
The goal should never be to remove the eponychium. Instead, after a shower when the skin is soft, you can very gently push back the skin at the base of the nail with a soft, rubber-tipped tool or a towel-wrapped orangewood stick. Any small, transparent bits of dead tissue that lift away (the true cuticle) can be carefully nipped. The living, pinkish fold must be left completely intact. Respecting this barrier is not just a suggestion; it is the most critical principle for preventing long-term nail health problems.
3 Toxic Ingredients to Avoid in Your Polish for Long-Term Safety
While physical trauma and microbial invasion are primary risks, chemical exposure presents a more insidious threat. The polishes and gels you apply are complex chemical formulations, and certain ingredients are notorious for causing both immediate irritation and long-term sensitization, which can be mistaken for infection. Being an informed consumer and reading ingredient labels is as important as using clean tools. Here are three categories of ingredients to be particularly wary of:
- Formaldehyde: Often used as a nail hardener, formaldehyde is a known skin sensitizer and a potential carcinogen. For our purposes, its most immediate danger is its ability to cause severe skin irritation and dryness. This leads to micro-cracks in the skin around the nail, compromising the skin’s barrier function and creating direct pathways for bacteria to enter.
- Toluene: This solvent is used to create a smooth application. However, it is also known to cause skin dryness and cracking, particularly around the nail beds. A compromised, overly dry skin barrier is a weak barrier, making you more susceptible to infections you would otherwise resist.
- HEMA (Hydroxyethyl Methacrylate) & Di-HEMA: According to the American Academy of Dermatology, these acrylates, found in many gel and long-wear polishes, are a leading cause of allergic contact dermatitis. Sensitization occurs when uncured or under-cured gel monomers touch the skin. This can happen from “flooding the cuticle” during application or from a sticky “inhibition layer” left after curing with an under-powered lamp. Once you become sensitized, the allergy is often permanent and can even trigger cross-reactions to acrylates used in dental and medical procedures.
The resulting allergic reaction—intense itching, redness, and blistering—is your immune system in overdrive. It’s not an infection, but it creates inflamed, broken skin that is then highly vulnerable to a secondary bacterial infection. Choosing polishes labeled as “3-Free” (free of Formaldehyde, Toluene, and DBP) or “5-Free” is a good starting point, but with gel polishes, the application technique is just as crucial as the formula to prevent skin contact with un-cured monomers.
The Blue Liquid Myth: Is Barbicide Actually Effective If Not Changed?
The iconic blue jar of Barbicide is a symbol of salon sanitation, but its presence alone guarantees nothing. One of the most dangerous misconceptions is that as long as the liquid is blue, it’s working. This is fundamentally false. The active ingredient in Barbicide, a quaternary ammonium compound, is a powerful disinfectant, but it gets “used up” as it works.
Every time you place a tool into the solution, the disinfectant molecules bind to and neutralize organic matter—skin cells, oils, and microorganisms. This chemical reaction depletes the solution’s killing power. While the blue dye remains stable, the disinfectant efficacy plummets. An unchanged jar of Barbicide can quickly become what professionals call a “bacterial soup”: a liquid that looks clean but is teeming with live, resistant pathogens. For this reason, professional guidelines are unequivocal: the solution must be mixed fresh and replaced daily, or even more frequently if it becomes visibly cloudy or contaminated.
Furthermore, effectiveness is contingent on proper dilution and contact time. A common violation is mixing a solution that’s too weak or pulling tools out before the mandatory 10-minute soak is complete. A real-world case saw a barbershop cited by health inspectors after a client developed an infection. The investigation found their Barbicide was not only improperly diluted but tools were also being removed prematurely. The blue liquid provided a false sense of security while actively failing to disinfect.
For the home user, this means that if you choose to use a liquid disinfectant, you must commit to the full protocol: pre-clean your tools, use the exact water-to-concentrate ratio, respect the full 10-minute contact time, and—most critically—dispose of and mix a fresh batch at least every 24 hours. The blue color is an indicator, not a guarantee.
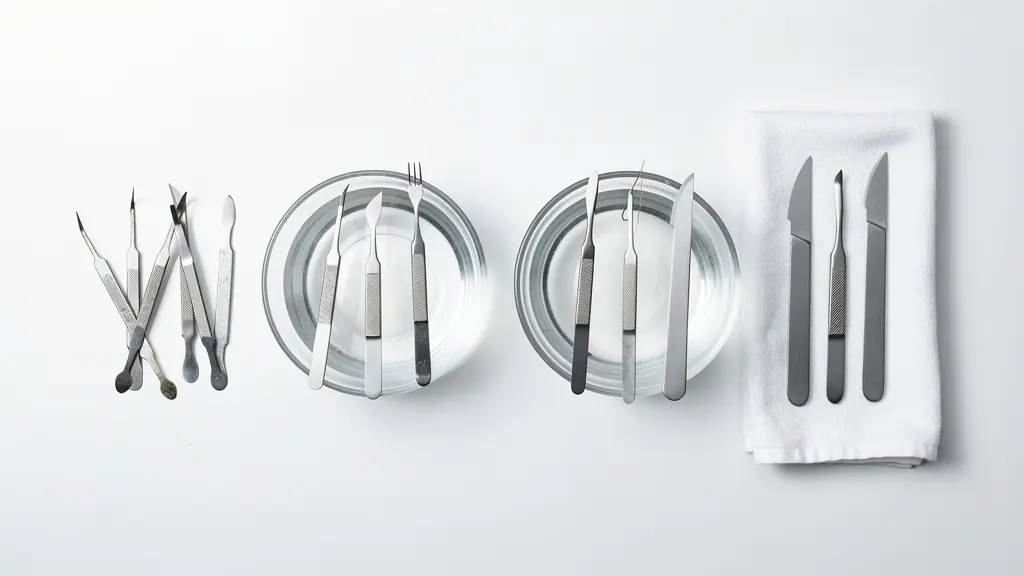
Pumice Stones and Buffers: Why You Must Throw Them Away?
If metal tools are a potential risk when uncleaned, porous tools are a guaranteed hazard that cannot be made safe. Items like emery boards, foam buffers, orangewood sticks, and pumice stones are essentially microscopic sponges. Their surfaces are filled with thousands of tiny crevices that absorb skin cells, oils, and moisture, creating the perfect breeding ground for bacteria and fungi. They are, in essence, bacterial apartment complexes.
The problem is that these tools are impossible to truly disinfect. You can wash the surface, but you cannot reach the microbes embedded deep within the pores. Spraying them with alcohol or even soaking them is ineffective, as the liquid cannot penetrate deeply enough to kill all the pathogens. As the Barbicide Professional Guidelines clearly state:
Porous items like nail files or buffers cannot be disinfected and contaminate the entire solution for your metal tools.
– Barbicide Professional Guidelines, Barbicide Infection Control Best Practices
This is why professional salons are mandated to follow a strict single-use standard: any porous item that touches a client’s skin must be immediately disposed of. Reusing a file from one client to the next is a serious health code violation. At home, reusing that same emery board on yourself week after week is no different. You are re-introducing old bacteria and fungi to your nails with every single use, dramatically increasing your risk of an infection that becomes difficult to treat.
The only safe approach is to adopt this professional standard. Treat all porous tools as single-use items. For a more sustainable and safer alternative, invest in tools that can be properly sterilized. A glass or crystal nail file can be washed and disinfected just like your metal tools. A stainless steel foot file can replace a porous pumice stone. The initial investment is higher, but the long-term benefit to your health is immeasurable.
Your 5-Step Audit for Porous Tool Safety
- Inventory Your Kit: Lay out all your manicure tools. Identify every item that is porous (files, buffers, wood sticks, pumice stones).
- Assess Usage History: For each porous item, be honest about its use. If it has touched your skin more than once, consider it contaminated.
- Immediate Disposal: Discard all used porous items. Do not attempt to “clean” them for reuse. This is the single most important step.
- Source Sanitizable Alternatives: Research and purchase non-porous alternatives. Prioritize a glass nail file and a stainless steel foot file.
- Implement a Single-Use System: For any porous items you choose to keep for specific tasks (like disposable buffers), create a system where they are thrown away immediately after one use, without exception.
Key Takeaways
- True disinfection is a process, not a single action. It requires physical scrubbing to remove biofilms, followed by a full 10-minute soak in a hospital-grade disinfectant that is changed daily.
- Your nail’s most important defense is the eponychium, the living seal at the base of the nail. Never cut this tissue; doing so is creating an open door for infection.
- Porous tools like nail files and buffers are impossible to disinfect and must be treated as single-use items. Reusing them is like painting your nails with a bacteria-laden brush.
Why Do Your Cuticles Turn Red and Itchy After Gel Application?
The advent of at-home gel kits has brought long-lasting, glossy manicures to everyone, but it has also introduced a new set of dermatological problems. When a patient presents with red, intensely itchy, and sometimes blistering skin around the nails after a gel manicure, we must consider two primary culprits: a thermal burn from the curing process, or a classic allergic contact dermatitis. Differentiating between them is key to both immediate relief and long-term prevention.
A “heat spike” is a common phenomenon during the UV/LED curing process. It’s a sudden, intense burning sensation that occurs as the gel molecules undergo polymerization (harden), releasing energy as heat. This is more likely with thicker layers of gel, as more molecules are reacting at once. The pain is sharp but brief, and while it may leave the underlying nail bed feeling tender and red for a short time, the reaction is a one-time thermal event, not an immune response.
An allergic reaction is a much more serious and persistent issue. It is caused by contact with un-cured acrylate monomers, the building blocks of the gel. This contact often happens when the “inhibition layer”—the sticky residue left after curing—is wiped improperly and spread onto the surrounding skin. According to research highlighted by UW Medicine, this is a leading cause of nail-area allergies. Unlike a heat spike, an allergic reaction is characterized by intense itching and a delayed onset, often appearing hours or days later and worsening over time. It is a sign that your body has become sensitized to acrylates. Regarding the UV lamps themselves, while concerns about cancer risk exist, studies generally show the exposure poses a low risk with occasional use.
This table breaks down the differences:
| Characteristic | Heat Spike Burn | Allergic Reaction |
|---|---|---|
| Onset | Immediate during curing | Hours to days after application |
| Duration | One-time pain event | Persistent, may worsen over days |
| Primary Symptom | Burning sensation | Intense itching |
| Appearance | Immediate redness that fades | Progressive redness, possible blistering |
| Cause | Thick gel layers curing too fast | Uncured monomers from inhibition layer |
| Treatment Response | Improves with cooling | Requires removal and antihistamines |
Your next step is to treat your manicure station not as a makeup corner, but as a clean workspace, almost like a minor operating room. Begin today by auditing your tools, discarding all porous items, and committing to a rigorous, multi-step disinfection protocol for your metal implements. This shift in perspective from aesthetics to clinical hygiene is the only path to a home manicure that is truly safe and beautiful.