Contrary to popular belief, your manicure isn’t chipping because of bad polish or a clumsy mistake. The real culprit is a series of invisible chemical and physical failures at the microscopic level.
- Your nail’s natural oil and flexibility are working against the polish bond.
- Water and household detergents are chemically engineered to break down your manicure’s seal.
Recommendation: Diagnose your specific nail type and environmental exposure to build a truly resilient manicure protocol.
There is no greater beauty tragedy than spending an hour perfecting your manicure, only to look down the next day and see a chip. That pristine, glossy finish is shattered, and frustration sets in. You followed all the common advice: you used a base coat, you applied thin layers, and you were careful. Yet, the chipping persists. It feels like a losing battle, and studies show that for many, it is; a recent analysis found that most unprotected manicures begin showing chips within 24 to 48 hours, confirming your experience isn’t unique.
The standard tips often fail because they don’t address the root cause of the problem. They treat the symptom, not the disease. The truth is that premature chipping isn’t about bad luck; it’s a failure of science. An invisible war is being waged on your fingertips between the chemistry of your nail plate, the physics of the polish, and the environment you expose it to. The key isn’t just to follow steps, but to understand *why* they work.
But what if the real solution wasn’t in a new brand of polish, but in becoming a detective? This guide takes an investigative approach, moving beyond the platitudes to uncover the hidden culprits behind manicure failure. We will diagnose the specific issues—from nail plate porosity to structural mismatches—that cause your polish to fail. By understanding the science, you can finally build a manicure that is truly resilient.
This investigation will dissect the evidence, moving from the foundational preparation of the nail to the external enemies that attack it daily. Below, we’ll explore each critical area to build your case for a long-lasting, chip-free manicure.
Table of Contents: An Investigator’s Guide to Chip-Proof Manicures
- The “Cap”: The Single Most Important Step for Chip Prevention
- Dehydrating Oily Nails: Why Alcohol Isn’t Strong Enough for You?
- Rubber Base vs. Regular Base: Which Stops Chipping on Flexible Nails?
- The “Dishes Rule”: How Water Expansion Causes Instant Chipping
- Does Reapplying Top Coat Every 3 Days Actually Extend Wear?
- The Impact of Water Exposure on Soft Gel Tips vs. Hard Gel
- Why Do Detergents Destroy Your Gel Polish Bond in Less Than 10 Minutes?
- How to Maintain 3-Week Manicures While Doing Daily Housework?
The “Cap”: The Single Most Important Step for Chip Prevention
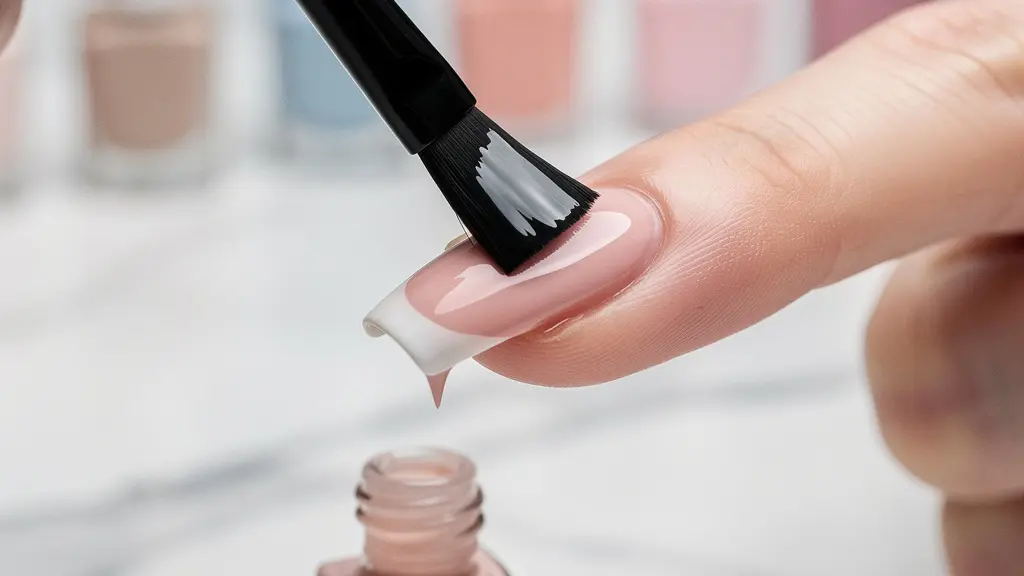
The first point of failure for most manicures is the free edge—the very tip of your nail. This area endures the most mechanical stress from typing, opening cans, and daily tasks. Without proper reinforcement, it’s an exposed flank where chipping begins. The single most effective technique to fortify this weak point is known as “capping the free edge.” This isn’t just an optional flourish; it’s a critical structural step that creates a protective seal around the tip of the nail.
Imagine you’re painting a wooden box. You wouldn’t just paint the top and sides; you’d also paint the edges to protect them from moisture and wear. Capping your nails works on the same principle. By running the brush with a tiny amount of polish (base coat, color, and top coat) horizontally along the very tip, you encapsulate the layers. This simple motion prevents water and oils from seeping underneath the polish, which is a primary cause of lifting and peeling from the edge.
This technique is non-negotiable for longevity. It transforms the edge from a vulnerable, sharp cliff into a smooth, sealed contour. It ensures that the entire nail and polish system is a single, cohesive unit, far more resistant to the friction and impacts of everyday life. Skipping this step is like leaving the gate open in a fortress; you’re inviting the enemy in. For a truly chip-proof manicure, the investigation always begins at the tip.
Dehydrating Oily Nails: Why Alcohol Isn’t Strong Enough for You?
You’ve cleaned your nails with a swipe of rubbing alcohol, but your polish still lifts within a day. The culprit? You may be fighting a chemical battle you can’t win with a weak weapon. Many people have naturally oily nail plates, which secrete lipids that act as a persistent, invisible barrier between the nail and the base coat. Polish simply cannot adhere to an oily surface. While alcohol removes surface residue, it often isn’t powerful enough to tackle deep-set oils, making it an insufficient prep step for those with this issue.
The solution lies in understanding the difference between simple cleaning and true dehydration. For a bond to be unbreakable, the nail surface must be completely stripped of all oils and moisture, creating a porous, chalky-white surface that acts like a magnet for primer and base coat. This is where 100% pure acetone becomes a diagnostician’s best tool. Unlike alcohol, acetone is a potent solvent that effectively removes both oils and water, creating the ideal canvas for adhesion. As experts in professional nail chemistry explain, proper dehydration is the non-negotiable first step before any primer can work effectively.

The visual difference is stark: a nail prepped with alcohol may look clean, but microscopically it retains a sheen of oil. A nail dehydrated with acetone appears matte and almost sterile. This superior preparation is a game-changer for those with oily nails. However, the window of opportunity is brief; the nail begins to rehydrate with its natural oils within a minute, so application of primer or base coat must be immediate.
This table from a professional nail product analysis compares the effectiveness of different dehydration methods, providing clear evidence for your diagnostic toolkit.
| Method | Effectiveness | Duration | Best For |
|---|---|---|---|
| 70-90% Isopropyl Alcohol | Moderate – removes surface oils only | 30-40 minutes rehydration | Regular maintenance, sensitive nails |
| 100% Pure Acetone | High – removes oils and moisture | 30-60 seconds before rebound | Oily nail plates, professional prep |
| Professional Dehydrators | Moderate-High – balanced formula | Variable based on formula | Daily salon use, regular clients |
Rubber Base vs. Regular Base: Which Stops Chipping on Flexible Nails?
Another hidden saboteur of your manicure could be the very structure of your nails. If you have nails that bend and flex easily under slight pressure, you are dealing with a “flexible” nail type. The common mistake is applying a standard, rigid base coat to these nails. This creates a fundamental structural mismatch: the hard, inflexible polish layer cannot move with the soft, pliable nail beneath it. Every time your nail bends, it creates stress at the bond line, leading to micro-fractures, lifting, and eventual chipping—especially at the free edge.
This is a problem of physics, not product quality. A rigid structure on a flexible foundation is destined to crack. The investigative solution is to choose a base coat that shares the physical properties of your nail. Enter the rubber base coat. This innovative formula is designed with flexible polymers that act as a shock absorber. It creates a pliable, rubber-like cushion between your natural nail and the color polish. When your nail bends, the rubber base bends with it, preventing the stress that causes detachment.
Professional technicians have observed that this approach dramatically reduces chipping on clients with soft, thin, or damaged nails. The rubber base formula ensures a superior bond by adapting to the nail’s natural movement, preventing the formation of air pockets and lifting near the cuticles. Determining your nail type is the first step in solving this specific problem.
Your Action Plan: The 5-Second Flex Test for Nail Type Diagnosis
- Clean your nail completely, removing all polish and oils.
- Gently press on your nail’s free edge with the thumb of your opposite hand.
- Observe if the nail bends easily and visibly under the pressure.
- If it bends, you have flexible nails and will benefit from a rubber base coat.
- If there is little to no movement, your nails are rigid, and a standard base coat will suffice.
The “Dishes Rule”: How Water Expansion Causes Instant Chipping
The age-old advice to “wear gloves when doing dishes” is often dismissed, but it’s rooted in hard science. Water is one of the most destructive external enemies of a manicure, and its damage is caused by a phenomenon we can call hydro-expansion. Your nail plate is not a solid, impermeable surface; it is composed of porous layers of keratin. When submerged in water for even a few minutes, these layers absorb water like a sponge, causing the nail to swell and change shape.
This swelling puts immense pressure on the rigid, non-porous polish layer sitting on top. The nail expands, but the polish does not. This creates a powerful shearing force that breaks the delicate bond between the base coat and the nail plate. As the nail dries, it contracts back to its original size, but the bond is already compromised. This cycle of expansion and contraction creates micro-gaps, particularly around the cuticle and free edge, allowing more water to seep in during the next exposure. It’s a vicious cycle that inevitably leads to lifting and large, sheet-like chips.
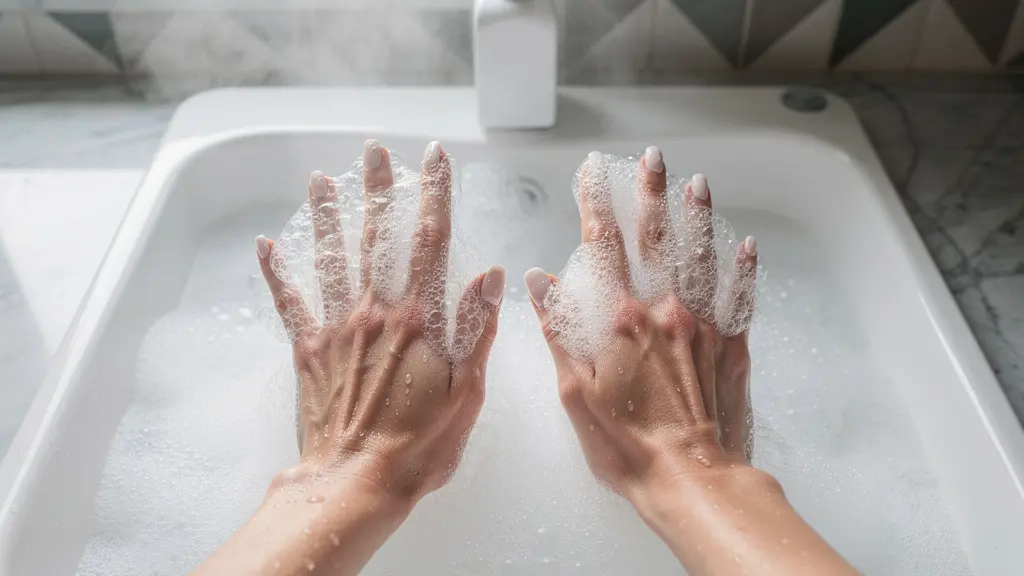
This is why a long, hot bath or washing a sink full of dishes without gloves can be a death sentence for a fresh manicure. The damage is not just from the physical abrasion but from the internal, structural stress caused by water absorption. Protecting your nails from prolonged water exposure isn’t just about preserving the gloss; it’s about preventing the very foundation of your manicure from being warped and broken from within. Gloves are not a suggestion; they are essential protective equipment in the war against hydro-expansion.
Does Reapplying Top Coat Every 3 Days Actually Extend Wear?
The idea of reapplying top coat every few days might seem like a fussy, high-maintenance chore. Is it truly effective, or just an old wives’ tale? The evidence from professional manicurists points to a clear “yes,” and the reason lies in a concept known as the “sacrificial layer” theory. Your initial top coat is the primary shield protecting your color from the world. It takes the brunt of all daily wear and tear: micro-scratches from keys, abrasion from fabrics, and dulling from contact with oils and lotions.
Over two to three days, this shield becomes weathered and weakened, even if the damage isn’t visible to the naked eye. By applying a fresh, thin layer of top coat, you are not just adding shine; you are applying a new, pristine sacrificial layer. This new layer now takes on all the environmental abuse, preserving the integrity of the original top coat and the color layers beneath it. It effectively “resets the clock” on wear and tear.
Case Study: The Sacrificial Layer Theory in Practice
Professional manicurists report that reapplying top coat can significantly extend the flawless appearance of a manicure. The new top coat absorbs the daily micro-scratches and abrasion that would otherwise degrade the original finish. This technique is particularly effective when the fresh top coat is also used to re-seal the free edge, reinforcing the nail’s most vulnerable point against chipping.
For this technique to work, the application must be precise. The nail should be clean, and the top coat layer must be thin to avoid a thick, gummy buildup. Pay special attention to capping the free edge again with this new layer. This simple, two-minute ritual is a powerful proactive measure. It’s not about fixing chips after they happen, but about continuously reinforcing your manicure’s defenses before a breach can even occur, ensuring the color beneath remains untouched and vibrant.
The Impact of Water Exposure on Soft Gel Tips vs. Hard Gel
When investigating manicure failure, it’s crucial to consider the system you’re using. Not all gels are created equal, especially when facing the persistent threat of water. The choice between soft gel systems (like Gel-X or soak-off builder gels) and traditional hard gel can determine your manicure’s resilience. The key difference lies in their molecular structure and porosity.
Soft gels have a more porous, permeable molecular structure. While they offer excellent flexibility, this porosity allows for trace amounts of water absorption over time. During prolonged water exposure, a soft gel extension can swell slightly, and more importantly, the gel adhesive layer used to bond it can become compromised. This makes the cuticle line a significant point of vulnerability for lifting. Hard gel, by contrast, is a non-porous, closed-chain polymer. It is virtually waterproof. Once cured, it forms a monolithic, impenetrable shield that does not swell or change shape when exposed to water, maintaining its structural integrity and bond.
This distinction is critical for anyone whose hands are frequently in water. While proper care can ensure gel polish can last for 14-21 days, the type of gel underneath plays a major role. For users who struggle with lifting despite meticulous prep, the very nature of their chosen gel system could be the underlying issue.
The following table breaks down the key differences in how these two systems interact with water, offering clear insight for choosing the right material for your lifestyle.
| Property | Soft Gel (Gel-X) | Hard Gel |
|---|---|---|
| Molecular Structure | More porous, allows trace water absorption | Non-porous, closed-chain polymer |
| Water Resistance | Moderate – slight swelling possible | High – virtually waterproof |
| Adhesion Method | Gel adhesive layer (vulnerable point) | Direct sculpting (monolithic bond) |
| C-Curve Stability | Can flatten with prolonged water exposure | Maintains structural integrity |
| Lifting Risk | Higher at cuticle line with water exposure | Minimal with proper application |
Why Do Detergents Destroy Your Gel Polish Bond in Less Than 10 Minutes?
If water is a persistent enemy, then household detergents are the equivalent of chemical warfare against your manicure. The very properties that make dish soap and cleaners so effective at cutting through grease are what make them devastating to your polish. The core issue is alkalinity. Most detergents are highly alkaline, which is a direct antagonist to the chemical bonds holding your gel manicure together.
Your cured gel polish is protected by a top coat that forms a tightly sealed bond around the cuticle and sidewalls. This seal is the only thing preventing external agents from getting underneath. Alkaline substances are chemically designed to break down fats, oils, and proteins. When you submerge your hands in soapy water, the alkaline detergents immediately begin to attack this seal. They slowly eat away at the bond, creating microscopic fissures and entry points. As a nail chemistry expert explains, this is the direct cause of premature lifting that begins at the edges.
Many household cleaners and dish soaps are highly alkaline. This alkalinity attacks the seal around the cuticle and sidewalls, slowly eating away at the bond and causing the premature lifting that starts at the edges.
– Nail Chemistry Expert, Professional Nail Technology Guide
Furthermore, the surfactants in these cleaners are designed to break down oils and lipids. A gel top coat, while durable, has properties that can be compromised by these powerful agents. The surfactants can strip the top coat of its gloss and create micro-fissures across the entire surface. These tiny cracks compromise the “sacrificial layer” and become entry points for water and oils long after you’ve finished cleaning. This combination of alkaline attack on the seal and surfactant damage on the surface creates a perfect storm for rapid manicure failure.
Key Takeaways
- Manicure failure is a science problem, not a skill problem, caused by chemical and physical forces.
- The three primary culprits are improper nail prep (oil/moisture), structural mismatch (rigid polish on flexible nails), and environmental enemies (water/detergents).
- Diagnosing your specific nail type (oily, flexible) is essential to choosing the correct products (acetone, rubber base).
How to Maintain 3-Week Manicures While Doing Daily Housework?
After investigating all the hidden culprits—from nail plate porosity and structural mismatches to the chemical warfare waged by detergents—the final step is to synthesize this knowledge into a comprehensive defense strategy. Achieving a flawless, three-week manicure while managing daily housework is not about being overly delicate; it’s about being smart and employing a systematic housework protection protocol.
This protocol is built on two pillars: minimizing exposure and proactive recovery. First, you must treat your nails as a tool you need to protect. This means creating barriers. The “double glove” technique is a professional secret: wear thin cotton gloves inside your rubber cleaning gloves. The cotton absorbs sweat, preventing the moisture buildup that leads to lifting, while the rubber blocks the water and alkaline detergents. Second, stop using your nails as tools. Keep a small arsenal of alternatives handy: a butter knife for opening cans, a scraper for removing labels, and using your knuckles for light switches. Every time you avoid using your nail tip, you preserve the capped seal.
Recovery is just as important. Immediately after any cleaning task, wash your hands with a gentle, pH-balanced soap to neutralize any residual chemicals. Dry your hands and nails thoroughly, paying special attention to the cuticle area where water can pool. Finally, apply a high-quality, penetrating cuticle oil. This does more than just moisturize your skin; it helps to restore a hydrophobic (water-repelling) barrier around the cuticle seal, reinforcing its defense against the next environmental assault. This holistic approach transforms manicure maintenance from a passive hope into an active, strategic defense.
Your investigation is complete. Now it is time to apply these diagnostic tools and protection protocols to build the resilient, long-lasting manicure you deserve.