
In summary:
- Mastering a temporary manicure is about controlling adhesion, not just using a peel-off product.
- Combine sticky tabs and a dot of glue for a secure but removable 48-hour press-on hold.
- Use the “foil method” with a peel-off base to remove stubborn glitter polish in under two minutes.
- Protect your nails during frequent changes with a recovery cycle and by adding glycerin to your acetone.
- Choose versatile metallic or “bridge” colors to ensure your nails match multiple outfits over a weekend.
You have a glamorous wedding to attend this Saturday. You envision a spectacular glitter manicure that catches the light. But come Monday morning, your hands need to be perfectly bare and professional for your nursing shift. The dilemma is real: how do you embrace expressive, high-impact nail art for a fleeting 48-hour window without committing to a week of wear or a damaging removal process? It’s the classic challenge of the temporary style enthusiast.
Many turn to peel-off base coats, only to find their masterpiece pops off prematurely, or they struggle with press-on nails that either fall off in an hour or refuse to budge without a fight. The common advice often misses the crucial point. It’s not about finding a product that happens to be temporary; it’s about mastering the art of adhesion engineering. This involves creating a bond that is intentionally designed for a controlled failure at a specific time.
But what if the secret wasn’t just about the base coat, but a holistic strategy? The real key lies in treating your manicure like a temporary installation, where you meticulously plan the application, the look, and the “exit strategy” from the very beginning. It’s about having a plan for a fun, flexible, and flawless 48-hour style transformation that ends as cleanly as it begins.
This guide will walk you through the complete strategy for mastering the weekend manicure. We’ll cover how to achieve the perfect 48-hour hold, choose the right art, manage color for multiple events, and ensure your nails remain healthy, all culminating in a quick and painless removal process that gets you back to work-ready in minutes.
Summary: Your Weekend Manicure: How to Make It Last Exactly 48 Hours (And Not a Minute More)
- How to Apply Press-On Nails for a Weekend Hold (And Easy Removal)?
- Stickers vs. Water Decals: Which Is Faster for a Last-Minute Look?
- The “Foil Method” for Regular Polish: Removing Glitter in 2 Minutes
- Color Theory: Choosing a Nail Color That Fits Two Different Outfits
- Does Changing Polish Every 2 Days Damage the Nail Plate?
- Using Magnetic Toppers to Upgrade a Creme Polish Instantly
- Using Peel-Base for Avant-Garde Looks: Is It Safe for Heavy Art?
- How to Add Glycerin to Acetone to Protect Your Skin During Removal?
How to Apply Press-On Nails for a Weekend Hold (And Easy Removal)?
The biggest mistake with temporary press-on nails is treating application as an all-or-nothing affair. You either use flimsy stickers that don’t survive a single hand wash, or you use so much glue that removal becomes a battle. The secret to a perfect 48-hour hold is a hybrid approach—a strategic combination of adhesive types that provides strength where needed and a clear exit path. It’s a classic example of adhesion engineering for a short-term goal.
Instead of fully relying on one method, you use sticky tabs to cover most of the nail, providing a protective barrier and the primary bond. Then, a single, tiny dot of professional nail glue is added to the center. This creates a strong anchor point that prevents the nail from lifting or sliding, while the tab-covered edges remain the “weak points” for easy removal later. Pre-hydrating the nail plate with a nourishing oil an hour before application can also create a slightly weaker bond, perfect for our controlled timeframe.
Case Study: The Zoned Application Method
To achieve this controlled failure, some brands have developed specific techniques. For instance, Olive & June recommends applying peel-off base coat to just the center of the nail, leaving a bare border around the edges. This creates a strong “frame” of direct adhesion for gel polish that prevents premature lifting while the center peels away easily after 48 hours. This “zoning” principle is the core of successful temporary adhesion.
This method gives you the confidence to wear press-ons for your event without fear of them popping off, yet ensures that when Monday morning arrives, a little warm water and oil will be enough to gently persuade them to leave without a trace. It’s the ultimate exit strategy, planned from the start.
Your Action Plan: The Hybrid Adhesive Method for a 48-Hour Hold
- Clean nails thoroughly and push back cuticles, but skip the dehydrating primer to ensure a less permanent bond.
- Apply thin, sticky tabs that cover about 90% of your nail surface, leaving a small gap around the cuticle and sides.
- Add a single, tiny dot of professional nail glue right in the center of the sticky tab. This is your anchor.
- Press and hold the press-on nail at a 45-degree angle, starting from the cuticle and flattening it down to avoid air bubbles.
- Plan your exit: apply a generous amount of jojoba or cuticle oil around the base of the press-ons 2-3 hours before you intend to remove them.
Stickers vs. Water Decals: Which Is Faster for a Last-Minute Look?
When you’re rushing to get ready for an event, every second counts. For a last-minute nail art upgrade, stickers and water decals are your best friends. But which one is the true speed champion? The answer depends on your priority: pure application speed or the quality of the final look. Nail stickers are the undisputed winner for raw speed. They are a peel-and-stick solution that requires minimal tools—often just a finger or a soft silicone stick to press them down. There’s no drying time, making them ideal for a true last-minute emergency.
Water decals, on the other hand, require a bit more finesse and time. You need to cut them out, soak them in water, slide them onto the nail, and wait for the water to evaporate before sealing with a top coat. While the process for a single nail is longer, the result is often a seamless, “painted-on” finish that looks far more sophisticated than a sticker. The decal melts into the polish, leaving no discernible edge.

The choice is a strategic one. For a fun, casual party where you need art in a flash, stickers are unbeatable. For a more elegant event like a wedding, where a flawless finish matters more than a few extra minutes of prep time, water decals deliver a superior aesthetic. The table below breaks down the trade-offs.
This comparison, based on a recent analysis of application methods, helps clarify which tool is right for the job.
| Feature | Stickers | Water Decals |
|---|---|---|
| Application Time | 30 seconds per nail | 60-90 seconds per nail |
| Drying Time | Instant | 2 minutes for water to evaporate |
| Finish Quality | Applied art look | Painted-on seamless finish |
| Best For | Fun parties, casual events | Sophisticated events |
The “Foil Method” for Regular Polish: Removing Glitter in 2 Minutes
Glitter polish is the life of the party, but its removal is notoriously difficult. The endless scrubbing is not only time-consuming but also damaging to the nail plate and surrounding skin. This is where the “foil method” becomes an essential part of your temporary manicure exit strategy, especially when combined with a peel-off base coat. This power duo transforms the most dreaded removal task into a quick, two-minute affair. The peel-off base does most of the work by creating a weak layer, and the foil method efficiently dissolves what’s left.
The traditional approach of scrubbing with a cotton pad is inefficient because the acetone evaporates faster than it can dissolve the polish and break down the glitter particles. The foil method creates a sealed environment, trapping the acetone and its fumes. This forces the solvent to work deeply into the polish. Adding body heat by cupping your hands over the foil-wrapped fingers accelerates the chemical reaction, making the process even faster. In fact, research shows the foil method reduces glitter removal time from a tedious 10+ minutes of scrubbing to a mere 30-60 seconds of gentle waiting.
To optimize this technique, a few details matter. Use tufts of cotton from a cotton ball instead of flat pads, as they hold more acetone. Pre-cutting small squares of both cotton and aluminum foil, sized specifically for your nails, prevents wasting acetone and protects the surrounding skin from unnecessary exposure. Once the time is up, the polish should slide off in one piece with a gentle push from an orange stick, revealing a clean nail underneath.
Here is the optimized process for a swift and clean removal:
- Use cotton from cotton balls, not flat pads, as it holds more acetone.
- Pre-cut small cotton squares sized to target only the nail, avoiding skin contact.
- Saturate a cotton square with acetone and place it directly on the nail.
- Wrap the fingertip tightly with a pre-cut aluminum foil square to seal it.
- Cup your hands over the foils to use your body’s warmth to accelerate the process.
- Wait 30-60 seconds for the peel-off base assisted removal to work.
- Unwrap and gently push off the dissolved polish with a wooden orange stick.
Color Theory: Choosing a Nail Color That Fits Two Different Outfits
A weekend event often involves multiple outfits—a formal dress for the ceremony, a fun outfit for the reception, and a casual look for the next-day brunch. Choosing one nail color to complement them all can feel like an impossible task. This is where a little color theory strategy comes into play. The goal isn’t to find a perfect match, but a versatile “bridge” color that harmonizes with everything. Forget boring nudes; the modern approach is about smart, chameleon-like shades.
One of the most effective strategies is using metallics as neutrals. As shown by brands like Holo Taco, certain metallic shades like champagne gold, pewter, or rose gold act as style chameleons. They don’t have a strong color identity of their own; instead, they reflect the colors of their surroundings, including your outfit, jewelry, and environment. This makes them incredibly versatile and a perfect choice for a multi-outfit weekend, especially within the 48-hour window of a peel-off base coat.
Another advanced technique is the “bridge color” strategy. Instead of a neutral, you pick a color that appears in a minor way in both outfits. For example, if one outfit is a floral dress with navy accents and the other is a solid navy top, a deep navy or slate blue polish will tie both looks together beautifully. Mid-tone, low-saturation colors (often called “dusty” shades like sage green or mauve) also work well, as they have a muted quality that avoids clashing with other vibrant colors. You can also use toppers to transform a look: a simple creme polish can be made sophisticated with a matte top coat for a daytime event, then instantly upgraded with a glitter or magnetic topper for the evening.
Consider these points when selecting your versatile shade:
- Analyze both outfits for any shared minor colors (e.g., a hint of burgundy in a pattern and a burgundy accessory).
- Opt for mid-tone, low-saturation colors like dusty sage or slate blue that are less likely to clash.
- Use a versatile creme base (like a deep teal or dusty mauve) that can be transformed.
- Apply a matte top coat to subdue a color for a daytime look.
- Add a glitter or magnetic topper for an instant evening upgrade without a full polish change.
Does Changing Polish Every 2 Days Damage the Nail Plate?
The freedom to change your nail style every 48 hours is liberating, but it raises a critical question: is it safe for your nails? The answer is nuanced. Frequent polish changes themselves aren’t the enemy; the real culprits are harsh removal processes and a lack of recovery time. When used correctly, a high-quality peel-off base coat is your greatest ally, acting as a protective shield between the nail plate and the polish, minimizing the need for aggressive, acetone-heavy removal.
However, this safety is conditional. The health of your nail plate is the most important factor. As a leading industry expert explains, the impact of frequent changes depends entirely on the starting condition of the nail.
Healthy nail plates may not see damage when peel-off base coats are used according to directions. However, if the nail plate is already damaged, these peelable nail coatings can worsen existing damage.
– Doug Schoon, Nail Structure and Product Chemistry Expert Analysis
This highlights the need for a proactive nail care routine. A great strategy is the “5 Days On, 2 Days Off” recovery cycle. This allows you to enjoy frequent style changes during the week (or for a special weekend) while dedicating two full days to nourishing and repairing your nails. During this recovery period, focus on hydration with cuticle oils and serums rather than applying nail hardeners, which can sometimes make nails brittle. Using a gentle glass file instead of a harsh metal one also prevents micro-tears and peeling.
Pay close attention to your nails’ feedback. Warning signs like white spots, excessive flexibility, or surface flaking indicate that you need to extend your recovery period or switch to an even gentler removal method for a while. Listening to your nails is the most important part of maintaining their health while enjoying the world of temporary styles.
Using Magnetic Toppers to Upgrade a Creme Polish Instantly
Magnetic toppers are one of the most exciting tools for a temporary style strategist. They offer a way to add complex, dimensional art to a simple creme polish in seconds, completely transforming your look without a full manicure change. This is perfect for taking a day-appropriate nail color and making it evening-ready. The magic lies in the tiny magnetic particles suspended in the polish, which you can manipulate with a magnet before the polish dries to create captivating designs like cat-eyes, velvet textures, or sweeping curves.
The basic technique involves holding a magnet near the wet polish for about 30 seconds to “pull” the particles into a design. But advanced techniques open up a world of creativity. You can use the magnet to create negative space designs by pulling the particles away from an area, or shape them into a crisp French tip or a soft half-moon. A powerful trick is to combine magnets: use a bar magnet to create an initial straight line, then use a circular magnet from the side of the nail to warp that line into a beautiful S-shape, creating a stunning 3D effect.
What if you mess up or the polish dries too fast? Don’t panic. There’s an easy fix that aligns perfectly with our temporary style philosophy. Simply apply a thin layer of a regular quick-dry top coat over the dried magnetic polish. This new wet layer will “reactivate” the magnetic particles, giving you another chance to perfect your design by re-magnetizing over the top coat. For those using gel polish, the key is to “flash cure” for 10-15 seconds while holding the magnet in place. This freezes the design at its sharpest before the particles have a chance to settle.
Here are some advanced techniques to try:
- Create negative space by using the magnet to push particles to the edges of the nail.
- Pull particles into a sharp French tip or a half-moon shape.
- Use a bar magnet for a crisp line, then a circular magnet from the side to warp it into a curve.
- To fix a dried design, apply a thin layer of top coat and re-magnetize while it’s wet.
Key takeaways
- The key to a successful 48-hour manicure is “adhesion engineering”—strategically planning for a controlled, easy removal from the start.
- Combine different adhesives for press-ons and use zoned application to create a bond that is both secure and simple to break when intended.
- Protect your nail health with a dedicated recovery cycle and by enhancing your acetone with glycerin to counteract its drying effects.
Using Peel-Base for Avant-Garde Looks: Is It Safe for Heavy Art?
Peel-off base coats are a dream for glitter, but can they handle more? For the truly adventurous stylist, the question is whether this temporary foundation can support heavy, avant-garde art like 3D charms, large crystals, or heavy gems. The answer is yes, but with careful planning and an understanding of physics. The primary risk with heavy art isn’t the weight itself, but the leverage. A tall crystal is more likely to get snagged on clothing or hair, creating a lever that can pop the entire polish layer off prematurely.
The safety and wear time depend entirely on the type of embellishment. Flat studs and small, low-profile gems have a low leverage risk and can be worn safely for the full 48-hour window on a peel-off base. Taller or more complex 3D charms, however, increase the risk. For these, it’s wise to limit wear time to 24-36 hours and apply them only to the center of the nail, away from the edges where they are more likely to catch. The “art island” method—where the heavy art is contained in the middle of the nail—is a key strategy for success.
To maximize adhesion, you can also “encapsulate” the art. After applying the charm or gem, covering it with a thick layer of a strong top coat or, for more advanced users, a layer of hard gel, can help integrate it into the polish and reduce the risk of snagging. It’s also crucial to allow the entire manicure to fully cure—often for 4-8 hours—before exposing it to the rigors of daily life. Applying the manicure in the evening and allowing it to cure overnight is an excellent strategy for maximizing longevity.
This guide helps assess the risk for your avant-garde look.
| Art Type | Safety Level | Maximum Wear Time | Special Considerations |
|---|---|---|---|
| Flat studs | High | 48 hours | Low leverage risk |
| 3D charms | Medium | 24-36 hours | Apply only to nail center |
| Tall crystals | Low | 12-24 hours | High catch risk, use zoned application |
| Heavy gems | Medium | 36-48 hours | Encapsulate with hard gel |
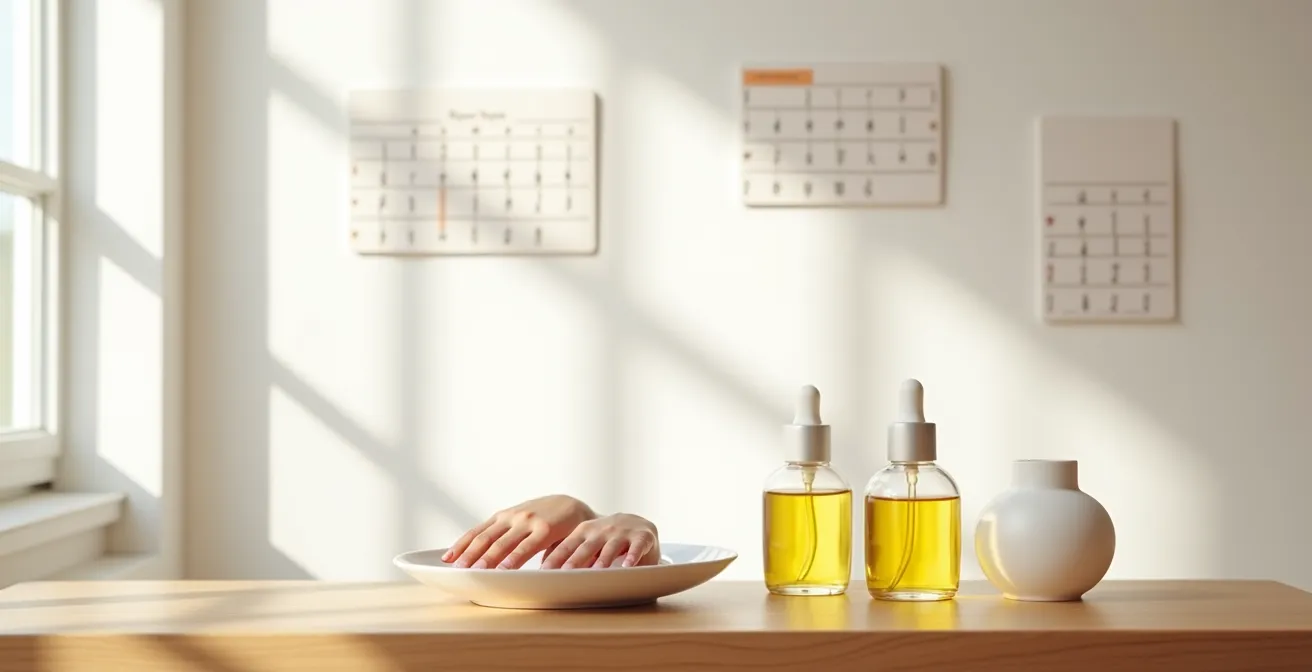
How to Add Glycerin to Acetone to Protect Your Skin During Removal?
The final step in your temporary manicure journey is a clean and gentle removal. While a peel-off base and the foil method make this process fast, the acetone itself can be incredibly drying to your nails and the surrounding skin. For someone like a nurse who washes their hands frequently, preventing extra dryness is critical. The solution is simple and inexpensive: adding a few drops of pure glycerin to your acetone bottle.
Glycerin is a humectant, which means it attracts and retains moisture. When added to acetone, it works to counteract the solvent’s harsh, stripping effect. It leaves behind a subtle, moisturizing film on your skin and nails, preventing that tight, white, chalky appearance that often follows a polish removal session. The optimal ratio is small but effective: adding about 5-10% glycerin to 90-95% acetone is enough to provide significant protection without compromising the acetone’s ability to dissolve the polish.
You can even create custom remover boosters to further enhance your nail care. Adding a few drops of jojoba oil can provide extra conditioning, while a drop of vitamin E oil offers antioxidant benefits. For an even faster removal, you can gently warm your custom acetone mix. Never heat acetone directly or in a microwave. Instead, use a “double-pot” method: place your acetone mix in a small glass or ceramic bowl, and then place that bowl inside a larger bowl of warm water. This gentle heating makes the acetone work more efficiently, reducing the time your nails need to be in contact with the solvent.
Here are some simple recipes for a custom remover:
- Basic Protective Formula: Mix 5-10ml of glycerin into a 100ml bottle of acetone.
- Conditioning Boost: Add 2-3 drops of jojoba oil to your basic formula.
- Antioxidant Blend: Add 1 drop of vitamin E oil to your mix.
- Pre-Treatment Alternative: If you don’t want to mix, apply a thick balm or cuticle oil to your skin *before* starting the removal process to act as a barrier.
Now that you are equipped with the full strategy for adhesion engineering and damage-free removal, you can confidently embrace any nail art trend for any occasion. Go ahead and experiment with that glitter, knowing you have a flawless exit plan ready for Monday morning.