Mastering e-file safety requires understanding that RPM settings are secondary to bit material selection and hand stabilization techniques.
- Ceramic bits generate significantly less conductive heat transfer than carbide alternatives due to lower thermal conductivity (2.5–3 vs. 100 W/mK).
- Intermittent contact patterns and proper anchoring prevent thermal buildup more effectively than arbitrary speed reduction.
Recommendation: Implement the “lift-and-pass” movement protocol and verify bit security before adjusting RPM settings to minimize heat spike risks.
The acrid scent of keratin burning under a nail drill is a technician’s nightmare. For beginners, the fear of inflicting thermal damage often leads to paralysis or inconsistent technique. The prevailing wisdom suggests simply lowering the RPM, yet this approach addresses only one variable in a complex thermal equation. Heat spikes occur when friction, pressure, and conductive material properties converge at the nail plate.
True safety requires a systematic understanding of thermal conductivity, mechanical stability, and tool maintenance. This guide dismantles the RPM-centric myth and reconstructs a safety protocol based on material physics and biomechanical control. From bit selection to hand anchoring, each element plays a critical role in preventing nail bed trauma.
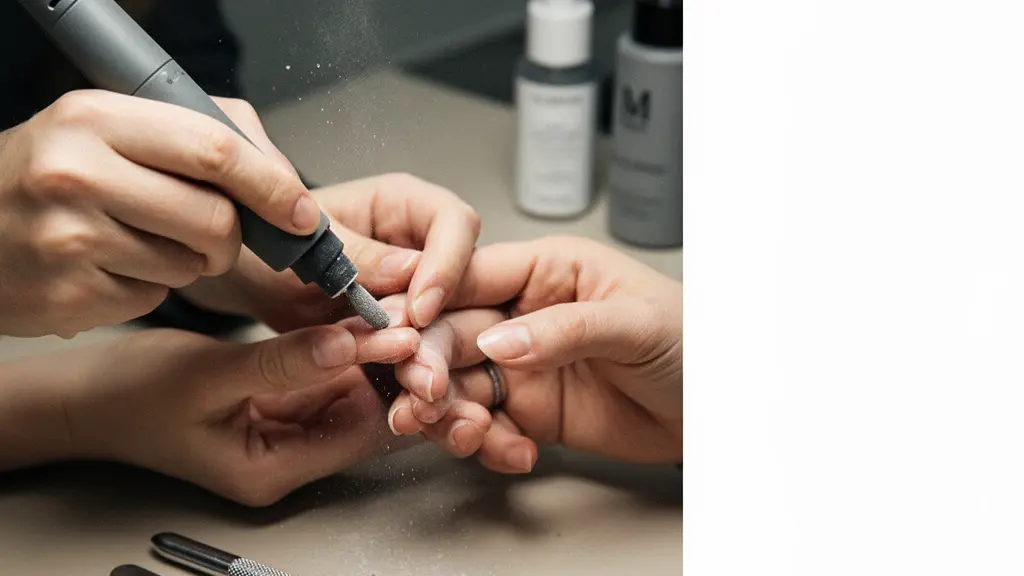
For those who prefer visual learning, the following tutorial demonstrates the proper e-file technique in action, complementing the detailed safety protocols outlined below.
The following sections dissect the mechanical and material factors that contribute to heat generation. By mastering these elements before touching the RPM dial, you establish a foundation of safety that protects both technician and client.
Table of Contents: Safe Gel Polish Removal RPM and Techniques
- Carbide vs. Ceramic: Which Bit Generates Less Heat on Removal?
- Why Does Your Drill Stall When You Apply Pressure?
- Anchoring Your Hand: How to Stabilize for Cuticle Work?
- Forward or Reverse: Which Way to Spin for Left-Handed Techs?
- How to Clean Dust from the Handpiece Chuck to Prevent Jamming?
- Hand Filing vs. E-File: Which Causes More Inflammation for Beginners?
- Foil vs. Silicon Clips: Which Traps Heat Better for Removal?
- How to Remove Gel Polish at Home Without Scraping Layers off Your Nail?
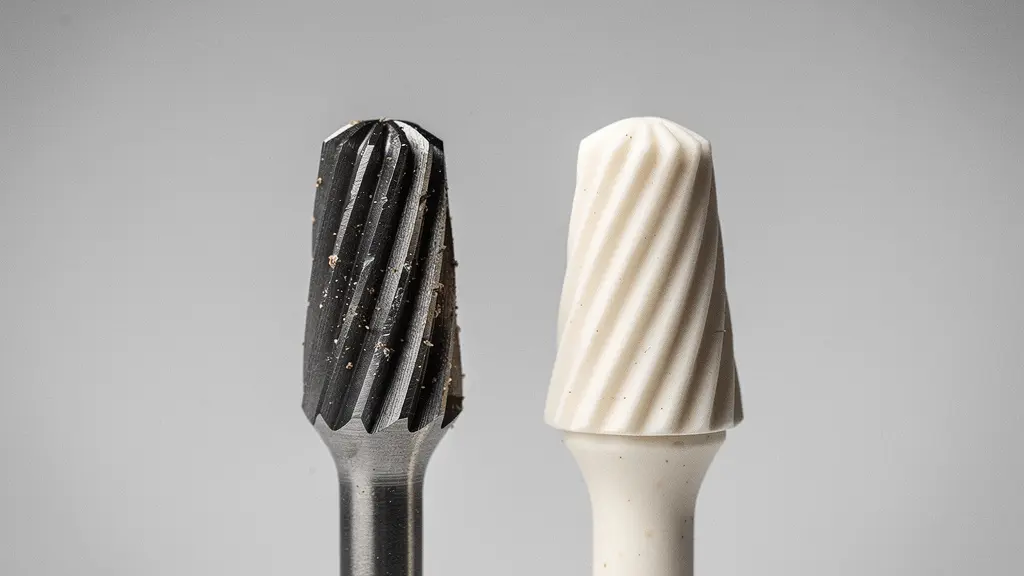
Carbide vs. Ceramic: Which Bit Generates Less Heat on Removal?
The material composition of your drill bit determines how efficiently frictional heat transfers from the abrasive surface to the nail plate. Tungsten carbide exhibits high thermal conductivity, rapidly conducting heat generated at the cutting edge directly into the nail bed. This property creates immediate thermal spikes if the bit remains stationary or encounters dense product buildup.
Ceramic bits, specifically those constructed from zirconia ceramic (ZrO₂), demonstrate significantly lower thermal conductivity. Material property data indicates that tungsten carbide conducts heat at approximately 100 W/mK, whereas zirconia ceramic operates within a range of 2.5–3 W/(m·K). This substantial difference means ceramic bits act as thermal insulators, keeping frictional heat localized at the bit surface rather than transferring it to the natural nail.
However, lower thermal conductivity requires careful observation. Ceramic retains heat at the flute edges longer, potentially glazing product if used at excessive speeds without intermittent contact. The safety advantage lies in the reduced coefficient of thermal transfer to the nail plate, not in the elimination of heat generation. For beginners, ceramic offers a wider margin of error before causing transepidermal water loss or protein denaturation in the keratin matrix.
Why Does Your Drill Stall When You Apply Pressure?
A stalling drill bit represents a critical safety hazard. When rotation ceases under pressure, friction converts kinetic energy directly into thermal energy at the contact point. Without the cooling effect of air movement and intermittent contact, localized temperatures can spike within seconds, causing immediate nail bed burns and permanent matrix damage.
Stalling typically indicates that your handpiece lacks sufficient torque for the applied pressure, or that the bit is not secured properly within the chuck. As noted in professional tutorials, this could be that your handpiece isn’t plugged in, or your drill bit isn’t secured properly. Both scenarios create identical thermal risks: stationary friction against living tissue.
Anti-Stall Protocol to Prevent Heat Spikes
- If the drill stalls or bogs down, stop immediately and check bit security and handpiece lock before increasing pressure.
- Reduce pressure and let the bit do the cutting—pressing harder increases friction and heat.
- Use removal-appropriate RPM for bulk product removal (high-RPM for the color layer and lower RPM near the natural nail).
- Switch to a less aggressive abrasive (e.g., sanding band) as you approach the natural nail to avoid ‘grabbing’ and accidental thinning.
- Keep strokes moving and intermittent (lift-and-pass) rather than holding the bit in one spot to prevent concentrated heat buildup.
The “lift-and-pass” technique ensures that heat dissipates into the air between passes rather than accumulating in the nail plate. Never compensate for a stalling bit by increasing pressure; this accelerates thermal trauma and risks entrapment neuropathy in the nail bed.
Anchoring Your Hand: How to Stabilize for Cuticle Work?
Unstable hand positioning creates erratic pressure fluctuations that translate directly into heat spikes. When your hand floats without support, microscopic tremors and sudden movements cause the bit to dig into the nail plate intermittently. These pressure spikes generate frictional heat far exceeding the thermal capacity of the keratin structure.
Professional stabilization requires creating a tripod anchor using your pinky finger, the side of your palm, or a table rest. This biomechanical foundation isolates the e-file movement to fine finger motions rather than wrist or arm movements, providing the precision necessary to maintain consistent, light pressure.
Stability Fundamentals for Cuticle Work
- Hold the e-file like a pencil and keep your wrist relaxed for smoother movement.
- Anchor your hand—use your pinky finger, the side of your palm, or rest your hand on the table (avoid ‘floating’).
- Use light, even pressure and keep the bit flat and parallel to the nail surface (avoid steep angles).
- Keep the bit moving; never hold it in one place to prevent heat build-up and friction.
- If the bit feels like it’s skipping or bouncing, stop and check rotation direction before continuing.
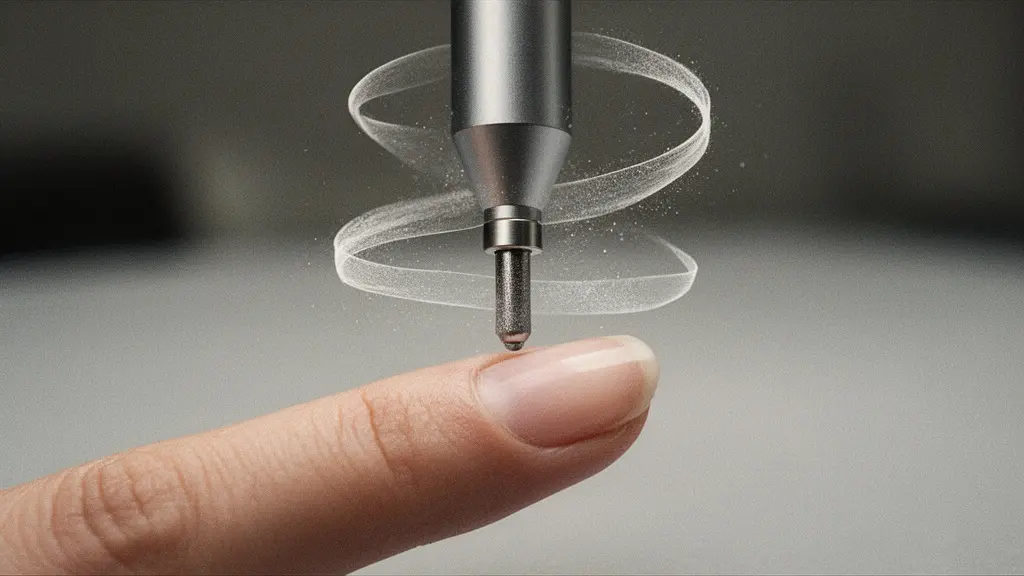
Critical to thermal safety is the principle of intermittent contact. As emphasized in professional guidelines, we’re not going to keep our drill bit in constant contact with the nail because we need to mitigate any heat. Even with perfect anchoring, the bit must lift periodically to allow thermal dissipation. Continuous contact, regardless of RPM, creates a heat sink effect in the nail plate that leads to protein coagulation and subsequent onycholysis.
Forward or Reverse: Which Way to Spin for Left-Handed Techs?
Rotation direction determines whether the bit pulls into the nail plate with traction or skips across the surface. Incorrect directional settings cause the bit to “skate” or chatter, creating microscopic friction points that generate heat without effectively removing product. This vibration not only reduces efficiency but creates thermal micro-trauma across the nail bed.
The bit must spin “into” the work rather than away from it. When the rotation opposes your natural stroke direction, the carbide or ceramic flutes fail to bite into the gel polish, instead rubbing against it. This rubbing action generates pure frictional heat without material removal, significantly increasing the risk of burns.
| Hand Holding the E-File | Client Hand Orientation | Recommended Rotation Setting | Practical Goal |
|---|---|---|---|
| Right hand | Left hand facing toward you | Forward | Maintain traction so the bit ‘bites’ instead of skating |
| Right hand | Left hand facing away from you | Reverse | Keep the cutting action aligned with your movement path |
| Left hand | (Same situations above) | Opposite of the right-hand settings | Preserve control and reduce skipping |
Left-handed technicians must systematically reverse these settings to maintain proper cutting geometry. Regardless of handedness, if you observe skipping, vibration, or require excessive pressure to remove product, immediately stop and reverse the rotation direction. Continued operation with incorrect rotation guarantees thermal damage to the nail matrix.
How to Clean Dust from the Handpiece Chuck to Prevent Jamming?
Dust accumulation in the handpiece chuck creates bit wobble and eccentric rotation. This vibration translates into uneven pressure distribution at the nail plate, generating localized heat points that burn the keratin layers. A jammed or dirty chuck effectively turns a precision instrument into a hazardous friction device.
Acrylic dust and skin cells compacted into the chuck mechanism alter the bit’s center of rotation. Even microscopic misalignment creates visible vibration at high RPMs, increasing the coefficient of friction between bit and nail. Regular maintenance prevents this mechanical degradation and preserves the thermal safety margins of your equipment.
Preventative Handpiece Chuck Care Routine
- Daily: Wipe exterior, keep the handpiece clean of dust before storage, and insert a protection bur/bit when not in use to reduce dust entry into the chuck.
- Weekly: Inspect for early signs of trouble—new vibration, unusual sound, or difficulty inserting/removing bits—then stop and clean before the issue becomes a jam.
- Monthly: Schedule deeper cleaning if you work in high-dust conditions (frequent removal services).
- Service cadence: Light use (1–2 hours/week) service every 6–12 months; heavy/salon use service every 3–6 months.
During daily cleaning, dust with the Gelous Dust Brush while the Drill Bit is still in the handpiece. This technique prevents debris from falling into the chuck during bit changes. Never operate the e-file with a visibly wobbling bit; the eccentric rotation creates harmonic vibrations that generate heat independent of your pressure or RPM settings.
Hand Filing vs. E-File: Which Causes More Inflammation for Beginners?
The debate between manual and mechanical removal often overlooks the physiological reality of nail plate trauma. Aggressive hand-filing with coarse grit abrasives creates micro-fractures in the keratin layers, leading to onychorrhexis (ridging) and subsequent inflammation of the nail bed. While e-files carry a reputation for thermal damage, improper hand-filing causes more widespread structural compromise for beginners.
Clinical measurements demonstrate significant nail plate thinning following aggressive removal. A clinical case report measured nail plate thinning before and after gel polish wear and removal, documenting decreases from 0.063 cm to 0.050 cm (ultrasound) and from 0.059 cm to 0.030 cm (RCM) following acetone exposure and manual manipulation. This structural loss compromises the nail’s barrier function, allowing irritants to penetrate and trigger inflammatory responses.
E-files, when used with the safety protocols outlined above, remove product with minimal lateral stress on the nail plate. The key distinction lies in controlled material removal versus aggressive abrasion. However, beginners must understand that acetone soaking—a component of many removal methods—causes only temporary dehydration. As confirmed by nail science research, acetone removes surface oils and temporary surface water, not the nail’s structural moisture, and its drying effect is temporary and reversible.
The inflammation risk from hand-filing persists longer because physical abrasion damages the nail matrix’s ability to regenerate healthy keratin, whereas thermal damage from e-files, while acute, typically affects only the immediate nail bed when proper techniques are neglected.
Foil vs. Silicon Clips: Which Traps Heat Better for Removal?
When chemical removal replaces mechanical filing, thermal management shifts from friction control to insulation efficiency. Maintaining acetone temperature during the soak-off process determines how quickly gel polish releases from the nail plate. Prolonged exposure due to poor heat retention increases the temptation to scrape prematurely, causing mechanical damage.
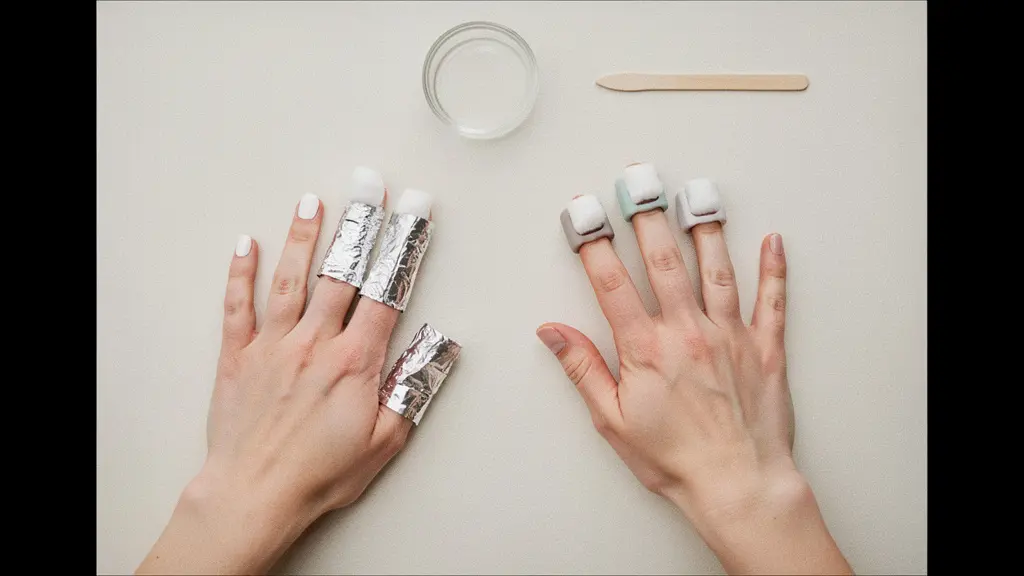
Aluminum foil provides superior thermal retention for soak-off procedures. A materials explainer notes aluminum foil’s high radiant heat reflectivity, indicating that it reflects up to 97% of radiant heat due to low emissivity. This property maintains the acetone’s temperature longer, accelerating the penetration of solvent molecules into the cured gel network without requiring external heat sources that could damage surrounding skin.
Silicone clips, while convenient, allow greater thermal exchange with ambient air. The compression they provide ensures cotton contact but does not create the sealed thermal environment necessary for efficient softening. For hard gels or heavily pigmented layers, foil wrapping provides the consistent thermal environment necessary to prevent the “tugging” sensation that leads to nail plate delamination.
Wrap Method Essentials for Safe Removal
- Break the seal and remove shine by filing the gel surface so remover can penetrate.
- Prepare wraps and fully saturate the cotton/removal pad with remover before applying to the nail.
- Wrap securely so the pad stays in full contact with the nail during the wait time.
- Remove wraps after the wait, then proceed gently—re-wrap and wait longer if product is not releasing easily.
The goal is maintaining sufficient thermal energy to break down the gel’s cross-linked polymer chains without allowing the acetone to evaporate prematurely. Foil’s metallurgical properties create a micro-environment that optimizes this chemical reaction while protecting the surrounding tissue from evaporative cooling.
Key Takeaways:
- Ceramic bits (2.5–3 W/mK) transfer less heat to the nail than carbide (100 W/mK) due to lower thermal conductivity.
- Intermittent contact and proper anchoring prevent thermal accumulation more effectively than arbitrary RPM reduction.
- Drill stalling indicates immediate mechanical failure requiring cessation to prevent burns.
- Aluminum foil’s 97% heat reflectivity creates the optimal thermal environment for chemical removal.
How to Remove Gel Polish at Home Without Scraping Layers off Your Nail?
For individuals without professional e-file training, soak-off removal remains the safest option—provided patience overrides the impulse to scrape. The critical error in home removal involves attempting to push or peel gel polish before the acetone has fully penetrated the product layers. This premature mechanical action shears the upper layers of the nail plate, causing thinning and weakness that persists for months.
Timing is the primary safety variable. A professional removal guide notes that soak-off timing varies, often around a 10–15 minute window (or longer), reinforcing the patience-versus-damage tradeoff. Attempting removal at five minutes may release the color layer while leaving the base coat bonded to the nail, creating the illusion that force is necessary.
No-Scrape Soak-Off Protocol
- Break the seal first (remove shine/top layers) so acetone can penetrate effectively.
- Wrap with acetone using wraps or clips and allow adequate time for softening (do not rush).
- Perform a ‘softening check’ before pushing—if the gel hasn’t visibly lifted/softened, re-wrap and wait longer rather than applying force.
- Gently remove only released product; stop immediately if resistance is felt.
- Lightly refine only if needed; avoid re-prepping the same natural nail areas repeatedly.
Post-removal concerns about nail dehydration often drive aggressive rehydration attempts. However, its drying effect is temporary and reversible. The nail plate naturally rehydrates through environmental moisture and cuticle oil application. The permanent damage occurs not from the acetone exposure, but from the scraping that accompanies impatience.
Whether using professional e-files or home soak-off methods, the fundamental safety principle remains consistent: never sacrifice the structural integrity of the natural nail for speed. Thermal and mechanical trauma share the same root cause—pressure applied without proper preparation or patience.
Evaluate your current removal protocols against these safety standards. Identify whether your technique prioritizes speed or nail integrity, then adjust your bit selection, anchoring position, and timing accordingly to prevent permanent damage to the nail matrix.