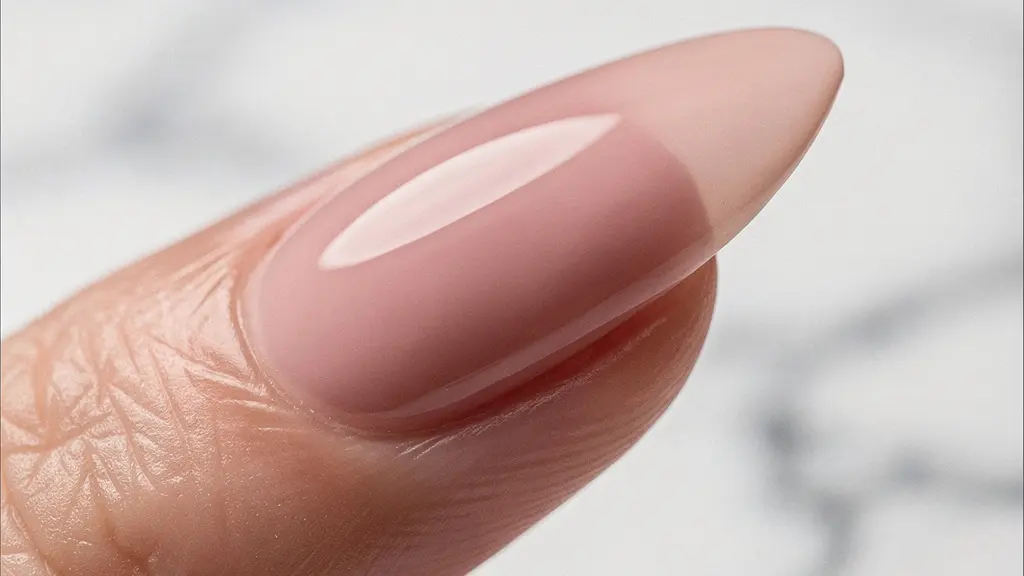
The key to unbreakable long nails lies in treating the apex not as a simple mound of product, but as a feat of structural engineering designed to distribute stress.
- The durability of an enhancement is determined by a combination of a solid foundation (forms vs. tips), precise material science (liquid-to-powder ratio), and strategic architecture (C-curve and apex placement).
- Filing is not just about shape; it’s about refining the structure without compromising its weakest points, particularly where the side walls meet the stress area.
Recommendation: Shift your focus from simply applying product to consciously building a load-bearing arch, and you will fundamentally eliminate chronic breakage.
As an intermediate nail technician, you’ve mastered the basics. You can lay a bead, shape a nail, and create a beautiful finish. Yet, a persistent frustration haunts you: a client returns in a week, or sometimes just days, with a long nail snapped cleanly at the stress point. You’ve tried adding more product, changing your filing technique, or blaming the client’s lifestyle. The common advice to “just build up the apex” feels vague and unhelpful when your structures continue to fail. This cycle of breaks and repairs is not just costly in time and materials; it undermines your confidence and your client’s trust.
The nail industry often focuses on the artistry, the colors, and the trends. But beneath every stunning, durable nail enhancement is a hidden world of physics and engineering. The platitudes you’ve heard about product ratios and filing are only surface-level observations. They tell you *what* to do, but not *why* it works. They don’t explain how forces travel through an acrylic or gel structure, why a C-curve flattens, or how to create an optical illusion of straightness on a naturally curved nail. The problem isn’t your artistic skill; it’s a gap in your understanding of structural mechanics.
But what if the solution wasn’t about adding *more* product, but about placing it with more intelligence? What if the key to preventing breakage wasn’t in the filing, but in the architectural blueprint you establish before you even pick up a file? This guide reframes the concept of the apex. We will move beyond the idea of a simple “hump” and into the realm of structural engineering. We will treat the nail enhancement as a small-scale bridge, designed to withstand daily forces with calculated precision.
Together, we will deconstruct the science behind a resilient nail, from the foundation to the finishing touches. We will explore the material properties that dictate strength, the techniques that preserve structural integrity, and the advanced strategies that turn even the most challenging nail beds into a foundation for durable, long-lasting art. By the end, you won’t just be building nails; you’ll be engineering them for perfection.
This comprehensive guide is structured to build your expertise from the ground up, addressing the most critical technical challenges you face. Explore the sections below to transform your approach to nail architecture.
Summary: The Engineer’s Guide to a Flawless Structural Apex
- Paper Forms vs. Plastic Tips: Which Provides Better Structural Integrity?
- Why Does Your C-Curve Flatten Out After Curing and How to Fix It?
- The Liquid-to-Powder Ratio Mistake That Causes Lifting in 3 Days
- How to File the Side Walls Without Cutting into the Stress Point?
- Optimization Strategy: Sculpting a Perfect Square on a Ski-Jump Nail
- Which Extension Method Feels Most Like Natural Nails?
- The “Snowy” Bead: Signs Your Monomer Ratio Is Too Dry
- Polygel, Acrylic, or Soft Gel: Which Extension Method Lasts 4 Weeks?
Paper Forms vs. Plastic Tips: Which Provides Better Structural Integrity?
The foundation of any strong structure is critical, and in nail enhancements, your first choice is between a pre-fabricated plastic tip and a custom-sculpted form. While tips offer speed and consistency, they introduce a seam and a layer of adhesive that can become a point of weakness. A tip that doesn’t perfectly match the natural nail’s C-curve can create internal tension, predisposing the enhancement to cracks and lifting from the moment it’s applied. They are essentially a shortcut that can compromise the bespoke nature of a truly engineered structure.
Paper forms, conversely, allow you to become a true architect. They empower you to create a completely monolithic structure that is an extension of the natural nail, not just an attachment to it. This method eliminates the bond seam and allows for a perfect, customized fit to any nail shape or size. According to a professional comparison, nail forms frequently edge out tips in durability when applied correctly. They create a seamless, continuous arch from the cuticle to the free edge, which is superior for distributing stress evenly.
The advantage of forms lies in the ability to dictate the nail’s architecture from the very beginning. You control the C-curve, the lower arch, and the overall shape before any product is even applied. This “structural pre-shaping” ensures the final enhancement has inherent strength. Furthermore, this technique minimizes the use of adhesives, which can be a significant benefit for clients with sensitivities or allergies. By mastering forms, you move from being an assembler to a sculptor, building a foundation that is not only stronger but also feels more lightweight and natural to the wearer, offering a truly high-end, customized service.
Why Does Your C-Curve Flatten Out After Curing and How to Fix It?
You sculpt a beautiful, deep C-curve, but after the final cure, you notice it has relaxed, becoming wider and flatter than you intended. This common issue, known as “spread,” directly compromises the architectural integrity of the nail. The C-curve is not just an aesthetic feature; it’s a crucial transverse arch that provides rigidity and resistance to downward pressure. When it flattens, the nail loses this structural support, making the side walls more likely to flex and the apex more susceptible to cracking under pressure. The primary cause is product shrinkage and the memory of the gel or acrylic as it polymerizes without constraint.
The solution is not to build a thicker nail, but to intervene during the curing process using a technique called flash curing and pinching. This involves partially curing the product just long enough for it to hold its shape but remain pliable. For a gel product, this initial cure is very short. One expert guide on sculpting recommends a flash cure for 10 to 30 seconds, depending on the specific gel and lamp wattage. This is the critical window of opportunity.
Once removed from the lamp, the product is warm and malleable. This is when you use specialized pinching tools or your gloved fingers to manually compress the side walls, redefining and locking in the deep C-curve you desire. The pressure is held for a few moments as the gel cools slightly, before returning the nail to the lamp for a full and final cure. This technique forces the polymer chains to link up in the new, more curved position, overcoming the natural tendency to spread. Mastering this timing is essential; pinch too early, and the product will flood, pinch too late, and it will be too rigid and could fracture.
As you can see, this is a precise, controlled action. By actively setting the C-curve during polymerization, you create a nail with superior structural strength. The resulting deep, consistent curve acts like the arch in a bridge, effectively channeling stress away from the center and preventing the devastating breaks that occur when a flat nail bends at its weakest point.
The Liquid-to-Powder Ratio Mistake That Causes Lifting in 3 Days
One of the most fundamental yet misunderstood skills in acrylic application is achieving the perfect liquid-to-powder ratio. A bead that is too wet or too dry is the primary culprit behind premature lifting and structural failure. A wet bead, while easy to pat into place, undergoes excessive shrinkage as the monomer evaporates during curing. This shrinkage pulls the product away from the nail plate, particularly at the cuticle and side walls, creating microscopic gaps that allow water and oils to seep in, breaking the adhesive bond within days. It creates a weak, flexible nail that is prone to stress cracks.
Conversely, a bead that is too dry results in a porous, brittle structure. There isn’t enough monomer to properly wet every polymer particle, leading to incomplete polymerization. The resulting acrylic is chalky and weak, filled with air pockets. This “snowy” bead doesn’t bond properly to the natural nail and is prone to shattering during filing or from a minor impact. The key to durability is the “perfect structural bead”—a precise balance that ensures strong molecular bonds and optimal adhesion.
Professional educators describe the ideal bead through sensory cues: it should feel slightly heavy but not dripping on the brush, appear glossy but not runny, and hold a perfect dome shape for 2-3 seconds before it starts to self-level. This consistency is the sweet spot. It contains just enough monomer to create a strong, non-porous structure with minimal shrinkage, while still being pliable enough to sculpt into a perfectly placed apex. Learning to recognize this perfect bead by sight and feel, rather than by a rigid number of “dips,” is a hallmark of a master technician.
This comparative analysis, based on a professional guide to nail durability, clarifies the direct impact of your mix ratio.
| Ratio Type | Visual Indicators | Structural Impact | Filing Behavior |
|---|---|---|---|
| Too Wet (excess liquid) | Runny, glossy, slow to set | Excessive shrinkage, weak apex, prone to stress cracks | Gummy texture, clogs files, imprecise shaping |
| Perfect Ratio | Glossy dome, holds shape 2-3 seconds | Strong molecular bonds, durable apex, optimal flexibility | Smooth filing, precise refinement possible |
| Too Dry (excess powder) | Chalky, matte, crystalline appearance | Porous structure, brittle apex, micro-fractures | Shatters during filing, compromises built structure |
By focusing on creating this perfect bead every single time, you are laying the very molecular foundation for a 4-week adhesion. You eliminate the primary cause of lifting and build an enhancement with the inherent architectural integrity needed to last.
How to File the Side Walls Without Cutting into the Stress Point?
Filing is often seen as the final step to create a pretty shape, but for a structural engineer, it’s the process of refining the architecture without compromising its integrity. The most common and catastrophic filing error is cutting upwards into the lower arches when shaping the side walls. This thins out the product exactly where the nail needs the most support—the stress point where the free edge meets the nail bed. Doing so creates a pre-determined fracture line, making a break inevitable, no matter how perfectly you built your apex.
To avoid this, you must adopt a systematic approach. A professional 4-point filing system helps maintain structural integrity:
- Point 1 – Free Edge: Shape the tip first to establish your final length and shape.
- Point 2 – Lower Arches/Sides: This is the critical step. You must file the lateral structure so it extends straight out from the nail’s side walls. Your file should be held parallel to this line, never angled upwards.
- Point 3 – Surface & Apex: Blend and file the nail’s surface, ensuring it is balanced from side to side and that the apex is the highest point.
- Point 4 – Cuticle Area: Taper the product thinly and smoothly towards the cuticle, ensuring a seamless transition with no ledges.
This structured process prevents you from haphazardly removing product from critical areas. The golden rule for side walls is to maintain a straight, continuous line from the nail groove out to the free edge. Any dip or curve inwards is a structural flaw.
A powerful professional technique to visualize this is the “Barrel View” method. As one academy suggests, you should hold the client’s finger and “close one eye looking down the barrel of the nail” against a dark background like a black glove or towel. From this perspective, you can clearly see the thickness and uniformity of your C-curve and side walls. This view immediately reveals if you have inadvertently filed away one side more than the other or thinned out the lower arch. It trains your eye to see the nail not as a flat surface, but as a three-dimensional, load-bearing structure, ensuring that your refinement process enhances its strength rather than creating its downfall.
Optimization Strategy: Sculpting a Perfect Square on a Ski-Jump Nail
Ski-jump nails, which have a natural upward curve, are one of the most significant architectural challenges for a nail technician. If you simply follow the natural nail’s growth pattern, the resulting enhancement will look unrefined and be structurally weak, with the apex misplaced and the tip pointing upwards. The goal is to create an optical illusion: a nail that appears perfectly straight from profile view, even though its foundation is curved. This requires a strategy of counterbalance and apex repositioning.
The first step is to counteract the upward curve at the foundation. When applying a paper form, instead of placing it straight, you must angle it slightly downwards, typically between 5 and 10 degrees. This forces the free edge to be built in a straighter line, immediately beginning the process of optical correction. A standard apex placement on a ski-jump nail will only accentuate the curve. Therefore, the apex must be moved further back towards the cuticle, from the typical one-third position to approximately 40% of the way down the nail bed. This shifts the visual and structural high point, creating weight that visually pulls the nail down into a straight line.
The product application itself must also be strategic. You need to build the apex slightly higher (20-30% more product) than on a normal nail to create the necessary counterbalance mass. It’s often effective to use a drier, stiffer bead of acrylic at the free edge to build a stable, non-flexing foundation, then use a medium-wet bead to construct the repositioned apex. This advanced technique requires constant checking from multiple angles—profile, barrel view, and top-down—to ensure the illusion is holding. The final nail should look effortlessly straight, hiding the complex engineering that lies beneath.
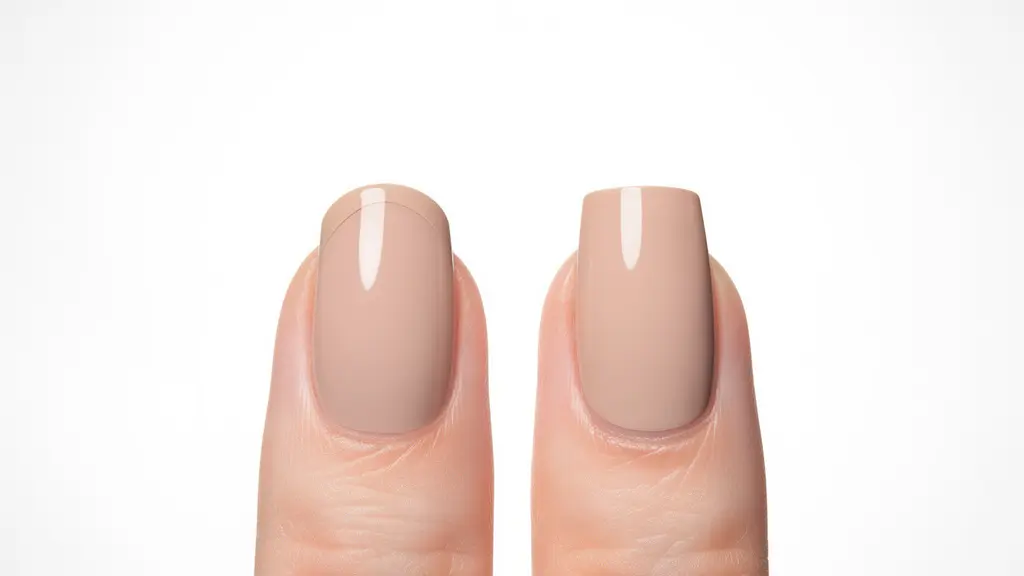
The transformation shown in this profile view is not magic; it’s a calculated application of structural principles. By mastering the counterbalance technique, you can take on the most challenging nail types with confidence, delivering flawless, durable results that showcase your advanced expertise.
Action Plan: The Counterbalance Apex for Ski-Jump Nails
- Apply the form angled slightly downward (5-10 degrees) to counteract the natural upward curve.
- Place the apex further back than standard placement—approximately 40% from the cuticle instead of the typical 33%.
- Build up the apex height by 20-30% more than usual to create the counterbalance weight.
- Use a drier, stiffer bead (60/40 powder-to-liquid ratio) at the free edge for foundation stability before applying a medium-wet bead for the apex.
- Check the “optical illusion” from multiple angles throughout the process—the nail must appear straight despite the natural curve.
Which Extension Method Feels Most Like Natural Nails?
While strength is paramount for longevity, the client’s experience is defined by how the enhancement feels. The sensation of weight, rigidity, or flexibility is a critical factor in client satisfaction. The method that feels most like a natural nail is typically the one that best mimics a natural nail’s balance of strength and slight flexibility. An overly rigid enhancement can feel foreign and bulky, while one that is too flimsy feels insecure. Based on material properties, soft gel extensions (like Gel-X or Aprés) consistently score the highest for a natural feel.
Soft gel is inherently more flexible than acrylic or hard gel. This flexibility allows the enhancement to move and bend slightly with the natural nail, which prevents the rigid, “stuck-on” feeling some clients dislike. It’s also the lightest of all extension materials, further contributing to a “barely there” sensation. However, this flexibility comes at a cost: for very long or stiletto shapes, soft gel may not have the rigid structural integrity of acrylic to prevent bending or flexing at the tip.
To get a clearer picture, this analysis based on a comparison of material properties is incredibly helpful:
| Material Type | Flexibility Rating | Weight | Strength for Long Nails | Natural Feel Score |
|---|---|---|---|---|
| Soft Gel (Gel-X, Aprés) | High (8/10) | Lightest | Moderate – best for medium length | 9/10 |
| Polygel | Medium (6/10) | Light-Medium | Good – unique dampened flex | 7/10 |
| Hard Gel | Low-Medium (4/10) | Medium | Very Good – balanced strength | 5/10 |
| Acrylic | Low (2/10) | Medium-Heavy | Excellent – maximum strength | 3/10 |
For the ultimate combination of natural feel and strength, advanced technicians are now using a “Hybrid Structure” approach. This involves applying a thin, flexible soft gel base for adhesion and comfort, then building the apex and free edge with a stronger material like hard gel or acrylic. This innovative method provides the best of both worlds: the comfort and flexibility of soft gel at the nail bed, with the rigid, unbreakable strength of a harder material precisely where it’s needed for structural support. It is the pinnacle of customized nail engineering.
The “Snowy” Bead: Signs Your Monomer Ratio Is Too Dry
When you dip your brush into powder and the resulting bead appears chalky, matte, or crystalline, you are witnessing a “snowy” bead. This is a critical red flag indicating your monomer-to-powder ratio is far too dry. This isn’t just an aesthetic issue; it’s a sign of impending structural failure. A dry bead signifies incomplete polymerization. There is not enough liquid monomer to fully saturate the polymer powder, preventing the molecules from forming the long, strong cross-linked chains that give acrylic its durability. The resulting structure is porous, brittle, and has a significantly weaker bond to the natural nail.
The consequences are severe. Professional studies on nail product chemistry demonstrate that with incomplete polymerization, you can see an up to 75% reduction in tensile strength. This means the nail is dramatically more likely to crack or shatter under normal daily stress. Furthermore, the porous nature of the improperly cured acrylic can trap moisture, creating a breeding ground for bacteria and increasing the risk of nail infections. Filing a dry application is also a nightmare; instead of producing a smooth dust, the material chips and shatters, making it impossible to create a refined shape and further compromising the already weak structure.
Fortunately, if you act quickly, a snowy bead can sometimes be saved with the “Re-wetting Rescue” technique. If you identify the chalky appearance within the first 5 seconds of placement, you can dip your brush back into clean monomer to create a “slip layer” and gently pat this extra liquid over the dry bead. This allows the monomer to re-saturate the powder and kickstart proper polymerization. The steps are:
- Identify the “snowy” or chalky look immediately after placement.
- Act within 5 seconds before the product begins to set.
- Dip the brush in fresh monomer.
- Apply this tiny, wet slip layer of monomer over the top with gentle strokes.
- Allow the monomer to re-saturate the powder, watching for a glossy appearance.
- Shape the now-workable bead quickly.
While this can work in a pinch, the best solution is prevention. Recognizing the visual cues of a dry bead and adjusting your technique to pick up a perfect, glossy bead every time is fundamental to building strong, reliable enhancements.
Key Takeaways
- Structural integrity is a result of engineering, not artistry; the apex is a load-bearing arch.
- The C-curve, set via flash-curing and pinching, is a critical transverse arch that provides rigidity and prevents breaks.
- The perfect liquid-to-powder ratio is the molecular foundation of a durable nail, preventing both shrinkage-related lifting and brittle, porous structures.
Polygel, Acrylic, or Soft Gel: Which Extension Method Lasts 4 Weeks?
The question of which material “lasts the longest” is a trick question. The truth is, any professional extension material can be engineered to last 4+ weeks when applied with proper technique and matched to the client’s lifestyle. The longevity of an enhancement has less to do with the specific product (Polygel, Acrylic, or Soft Gel) and more to do with the technician’s ability to build a sound architectural structure. Durability is a function of a well-prepared nail plate, correct apex placement, a balanced structure, and a material choice that suits the client’s daily activities.
A “heavy-handed” client who types aggressively for 8 hours a day will put immense, repetitive stress on their nail tips. For this client, the extreme rigidity and hardness of acrylic make it the superior choice. Its low flexibility means it won’t bend under impact, protecting the stress point. Conversely, for a client with naturally flexible nails who wants a lighter feel, Polygel’s unique “dampened” flexibility might be a better fit, as it can move with the natural nail without causing the lifting that a hyper-rigid acrylic might. Soft gel extensions, being the most flexible, are often best for clients who prioritize a natural feel and have a less demanding lifestyle, as they may not withstand the same level of abuse as acrylic.
This decision matrix, adapted from a professional guide to extension methods, helps match the material to the client profile for maximum longevity.
| Client Type | Lifestyle Factors | Recommended Material | Expected Longevity | Apex Strategy |
|---|---|---|---|---|
| Heavy-handed typist | 8+ hours daily keyboard use | Acrylic | 4-5 weeks | High apex, 35% back from free edge |
| Flexible nail client | Wants lighter feel, moderate activity | Polygel | 3-4 weeks | Standard apex with gradual taper |
| Shape perfectionist | Prioritizes aesthetics over durability | Soft Gel Extensions | 2-3 weeks | Minimal apex, focus on smooth lines |
| Active professional | Mixed manual and desk work | Hybrid (Soft gel base + hard gel apex) | 4+ weeks | Reinforced apex with migration planning |
The ultimate pro-level strategy for ensuring 4-week durability is “Apex Migration” planning. An expert technician knows that as the nail grows, the apex moves forward. If the apex is perfectly placed on day one, it will be too far forward by week two, creating a weak point. Therefore, a master technician places the apex 2-3mm further back than ideal for a fresh set. This ensures that as the nail grows, the apex “migrates” into the perfect, structurally sound position by weeks two and three. This forward-thinking approach is the true secret to achieving bulletproof 4-week wear, regardless of the material you choose.
By shifting your perspective from that of an artist to that of a structural engineer, you unlock the ability to create enhancements that are not only beautiful but are fundamentally sound and resilient. Mastering the science of stress distribution, material properties, and architectural planning is the final step in your journey from an intermediate technician to a true nail expert. To build upon these principles, your next step is to get a personalized analysis of your current technique and identify the precise areas for improvement in your own work.