Contrary to popular belief, the secret to perfect cuticles isn’t just avoiding nippers, but mastering the chemical process of dissolving dead tissue and then neutralizing it to prevent damage.
- Cuticle removers use alkaline ingredients to soften keratin, but this high pH must be balanced afterward to prevent chronic dryness and irritation.
- Gentle tools like glass pushers and proper technique are more important than aggressive scraping for protecting the delicate nail matrix from micro-trauma.
Recommendation: Shift your focus from mechanical removal (cutting and scraping) to a chemical care routine: dissolve, push gently, neutralize, and hydrate for truly healthy cuticles.
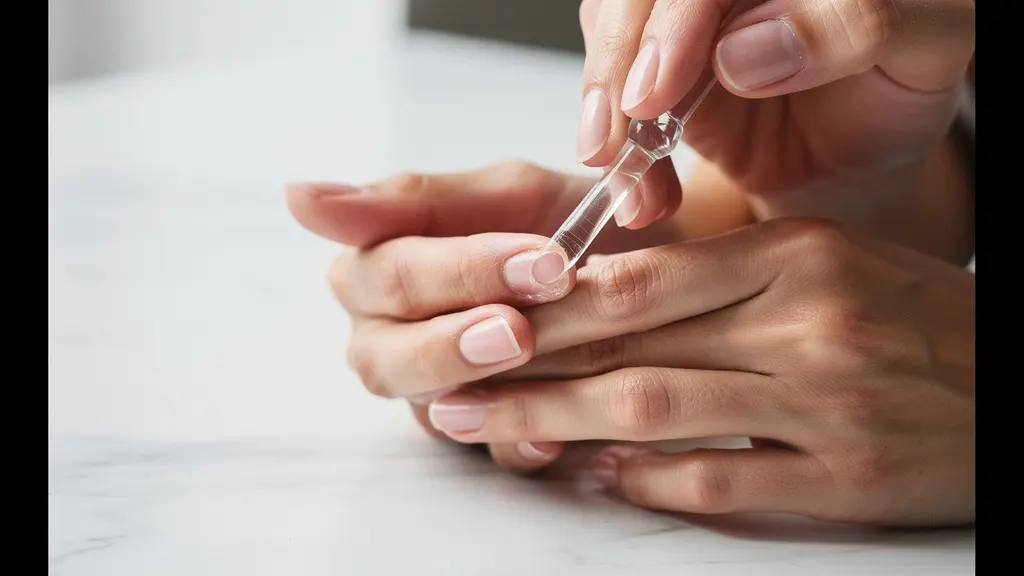
The very thought of cuticle nippers can make many of us cringe. The fear of a painful snip, a potential infection, or simply going too far is real. For years, the advice has been a simple “don’t cut your cuticles,” but that leaves a frustrating question unanswered: what do you do with the stubborn, overgrown, or ragged tissue that ruins an otherwise perfect manicure? The common solutions—soaking in water, pushing them back, and slathering on oil—are parts of the puzzle, but they often feel incomplete and yield temporary results, leading to a cycle of dry, unruly skin around the nails.
This cycle of frustration happens because the conventional approach misses the most critical scientific principles of skin care. True, effective cuticle management isn’t about brute force or simply avoiding one tool. It’s about chemistry. The key is to understand that you’re not just tidying up; you are performing a controlled chemical exfoliation on a very delicate area. This means you need to respect the skin’s pH, understand the ingredients you’re using, and know how to properly neutralize their effects to stop them from causing more harm than good.
But what if the real secret to safe and effective cuticle care lies not in what you avoid, but in what you actively do to manage this chemical process? This guide will shift your perspective from one of fear and avoidance to one of control and understanding. We will explore the science of how cuticle removers work, the critical steps for preparation and neutralization that most people skip, and the tools that work with your nail’s biology, not against it. By the end, you will have a complete, science-backed protocol to dissolve stubborn cuticles safely, leaving you with nothing but a clean, healthy, and beautiful nail frame—no nippers required.
To guide you through this gentle yet effective approach, we’ve structured this article to cover every step of the process, from understanding the products to mastering the aftercare.
Contents: How to Dissolve Stubborn Cuticles Safely Without Using Nippers?
- Potassium Hydroxide in Removers: Is It Safe for Sensitive Skin?
- How Long Should You Soak Cuticles Before Pushing Them Back?
- Orange Stick vs. Metal Pusher: Which One Damages the Matrix Less?
- The Step Most People Skip That Causes Dryness After Cuticle Work
- Signs You Are Over-Using Cuticle Removers and Thinning the Skin
- The “Invisible Cut” Mistake: Bacteria Entry Points You Can’t See
- Tocopherol in Cuticle Oil: Does It Really Heal Micro-Cuts?
- Why Should You Switch to a Czech Glass File for Natural Nails?
Potassium Hydroxide in Removers: Is It Safe for Sensitive Skin?
The magic behind cuticle removers isn’t magic at all; it’s a chemical reaction driven by a powerful alkaline ingredient, most often Potassium Hydroxide (KOH) or Sodium Hydroxide (NaOH). These ingredients are highly effective because they excel at breaking down keratin, the protein that makes up dead skin cells. This is known as a keratolytic action. When applied, the remover quickly softens the adhered, non-living tissue on the nail plate, making it easy to gently push away. But is it safe, especially for those with sensitive skin?
The answer lies in concentration and proper use. Cosmetic safety bodies regulate these ingredients strictly. For instance, the European Cosmetics Regulation limits the concentration to a 5% maximum in cuticle products, a level considered safe for its intended, brief contact with the skin. However, “safe” does not mean “without risk.” The high alkalinity that makes KOH effective can also cause significant irritation if misused. A study in the Journal of the American Academy of Dermatology highlights that these products can cause irritant reactions, and in extreme cases of prolonged contact, such as leaving a product on overnight, have even led to a “unique crateriform onychodystrophy”—a distinct deformation of the nail.
For anyone with sensitive skin, or for those new to chemical removers, performing a patch test is not just a suggestion; it’s a crucial safety step. This ensures your skin won’t have an adverse reaction before you apply the product to the delicate nail area. The goal is selective exfoliation—dissolving only the dead tissue without irritating the living skin of the proximal nail fold.
Your Safety Checklist: Patch Testing a New Cuticle Remover
- Initial Application: Apply a tiny amount of the remover to a discreet area of skin, like the inner wrist or ankle, not the nail itself.
- Observation Time: Leave the product on for the manufacturer’s recommended time, which is typically between 30 and 60 seconds. Do not exceed this time.
- Thorough Rinsing: Rinse the area completely with lukewarm water and gently pat it dry with a clean towel.
- 24-Hour Watch: Wait a full 24 hours, observing the test area for any signs of an adverse reaction, such as redness, itching, swelling, or blistering.
- Proceed with Caution: If no reaction occurs after 24 hours, you can proceed to use the product on a single nail first as a final test before a full application.
How Long Should You Soak Cuticles Before Pushing Them Back?
Proper preparation is fundamental to a gentle cuticle-care routine. The goal of soaking is not just to get the skin wet, but to soften the non-living cuticle tissue (the eponychium) that is adhered to the nail plate, making it more pliable and easier to remove without force. Skipping this step or not doing it long enough means you’ll have to scrape harder, increasing the risk of damaging the nail plate or, worse, the delicate nail matrix beneath. So, what is the optimal duration?
When using plain warm water (without a chemical remover added), professional nail technicians recommend soaking for 3-5 minutes. This duration is long enough to effectively soften the dead tissue without causing the surrounding living skin to become overly waterlogged and prone to damage. Soaking for less than three minutes may not provide sufficient softening, while soaking for too long (over 10 minutes) can weaken the nail itself and make the live skin too fragile.
While a bowl of warm water is the classic method, a more targeted and spa-like approach involves using a warm, damp towel. This technique provides gentle, consistent heat and moisture directly to the cuticle area without having to soak your entire hands. Simply wrap your fingertips in a towel that has been soaked in warm water and wrung out. This method is not only relaxing but also prevents the nails from becoming oversaturated.

It’s important to note that if you are using a chemical cuticle remover, you should follow the manufacturer’s instructions precisely, which often recommend application on dry skin. In that case, the chemical does the softening work, not the water. The soak would then come during the rinsing phase to ensure all product is removed.
Orange Stick vs. Metal Pusher: Which One Damages the Matrix Less?
Once your cuticles are properly softened, the next step involves a tool. This is where a lot of invisible damage can occur. The goal is to gently push back the proximal nail fold and exfoliate the non-living tissue from the nail plate, not to gouge or scrape. The choice of tool is therefore critical in protecting the nail matrix, the delicate area under the skin at the base of the nail where new nail cells are created. Damage here can lead to permanent ridges, bumps, or white spots on the nail.
Traditionally, the choice has been between a disposable wooden orange stick and a reusable stainless steel pusher. The orange stick is often seen as safer due to its softness, but its porous nature makes it a single-use item, and it can splinter, potentially causing micro-scratches. The metal pusher is durable and can be sanitized, but its hardness means an unskilled hand can easily apply too much pressure and damage the matrix. However, a third option is emerging as the superior choice for gentle care: the Czech glass cuticle pusher.
As the experts at GERMANIKURE Professional Tools explain, the unique properties of glass offer a distinct advantage:
Glass cuticle sticks exfoliate the dead skin while leaving the living tissue intact, as the etched glass surface works differently than traditional tools.
– GERMANIKURE Professional Tools, The Best Way to Remove Cuticles: Top Tools and Pro Tips
The fine, uniform abrasive surface of a glass pusher allows you to simultaneously push and gently buff away only the dead, adhered tissue without harming the live skin or the nail plate. This targeted action significantly reduces the risk of damaging the matrix. The following table breaks down the key differences.
| Tool Type | Matrix Safety | Hygiene Level | Durability |
|---|---|---|---|
| Czech Glass Pusher | Highest (gentle abrasive tip) | Excellent (easily sterilized) | Years of use |
| Stainless Steel | Moderate (depends on technique) | Good (can be sterilized) | Long-lasting |
| Orange Wood Stick | Low (splinter risk) | Poor (porous, single-use) | Disposable |
The Step Most People Skip That Causes Dryness After Cuticle Work
You’ve successfully used a remover, gently pushed back your cuticles, and rinsed your hands. So why is it that a day or two later, the skin around your nails feels tight, dry, and sometimes even looks worse than before? The answer lies in a forgotten chemistry lesson: pH balance. This single, often-skipped step is the true cause of post-manicure dryness and irritation.
Cuticle removers, with their key ingredient Potassium Hydroxide, are extremely alkaline. In fact, studies show potassium hydroxide has a pH of around 13 (on a scale where 7 is neutral). Your skin’s natural, healthy state, known as the “acid mantle,” is mildly acidic, with a pH between 4.5 and 5.5. When you apply a high-alkaline product, you are dramatically disrupting this protective barrier. While rinsing with water (which has a neutral pH of 7) removes the product, it does not fully restore your skin’s natural acidity. The skin remains in a heightened alkaline state, which compromises its ability to retain moisture and defend against bacteria, leading directly to dryness, flaking, and irritation.
The solution is to perform a pH neutralization step immediately after rinsing away the remover. This involves applying a mild acidic solution to bring the skin’s pH back down to its happy place. This simple action helps to instantly restore the acid mantle, calm the skin, and prepare it to absorb hydration much more effectively. It’s the professional secret to avoiding the dreaded post-remover rebound dryness.
Here is a simple protocol to rebalance your skin’s pH after cuticle work:
- Rinse Thoroughly: After using the cuticle remover for the recommended time, wash your hands meticulously with soap and water to remove all product residue.
- Apply a Toner: Moisten a cotton pad with a gentle, alcohol-free facial toner or a diluted apple cider vinegar solution (one part vinegar to four parts water) and wipe it over each nail and the surrounding skin.
- Wait and Absorb: Let the toner air dry for about 30 seconds. You are actively helping your skin return to its optimal acidic state.
- Hydrate with a Humectant: Immediately follow up with a product containing a humectant like hyaluronic acid or glycerin to draw moisture into the freshly balanced skin.
- Seal with Oil: Finally, lock in that moisture with a good quality cuticle oil or balm, which acts as an occlusive layer.
Signs You Are Over-Using Cuticle Removers and Thinning the Skin
In the quest for perfectly clean nail beds, it’s easy to fall into the “more is better” trap. You might be tempted to leave the remover on a little longer, use it more frequently, or push a bit more aggressively, thinking it will yield better results. However, over-using these powerful keratolytic agents can backfire, leading to significant damage that goes far beyond simple dryness. Recognizing the warning signs is key to preventing long-term harm to your nails and the surrounding skin.
When used too often or for too long, cuticle removers don’t just dissolve the non-living tissue on the nail plate; they begin to affect the living skin of the proximal nail fold. This thins the skin, compromises its protective barrier, and can make the area red, shiny, and tender to the touch. This thinned skin is far more susceptible to irritation and infection. It creates a vicious cycle where the skin becomes damaged, appears ragged as it tries to heal, and tempts you to use the remover again, thus compounding the problem.
According to dermatological observations published in the Journal of the American Academy of Dermatology, the side effects of chemical remover misuse are well-documented. They can include contact dermatitis (an itchy rash), leukonychia (white spots on the nail), onycholysis (the nail plate separating from the nail bed), brittle nails, and an increased risk of secondary infections. If the skin around your nails is constantly red, inflamed, or peeling, it’s a clear signal to stop using the remover and focus on healing and hydration.
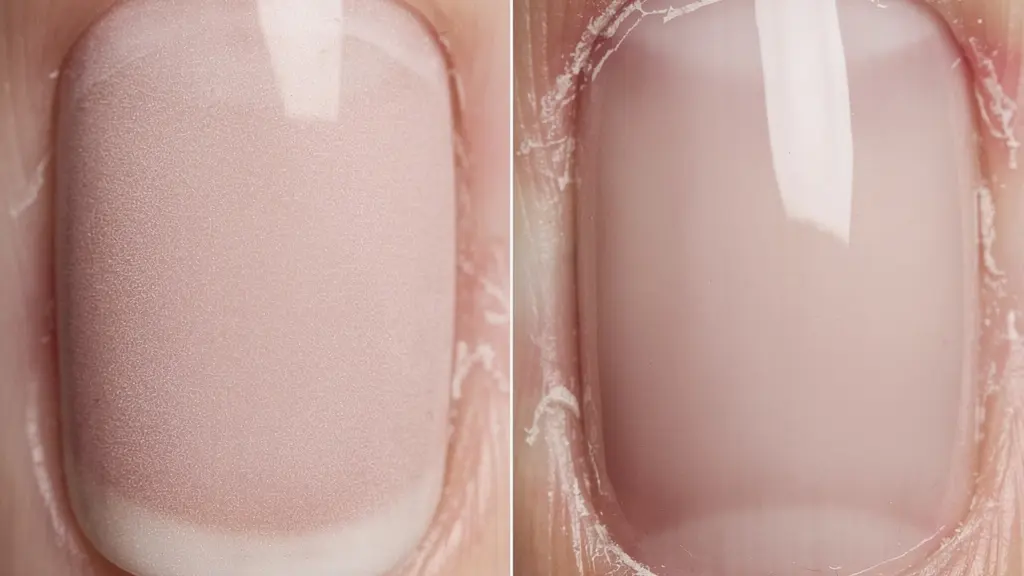
A healthy cuticle area should look calm and supple, seamlessly blending with the surrounding skin. A damaged, over-treated cuticle area often appears thin, shiny, and red or angry, as shown in the comparison above. Listen to your body; if your cuticle care routine is causing any pain, tenderness, or visible inflammation, it’s time to reduce the frequency and intensity of your treatment.
The “Invisible Cut” Mistake: Bacteria Entry Points You Can’t See
The most common reason people switch from nippers to removers is to avoid cutting the skin. This is a wise decision, as an open cut is an obvious invitation for bacteria. However, it’s a mistake to assume that just because you can’t see blood, you haven’t created an entry point for infection. The concept of the “invisible cut” or micro-trauma is crucial to understanding true, safe cuticle care.
The cuticle’s primary biological function is to act as a seal, protecting the nail matrix and surrounding tissues from pathogens in the environment. As the American Academy of Dermatology emphasizes, this barrier is your nail’s first line of defense.
Cuticles protect both your nails and the skin surrounding them from infection. After cutting the cuticle, it’s easier for bacteria and germs to get inside.
– American Academy of Dermatology, Cuticle: What Is It, Care, Removal, Signs of Infection
This warning applies not only to visible cuts from nippers but also to the microscopic abrasions and tears caused by aggressive pushing with metal tools or over-exfoliating with chemicals. When you scrape too hard or thin the skin with excessive remover use, you create tiny fissures in the skin’s surface. These are the invisible cuts. They may not bleed, but they are more than large enough to allow bacteria like Staphylococcus or fungi to enter, potentially leading to a painful infection known as paronychia. This condition causes redness, swelling, and throbbing pain around the nail and often requires medical treatment.
Therefore, the goal of a gentle routine is to avoid creating any breaks in the skin, visible or not. This means using chemical removers just long enough to soften the dead tissue and no longer. It means using a gentle tool, like a glass pusher, with minimal pressure. It means never, ever pushing or scraping on dry, unprepared cuticles. By respecting the integrity of this natural seal, you are not just aiming for a cleaner look; you are actively preserving your nail’s health and preventing infection.
Tocopherol in Cuticle Oil: Does It Really Heal Micro-Cuts?
After you’ve dissolved, gently pushed, and neutralized, the final step in a perfect, safe cuticle routine is healing and sealing. This is where a high-quality cuticle oil comes in, but not all oils are created equal. While most will provide some level of moisture, an oil containing Tocopherol (a pure form of Vitamin E) offers specific benefits that are ideal for repairing the micro-trauma we’ve been so careful to minimize.
But does it actually “heal” cuts? While it won’t magically close a wound, Tocopherol plays a powerful role in skin barrier repair. It is a fat-soluble antioxidant, which means it works to neutralize free radical damage caused by exposure to chemicals (like cuticle removers) and physical stress (from pushing). This antioxidant action helps to calm inflammation and supports the skin’s natural healing processes. As explained in nail care literature, ingredients like Vitamin E are included in formulations to help prevent the very dryness and irritation that can occur during the cuticle removal process.
Furthermore, Tocopherol helps to reinforce the skin’s lipid barrier. This barrier is what keeps moisture in and irritants out. By replenishing the lipids in the skin, a good Vitamin E oil helps to seal those “invisible cuts” and microscopic fissures, effectively locking in hydration and protecting the newly exposed, vulnerable skin. For the best results, it’s important to choose an oil with tocopherol, not its synthetic ester derivative, tocopheryl acetate, which is less potent. Massaging the oil in is also key, as this increases circulation to the area, further aiding the healing process.
To maximize the healing benefits, follow a consistent application protocol:
- Choose Wisely: Select a cuticle oil that lists pure tocopherol high on its ingredient list.
- Apply Sparingly: Place one small drop on each cuticle area. A little goes a long way.
- Massage for Absorption: Gently massage the oil into the nail and surrounding skin for at least 30 seconds per finger. Use circular motions to stimulate blood flow.
- Focus on Damage: Pay extra attention to any areas that look dry, feel tender, or may have been subject to more pressure.
- Be Consistent: For optimal healing and maintenance, reapply the oil two to three times a day, especially after washing your hands, which strips away natural oils.
Key Takeaways
- Safe cuticle care is a chemical process: the goal is to dissolve dead tissue with an alkaline remover and then neutralize the skin’s pH with a mild acid.
- The right tools are critical. A Czech glass pusher gently exfoliates dead tissue without the risk of splintering like wood or gouging the nail matrix like metal.
- Hydration is a two-step process: restore the skin’s pH balance first, then apply a quality oil with tocopherol (Vitamin E) to heal micro-trauma and seal in moisture.
Why Should You Switch to a Czech Glass File for Natural Nails?
Extending the philosophy of gentle, effective care beyond the cuticle area leads us to another game-changing tool: the Czech glass nail file. If your goal is to maintain healthy, strong natural nails, the tool you use to shape them matters just as much as how you care for your cuticles. Traditional emery boards and metal files create microscopic frays and tears at the nail’s edge, leading to peeling, splitting, and weakness over time. They essentially shred the nail tip on a micro-level.
Czech glass files, on the other hand, work in a fundamentally different and superior way. As noted by experts at Bona Fide Beauty, they offer a unique advantage: ” Czech glass nail files help seal your natural nail’s keratin layers for a nice smooth finish.” This sealing action is the key benefit. Instead of tearing the nail’s layers apart, the fine, uniform grit of the glass file turns the nail edge to dust, closing and sealing the keratin layers together. This prevents water and environmental stressors from getting in, resulting in a stronger, smoother nail tip that is far less prone to chipping and peeling.
The secret lies in the manufacturing process. According to Aveniro, this is due to a patented acid-etching technology that creates an abrasive surface with sharp, uniform elements. This allows the file to work smoothly and precisely. Another significant benefit is the ability to file in both directions. With traditional files, a back-and-forth motion is discouraged because it exacerbates tearing. With a glass file, you can safely file in any direction, giving you more control and precision in shaping your nails without causing damage. It’s a small switch in your toolkit that makes a huge difference in the long-term health and resilience of your natural nails, perfectly complementing a gentle cuticle care routine.
By adopting this science-backed, gentle approach—from choosing the right remover and tools to implementing crucial aftercare steps like pH balancing and healing with quality oils—you can finally break the cycle of cuticle damage. It’s time to move beyond the fear of nippers and embrace a routine that delivers truly healthy, beautiful nails.