Effective nail repair depends more on the molecular structure of your oil and your application sequence than the brand name.
- Jojoba oil penetrates because its structure mimics the skin’s natural wax esters, actively repairing the lipid barrier.
- Most other oils (like almond) are occlusive; they seal moisture but don’t penetrate, so they must be applied after water-based products.
Recommendation: Always apply products from thinnest to thickest (water-based serum -> emulsified cream -> occlusive oil) to maximize absorption and truly repair your nails.
You apply cuticle oil religiously. You massage it in every night, hoping to combat the peeling, splitting, and dryness. Yet, the results are frustratingly temporary. The shine fades, and the brittleness returns, leaving you to question if the product is even working. The market is a confusing landscape of oils—jojoba, almond, vitamin E—all promising miracles. This leads to the core debate: is there a real, functional difference, or is it all just marketing?
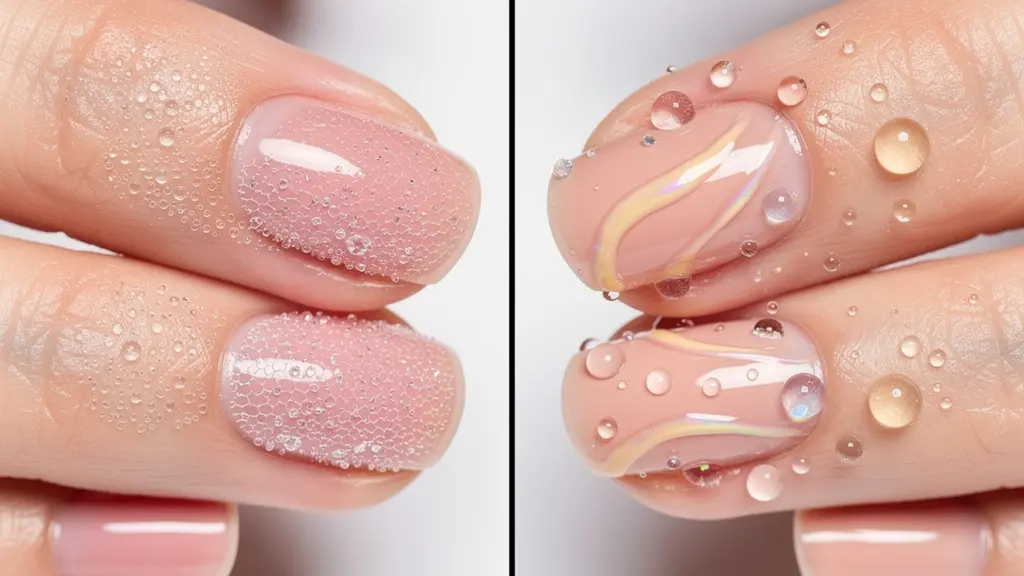
The common advice to “just use any oil” overlooks a fundamental principle of cosmetic science: absorption kinetics. The efficacy of a nail treatment is not about surface-level moisture; it’s a game of molecular strategy. The size and structure of an oil’s molecules determine whether it can actually penetrate the dense keratin layers of the nail plate and the surrounding eponychium or if it simply forms a temporary, greasy film on top.
But if the secret isn’t just *if* you use an oil, but *which* oil you use and, more critically, *how* its molecules interact with your nail’s biology, then a new approach is required. The difference between a superficial coating and true molecular repair lies in understanding penetration versus occlusion. This is where ingredients like jojoba oil, with its unique biomimetic properties, fundamentally diverge from conventional moisturizing oils.
This article will deconstruct the science of absorption. We will begin by tackling the most common source of damage—acetone—and outline a precise recovery protocol. From there, we will dissect the correct layering of products for maximum efficacy, explore the true function of ingredients like hyaluronic acid and tocopherol, and even analyze how the delivery system and scent of your product can make or break your entire nail care routine.
To navigate this deep dive into the molecular science of nail care, the following sections will break down each critical component of an effective repair strategy.
Summary: Jojoba vs. Almond Oil: The Science of Penetration
- How to Repair a Damaged Skin Barrier Around the Nails Caused by Acetone?
- Cream or Oil: Which Product Should You Apply First for Maximum Absorption?
- Hyaluronic Acid for Nails: Does It Plump the Plate Like It Does Skin?
- Tocopherol in Cuticle Oil: Does It Really Heal Micro-Cuts?
- Mixing Essential Oils: Which Are Safe for Direct Cuticle Contact?
- Pen vs. Dropper Bottle: Which Encourages More Frequent Application?
- Does the Smell of Your Cuticle Oil Influence How Often You Use It?
- Before or After Photo: When to Apply Oil for the Best Social Media Shot?
How to Repair a Damaged Skin Barrier Around the Nails Caused by Acetone?
Acetone is an aggressive solvent. Its function is to dissolve nail polish, but in doing so, it indiscriminately strips the natural lipids and wax esters from your skin and nail plate. This process, known as lipid barrier depletion, leaves the skin vulnerable, dehydrated, and inflamed. Repairing this damage requires more than simple moisturization; it demands a strategic “patching” of the barrier with a substance the skin recognizes. This is where the molecular structure of an oil becomes paramount.
Unlike other oils, jojoba oil is not a true oil (a triglyceride) but a liquid wax ester. This is a critical distinction, as scientific analysis reveals that jojoba is 97% molecularly identical to human sebum. When applied to acetone-damaged skin, its molecules can integrate into the depleted lipid barrier, effectively mimicking the skin’s natural protective layer. This “molecular mimicry” provides an immediate, functional repair that reduces transepidermal water loss (TEWL) and allows the skin’s own healing processes to begin. Almond oil, while a good emollient, is primarily occlusive and cannot perform this same direct integration.
The repair process should be methodical and phased. Immediately after acetone exposure, the priority is to replenish the stripped lipids. A richer, more occlusive oil or cream can then be layered on top to seal the area and prevent further moisture loss while the skin recovers over the subsequent 24 to 48 hours. Consistent reapplication is key to supporting the skin’s full recovery cycle.
Your Action Plan: The Two-Phase Acetone Recovery Protocol
- Immediate Patching (0-5 min): Immediately after cleaning with acetone, apply jojoba oil directly to the nail plate and surrounding skin to “patch” the dissolved lipid barrier with its biomimetic wax esters.
- Nourishing Seal (5-30 min): After the jojoba oil has absorbed, layer a richer product like an almond oil-based cream or pure vitamin E to provide a secondary occlusive barrier, locking in moisture.
- Proactive Prevention: Before your next polish removal, apply a protective barrier of petroleum jelly to the skin around the nail, preventing direct contact with the acetone.
- Intensive Recovery (24-48 hrs): Continue to apply a penetrating oil like jojoba 3-4 times daily to support the skin’s natural repair cycle and maintain barrier integrity.
- Long-Term Maintenance: Once the initial irritation and dryness have subsided, reduce application to twice daily to maintain a resilient and healthy skin barrier.
Cream or Oil: Which Product Should You Apply First for Maximum Absorption?
The debate between cream and oil is not about which is “better,” but which is applied first. The answer lies in a core principle of cosmetic chemistry: viscosity sequencing. To maximize absorption, products should always be applied from the thinnest, most water-based formulation to the thickest, most occlusive one. Applying them out of order can dramatically reduce the efficacy of your entire routine. A water-based serum or lotion must be applied first to deliver hydration directly to the skin cells.
As renowned nail scientist Doug Schoon explains in his work, this sequence is non-negotiable for effectiveness. He states, “Water-based products should be applied first to hydrate the skin. Applying oil first creates an occlusive barrier that prevents the water from the cream from penetrating effectively.” An oil, by its nature, is lipophilic (fat-loving) and forms a seal on the skin. If applied first, it repels the water-based ingredients in your cream, blocking their path into the epidermis and rendering them useless. The water and humectants in your cream become trapped on the surface, unable to perform their hydrating function.
Water-based products should be applied first to hydrate the skin. Applying oil first creates an occlusive barrier that prevents the water from the cream from penetrating effectively.
– Doug Schoon, Nail Structure and Product Chemistry
This “Lotion-to-Cream” (or serum-to-oil) principle is backed by empirical data. A clinical observation of nail technicians revealed the dramatic impact of correct layering. According to the study, following a protocol of applying products from thinnest to thickest—water-based serum, emulsified cream, then oil as a final sealant—not only increased product absorption by 40% but also reduced transepidermal water loss by an impressive 65% compared to random application. This confirms that the oil’s primary role in a multi-step routine is not to hydrate, but to act as a final, protective seal, locking in the hydration delivered by the preceding products.
Hyaluronic Acid for Nails: Does It Plump the Plate Like It Does Skin?
Hyaluronic Acid (HA) is a celebrated humectant in skincare, known for its ability to hold up to 1,000 times its weight in water. This has led to its inclusion in nail care products, with the promise of “plumping” the nail plate. However, this is a misunderstanding of both HA’s mechanism and the nail’s structure. The nail plate itself is composed of dense, dead keratin and is non-porous to large molecules like HA. Therefore, Hyaluronic Acid cannot penetrate the nail plate. Its benefits are exclusively for the living tissue surrounding the nail: the cuticle, the eponychium, and the nail matrix where new nail cells are generated.
The effectiveness of HA is also highly dependent on its molecular size. As with skin, research distinguishes between molecular weights: High Molecular Weight (HMW) HA has large molecules that sit on the skin’s surface, forming a hydrating film that draws moisture from the air. Low Molecular Weight (LMW) HA has smaller molecules that can penetrate the epidermis to deliver hydration deeper into the living tissue. For cuticle care, a formula containing LMW HA would be more effective at hydrating the matrix where it matters most.
However, HA’s hygroscopic nature is a double-edged sword. In dry environments (like an air-conditioned office or a heated home), if there is not enough moisture in the air for HA to draw from, it will pull moisture from the deeper layers of your skin to the surface, where it then evaporates. This can lead to a net loss of hydration, making your skin even drier. To prevent this, it is absolutely essential to always seal HA with an occlusive product. After applying an HA serum to your cuticles, you must follow up with a cuticle oil (like jojoba or almond) to create a barrier that locks the moisture in and prevents this reverse-evaporation effect.
Tocopherol in Cuticle Oil: Does It Really Heal Micro-Cuts?
Tocopherol, or Vitamin E, is a powerful antioxidant commonly added to cuticle oils for its reputed healing properties. Its primary function is not to act as a primary moisturizer but as a protective and restorative agent. When the skin around the nails suffers from micro-fissures—tiny, often invisible cuts caused by dryness, biting, or picking—it triggers an inflammatory response and becomes vulnerable to free radical damage from environmental stressors. Tocopherol intervenes directly in this process by neutralizing these free radicals, thereby reducing oxidative stress and allowing the skin’s natural repair mechanisms to function more efficiently.
The molecule’s lipophilic (fat-soluble) nature allows it to be readily absorbed into the lipid layers of the epidermis. Once there, it helps to stabilize and protect cell membranes from damage. This is particularly effective for healing the delicate skin of the cuticles. Rather than “healing” the cut in the way a stitch would, it creates an optimal biochemical environment for the body’s own cells to rebuild the damaged tissue without interference from oxidative damage. This stabilization of the cell structure also helps to reduce inflammation and redness associated with irritated cuticles.
Interestingly, the delivery and penetration of tocopherol are strategic. While some of the molecule penetrates into the deeper layers of the epidermis, research shows that tocopherol penetration is often concentrated near the surface. This is advantageous for cuticle care, as it means the antioxidant protection is focused precisely where the micro-cuts and environmental exposure are most severe. It acts as a frontline defender for the delicate eponychium, protecting it from further harm while it heals. For this reason, consistent application is crucial to maintain a protective shield of tocopherol on the skin’s surface.
Mixing Essential Oils: Which Are Safe for Direct Cuticle Contact?
Creating a custom cuticle oil blend with essential oils can elevate your nail care ritual, but it requires a strict adherence to safety protocols. Essential oils are highly concentrated plant extracts and should never be applied “neat” (undiluted) to the skin, as this can cause irritation, chemical burns, or sensitization over time. The key is proper dilution in a carrier oil, such as jojoba, almond, or fractionated coconut oil. For daily cuticle application, a dilution rate of 1-2% is considered the safest and most effective standard.
Not all essential oils are created equal in terms of function or safety. Some, like Tea Tree, offer potent antifungal properties, making them excellent for protecting nails prone to infection. Others, like Lavender and Frankincense, are prized for their anti-inflammatory and soothing qualities, ideal for calming irritated or picked-at cuticles. However, certain oils come with specific warnings. Citrus oils, including Lemon and Bergamot, are phototoxic. This means they can cause severe skin reactions, including burns or dark spots, if the skin is exposed to UV light (sunlight or tanning beds) within 12-18 hours of application. They should only be used in nighttime formulations.
To create a safe and effective blend, it is crucial to perform a patch test on a small area of skin (like the inner wrist) 24 hours before full use. This will reveal any potential sensitivities. The following table provides a quick reference for common essential oils used in nail care, their functions, and critical safety considerations.
| Essential Oil | Dilution Rate | Primary Function | Safety Notes |
|---|---|---|---|
| Tea Tree | 1-2% | Antifungal protection | Use with caution, may irritate sensitive skin |
| Lavender | 2-3% | Anti-inflammatory, soothing | Generally safe, well-tolerated |
| Frankincense | 1-2% | Anti-inflammatory, healing | Safe for most users |
| Lemon | 0.5-1% | Brightening, cleansing | Phototoxic – avoid sun exposure |
| Rosemary | 1-2% | Circulation-boosting | Avoid if pregnant or have epilepsy |
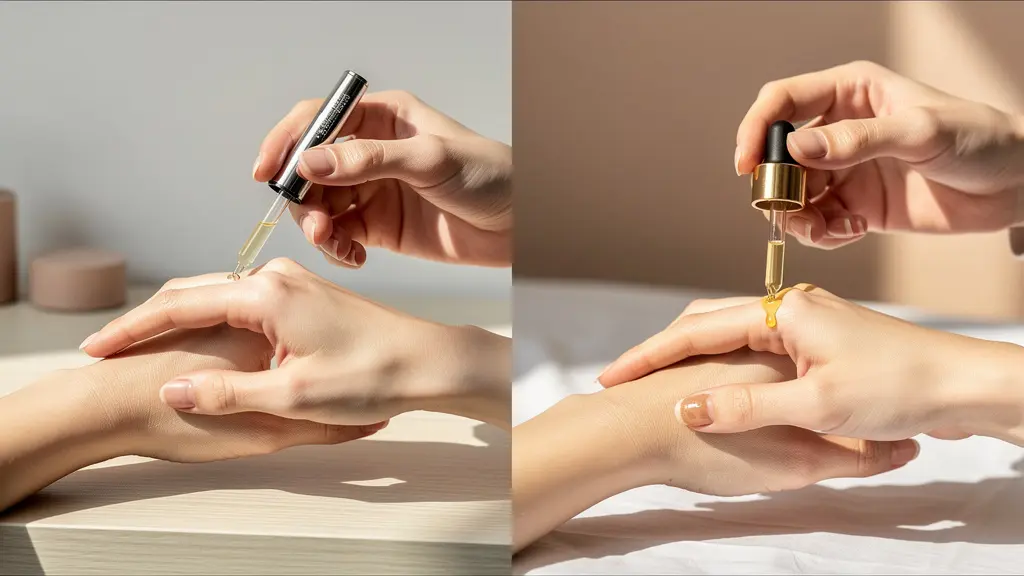
Pen vs. Dropper Bottle: Which Encourages More Frequent Application?
The most scientifically advanced cuticle oil is utterly useless if it remains in the bottle. Consistency is the true catalyst for nail transformation, and the greatest barrier to consistency is often inconvenience. This is where the delivery system—pen versus dropper bottle—moves beyond mere preference and becomes a crucial factor in user compliance. While the dropper bottle is classic, associated with a luxurious, at-home ritual, its design presents practical challenges for the modern user. It can be messy, is not easily portable, and requires a dedicated moment to sit down and apply carefully.
The cuticle oil pen, by contrast, is engineered for consistency. Its design is discreet, portable, and allows for a quick, precise, and mess-free application anywhere—at your desk, in the car, or while watching TV. This “micro-dosing” capability encourages the user to apply the oil multiple times throughout the day, which is far more effective for maintaining hydration than a single, heavy nighttime application. The brush tip allows for targeted delivery directly to the cuticle line, minimizing waste and preventing the greasy feeling that can discourage use.
The impact of this convenience is not just theoretical. In a well-documented case study, a user who struggled with consistency switched to a pen-style applicator. The ability to carry it to the office for midday reapplication was a game-changer. Over six months of consistent daily use, the user documented a significant transformation: nails grew stronger, stopped peeling, and could be maintained at a long length for weeks. This outcome was attributed directly to the portability of the pen format enabling the consistent, multiple daily applications necessary for real change.
This demonstrates that for most people, the battle for healthy nails is won through small, repeated actions. The applicator that best integrates into your daily life is, by definition, the most effective one. The pen’s design directly addresses the primary obstacle to nail health: the friction of application.
Does the Smell of Your Cuticle Oil Influence How Often You Use It?
The scent of a cosmetic product is often dismissed as a mere aesthetic choice, but in the context of habit formation, it plays a powerful psychological role. The sense of smell is directly linked to the limbic system, the brain’s center for memory and emotion. This connection can be leveraged to build a stronger, more consistent nail care routine through a process known as scent-association. By using a product with a distinct and pleasant aroma, you can transform a mundane task into a rewarding sensory ritual.
This principle is similar to a Pavlovian response. As research in nail care psychology suggests, a specific scent can become a powerful trigger. When a particular fragrance is used exclusively during a manicure or a moment of self-care, the brain begins to associate that smell with feelings of relaxation and pampering. Over time, simply smelling the oil can cue a “me-time” mindset, making you more likely to reach for the product and complete the routine. The scent becomes a reward in itself, reinforcing the habit loop.
Using a specific scent only for manicures can create a Pavlovian-like trigger that puts you in a relaxed, ‘me-time’ mindset.
– Nail Care Psychology Research, Professional Nail Care Analysis
This is not just a theory; users have successfully implemented “scent-layering” to boost compliance. A notable case involved users creating different formulations for different contexts: a fast-absorbing, unscented jojoba oil for professional, daytime use at the office, and a pleasant lavender-vanilla blend reserved specifically for their nighttime ritual. The calming, enjoyable scent association for bedtime was transformative. Over a three-month period, nightly application compliance surged from a mere 40% to a consistent 85%. The scent transformed the routine from a chore into a cherished, non-negotiable part of winding down for the night.
Key Takeaways
- True nail repair is a matter of molecular science; jojoba oil’s structure allows it to penetrate and repair the lipid barrier, while most oils merely seal the surface.
- The order of application is critical: always apply water-based products (serums, lotions) before oil-based products to ensure proper hydration and absorption.
- Consistency is more important than the quantity of product used. A portable pen applicator that encourages frequent, small applications throughout the day is often more effective than a single nightly ritual.
Before or After Photo: When to Apply Oil for the Best Social Media Shot?
In the world of nail art and social media, a single, perfectly captured photo can make all the difference. The secret to that “just-manicured,” ultra-glossy look often seen online isn’t a special filter; it’s the strategic application of cuticle oil right before the photo is taken. Applying oil *after* polish is dry and just moments before shooting is a non-negotiable step for professional nail photography. Its purpose is not just to moisturize, but to manipulate light for the camera.
The science behind this trick is based on light refraction. Even the smoothest-looking nail plate and surrounding skin have microscopic imperfections, ridges, and dry patches. When light hits these uneven surfaces, it scatters in multiple directions, creating a dull or matte appearance. A thin layer of oil acts as a “filler,” temporarily smoothing over these imperfections. This creates a uniform, glass-like surface that allows light to reflect more evenly, resulting in a high-gloss, intensely vibrant appearance on camera. The oil effectively perfects the canvas for light to bounce off of.
However, there is a technique to achieving this look without creating a greasy mess. The goal is a subtle sheen, not a pool of oil. Professionals follow a precise protocol:
- Apply a small amount of cuticle oil to the skin around the nail and let it sit for about 60 seconds to plump and hydrate the skin.
- Use a clean, dry brush (a lip brush works perfectly) to gently “paint away” any excess oil from the surface of the nail plate itself.
- Ensure no oil is pooling in the sidewalls, as this will create undesirable glare and reflections in the photo.
- Take the photograph within the next 2-3 minutes to capture the optimal glossy effect before the oil fully absorbs or evaporates.
This technique enhances the color saturation of the polish, makes the skin look healthy and hydrated, and delivers that professional, fresh-from-the-salon finish that performs so well on visual platforms.
Now that you are equipped with the molecular knowledge to select the right products and the strategic understanding to apply them correctly, you can move beyond temporary fixes and begin the work of true, lasting nail repair. Start today by evaluating your current routine against these scientific principles to build a regimen that delivers measurable results.