Nail art techniques
Nail art has evolved from simple polish application into a sophisticated craft that combines chemistry, architecture, and artistry. Whether you’re drawn to creating flawless enhancements, intricate 3D sculptures, or mesmerizing magnetic effects, mastering the fundamental techniques is your foundation for success. Each method—from building the perfect C-curve to controlling polymerization timing—requires understanding not just the “how” but the “why” behind each step.
This comprehensive resource connects the essential techniques that transform basic application into professional-quality work. You’ll discover how structural principles ensure durability, how product chemistry affects your results, and how specialized tools like the e-file can elevate your efficiency when used correctly. Think of these techniques as building blocks: once you understand how each one functions independently, you can combine them creatively to bring any design vision to life while maintaining the health and integrity of the natural nail.
Understanding Nail Enhancement Structure and Architecture
The longevity and appearance of any nail enhancement begins with its underlying architecture. Just as a building needs a solid foundation, artificial nails require precise structural elements to withstand daily stress without lifting, cracking, or appearing bulky.
The form you select—whether reusable metal, disposable paper, or dual-form systems—acts as your construction scaffold. Proper form placement determines where your apex will sit and how the extension will balance on the natural nail. A form positioned too high creates excessive length that levers against the free edge, while one set too low produces a weak, flat enhancement prone to breakage.
The C-curve represents the natural arch when viewing the nail from the free edge. Correcting this curve during application creates strength through geometry—a properly curved nail distributes pressure across its surface rather than concentrating stress at a single point. Many beginners create overly flat enhancements that appear artificial and snap easily. To achieve natural-looking curves, observe the client’s other nails and match their natural architecture, adjusting only when correcting severely flat or overly curved nail beds.
Product ratio management separates amateur work from professional results. With acrylics, your monomer-to-powder ratio determines workability, curing time, and final strength. Too wet creates heat spikes and prolonged curing; too dry produces a crumbly texture that files poorly and may contain micro-bubbles. The ideal bead should be smooth and self-leveling without flooding the cuticle area—typically described as having the consistency of whipped butter.
Filing techniques refine your structure after curing. Strategic filing removes bulk from sidewalls while preserving the apex strength zone, creating the illusion of a thinner, more natural enhancement that retains its durability. The key is working in consistent directions with graduated grit levels—never see-sawing the file, which creates heat and surface scratches that weaken the structure.
Selecting the Right Lengthening Method for Your Needs
The decision between gel systems, traditional acrylics, or pre-formed tips involves balancing multiple factors that affect both the application experience and long-term results. Understanding these differences helps you select the most appropriate method for each client’s lifestyle and nail condition.
Weight and wearability vary significantly across methods. Hard gels create lightweight enhancements that feel natural, making them ideal for clients unaccustomed to extensions. Acrylics offer more heft but provide superior strength for those with physically demanding jobs. Pre-formed tips with overlay fall somewhere between, though the seam where tip meets natural nail can create a weak point if not properly blended.
Application difficulty differs based on your experience and the technique’s learning curve:
- Gel systems: Forgiving work time since they don’t cure until exposed to UV/LED light, allowing repositioning and refinement
- Acrylics: Self-leveling properties help with smoothness, but require speed and precision as the product begins setting immediately upon application
- Tips and overlay: Fastest initial application but require excellent blending skills to eliminate visible lines
Damage potential relates directly to removal methods and application technique. Gels that soak off minimize mechanical damage but may still require filing of the top layer. Acrylics dissolve readily in acetone but can dehydrate the nail plate with frequent removal. Hard gels requiring filing for removal carry the highest risk if performed by inexperienced hands. The natural nail’s health depends more on proper removal technique than the product itself.
Cost analysis extends beyond product pricing. Consider curing lamp investment for gels, ventilation systems for acrylics, and time investment—acrylics typically cure faster than builder gels, affecting appointment scheduling and profitability.
Mastering Product Chemistry and Application Control
Behind every flawless enhancement lies chemical reactions you can harness through understanding rather than fighting. Product chemistry determines not just how materials bond, but how they behave during application and how long they last.
Chemical bonding begins with proper nail preparation. Gels bond through a mechanical grip—primers create a slightly textured surface that the gel grips like velcro. Acrylics use both mechanical and chemical adhesion, with primers creating microscopic etching that the monomer penetrates before polymerizing. This explains why skipping or rushing preparation causes lifting regardless of application skill.
Heat spikes during acrylic application occur when excessive monomer evaporates rapidly, releasing energy. This happens most commonly from oversaturated beads, applying product too thickly, or working over compromised nail beds with increased sensitivity. Controlling heat involves proper bead consistency and applying thin layers that cure with minimal exothermic reaction. If clients consistently experience burning, reassess your monomer choice—slower-setting formulas reduce heat peaks.
Acrylic bead consistency changes with room humidity, monomer freshness, and powder formulation. In dry environments, beads may set faster and appear drier; humid conditions extend working time. Professional technicians adjust their pick-up ratio throughout the day to maintain consistent results. The bead should hold together without running when placed on the nail—think of how cream cheese holds its shape on a bagel without sliding off.
Lifting analysis requires detective work. Lifting at sidewalls typically indicates inadequate preparation or product touching the skin during application. Free edge lifting suggests the enhancement is too flat or the apex is positioned incorrectly. Cuticle area lifting points to product flooding the eponychium or inadequate cuticle prep. Each lifting pattern tells you exactly where your technique needs adjustment.
Thickness control throughout the enhancement prevents that obviously artificial look. Your apex—the highest point of the arch—should sit approximately one-third of the way back from the free edge, gradually tapering toward cuticle and tip. Visualize a gentle hill rather than a plateau. Strategic product placement during application eliminates the need for excessive filing afterward.
Safe Removal Techniques That Protect Natural Nails
How you remove enhancements matters as much as how you apply them. Improper removal causes more natural nail damage than any application technique, yet it’s often rushed or performed with excessive force. Patience during removal preserves nail health and maintains client trust.
Acetone concentration determines removal efficiency and skin comfort. Pure acetone works fastest but severely dehydrates skin and nails. Many professionals use acetone-based removers with moisturizing additives that slow the process slightly but reduce the drying effect. The trade-off between speed and comfort depends on your service structure—quick removal between enhancement fills versus complete removal before a natural nail service.
Heat retention techniques accelerate product breakdown without increasing acetone concentration. Wrapping each finger in foil after applying soaked cotton traps body heat, raising the temperature around the enhancement. Some technicians use warming mitts or place foiled fingers in heated towels. The warmth helps acetone penetrate the product more efficiently, reducing soak time from twenty minutes to approximately twelve to fifteen minutes for most acrylic systems.
The “steam off” method uses controlled moisture and gentle pressure for gel systems that resist traditional soaking. After filing away the top coat and color layers, warm water soaks soften the remaining gel enough to gently push it from the nail plate using a wooden tool. This technique requires more time and skill but eliminates acetone exposure entirely—particularly valuable for clients with sensitivities or pregnant individuals avoiding chemical exposure.
Post-removal care begins immediately. Natural nails emerge dehydrated and temporarily weakened, regardless of removal method. Apply cuticle oil and intense moisturizer immediately, then educate clients to continue daily oil application for at least a week. This simple step dramatically reduces peeling and breakage that clients often incorrectly attribute to the enhancement rather than the removal process.
Creating Dimensional Art: 3D and Encapsulated Designs
Three-dimensional nail art transforms flat surfaces into wearable sculptures, but durability challenges arise when decorative elements extend beyond the nail’s protective top coat. Successfully executed 3D work balances artistic impact with practical wearability.
Adhesive selection depends on the embellishment material and its placement. Gel adhesives cure clear and bond strongly to both the nail surface and most decorative elements, but they require UV/LED exposure, limiting application to areas you can position under the lamp. Resin-based glues set without light and bond instantly, making them ideal for delicate placement, though they may yellow over time. For heavy elements like larger crystals or metal charms, consider using both—gel as the base layer with resin for final positioning security.
Gap filling prevents the lifted edges that compromise 3D longevity. When placing flat-backed elements, a tiny amount of gel applied around the base after initial adhesion creates a seamless transition from nail to embellishment. This technique, called “sealing,” prevents edges from catching on clothing and creates a smooth surface for top coat application over surrounding areas.
Encapsulated designs offer dimensional effects within the nail structure itself, protecting delicate elements while creating depth. Layering for encapsulation requires building a clear base, placing thin decorative elements like dried flowers or foils, then capping with additional clear layers. Each layer must cure completely before adding the next to prevent material shifting or color bleeding. The number of layers determines depth perception—more layers above the embedded element create a deeper, more three-dimensional appearance.
Bubble prevention during encapsulation comes down to product viscosity and application pressure. Thicker gels trap air more easily; slightly warming the gel bottle in your hands improves flow. Apply each layer with firm, deliberate brush strokes rather than stippling or dabbing, which incorporates air. If bubbles appear, a dry brush or orange stick can coax them to the surface before curing.
Achieving Specialized Effects: Matte and Magnetic Finishes
Specialty finishes expand your artistic vocabulary beyond standard glossy nails, but they require adjusted techniques to maintain their unique characteristics without common pitfalls.
Matte finishes create a sophisticated, non-reflective surface, but application technique dramatically affects the final appearance. Streaking occurs when matte top coat is overworked—unlike glossy formulas that self-level, matte products begin setting immediately. Apply in thin, even coats with minimal brush overlap, working quickly from cuticle to free edge in smooth strokes. Allow the first coat to dry completely before assessing coverage; many apparent thin spots self-correct as the product settles.
The difference between velvet and satin finishes lies in the matting agents’ particle size and concentration. Velvet matte creates a completely flat, almost powdery appearance with zero shine. Satin finishes retain subtle sheen, falling between glossy and fully matte. Consider the design context—velvet emphasizes bold colors and graphic designs, while satin softens delicate nail art and provides a more wearable everyday look.
Stain resistance varies among matte formulas. The textured surface that creates the matte effect also provides more surface area for pigments to adhere to, making matte nails more susceptible to staining from hair dyes, self-tanners, and heavily pigmented foods. Higher-quality matte top coats incorporate stain-blocking technology, but client education about wearing gloves during potentially staining activities prevents disappointing discoloration.
Magnetic nail art manipulates metallic particles suspended in gel polish to create dimensional patterns. Magnet shapes determine the effect—straight bar magnets create classic cat-eye lines, while circular magnets produce starburst or bullseye patterns. The magnet’s distance from the nail surface affects pattern intensity; closer positioning creates sharper, more defined effects, while holding the magnet slightly further produces softer, more diffused patterns.
Flash curing technique—briefly exposing magnetic gel to lamp light for just a few seconds—partially sets the pattern while keeping deeper layers workable for layered effects. This advanced technique allows building multiple magnetic patterns at different depths within a single nail, creating complexity impossible with single-layer application. Pigment density in your magnetic gel affects how dramatically particles respond; heavily pigmented formulas create bold, obvious patterns, while sheer formulas produce subtle, sophisticated effects.
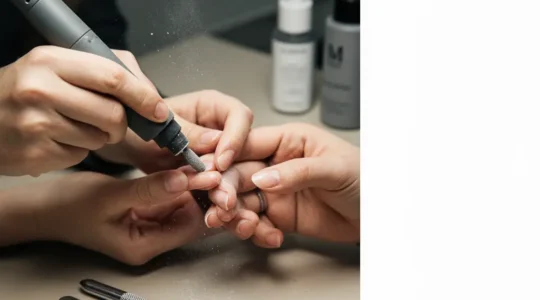
Professional Tool Techniques: Mastering the E-File
The electric file represents both the most efficient and potentially most damaging tool in nail services. Proper technique separates safe, professional use from the horror stories of burned or damaged nail plates. Respect for this tool’s power is the foundation of mastery.
Bit selection determines what the e-file accomplishes and how safely. Carbide bits with crosscut patterns quickly remove product but can be aggressive on natural nails. Fine-grit ceramic or diamond bits refine surfaces and safely work near cuticles. Mandrel bits with replaceable sanding bands suit large-area product removal. Never use the same bit for both product work and natural nail refinement—cross-contamination transfers product dust onto natural nails, compromising adhesion.
Understanding torque versus speed prevents common mistakes. Speed (RPM) determines how fast the bit rotates; torque represents the motor’s power to maintain that speed under pressure. High-quality machines maintain consistent speed even when you apply pressure, preventing the sudden acceleration changes that cause digging or nail damage. For most product removal, moderate speeds around 15,000-20,000 RPM provide control; higher speeds suit experienced technicians doing specific techniques.
The fulcrum finger technique stabilizes your working hand against the client’s hand, creating a controlled pivot point. Rest your ring finger or pinky against the client’s hand, allowing subtle pivoting movements rather than waving the handpiece through space. This single technique prevents most e-file accidents by ensuring controlled, deliberate movements rather than slips or jerks.
Directional safety means always moving the bit away from cuticles, sidewalls, and skin—never toward them. Work with the bit’s rotation, not against it, and maintain light, consistent pressure. The bit should remove product through rotation, not through force you apply. If you’re pressing hard enough to feel resistance, you’re working too aggressively. The whispering sound of product being filed away should never become the grinding of excessive pressure.
Streamlining Your Creative Workflow and Design Process
Custom nail art requests range from simple inspiration photos to vague descriptions like “something summery.” Developing a systematic creative process transforms these requests into clear execution plans while managing client expectations and protecting your time.
Reference photos provide concrete starting points for communication. When clients present inspiration images, assess them for technical feasibility: Can this be replicated at nail scale? Does it require techniques in your skillset? Will the detail level survive daily wear? Ask clients what specific elements attract them—sometimes they love the color palette rather than the exact design, opening creative flexibility. Save approved references digitally organized by technique or theme, building a library that speeds future similar requests.
Digital sketching applications designed for nail art let you visualize designs before touching the nail. These tools provide templates shaped like various nail forms where you can experiment with color placement, pattern sizing, and composition. Presenting digital mockups for complex designs ensures client approval before investing application time, and screenshots serve as reference guides during execution. This step proves particularly valuable for asymmetrical designs or specific element placement.
Freestyling confidence develops through deliberately practicing improvisation with low stakes. Dedicate practice sessions to creating designs without predetermined plans, building your ability to make confident design decisions in real-time. This skill becomes invaluable when clients request “whatever you think would look good”—a phrase that seems freeing but often paralyzes technicians without freestyle experience. Start by establishing one anchor element—a color story, a single accent nail theme—then build around it intuitively.
Pricing ambiguity for custom work stems from difficulty estimating time investment. Track your actual application time for various techniques over multiple services to establish personal benchmarks. Basic nail art might add fifteen minutes; intricate hand-painting might require forty-five. Price based on time investment plus materials rather than perceived value—this ensures profitability while remaining fair. Communicate pricing before beginning so clients can adjust scope if needed.
Replication limits require clear client communication. Hand-painted art will never be identical across ten nails or between fill appointments. Set expectations that custom work will be “inspired by” rather than exact copies, and that subtle variations prove the work’s handmade authenticity. This conversation prevents disappointment and positions natural variation as a feature rather than a flaw.
The journey from basic application to advanced nail artistry isn’t measured in techniques collected but in understanding developed. Each method you master—whether architectural principles, product chemistry, or specialized effects—becomes a tool you can deploy creatively and confidently. Start with foundational skills like proper structure and safe removal before advancing to dimensional art or specialty finishes. Your hands will develop muscle memory, your eye will recognize proper consistency and placement instinctively, and your creative process will evolve from tentative to assured. The most accomplished nail artists never stop learning, viewing each challenge as an opportunity to refine their understanding of these interconnected techniques.
At What RPM Should You Remove Gel Polish to Avoid Heat Spikes?
Mastering e-file safety requires understanding that RPM settings are secondary to bit material selection and hand stabilization techniques. Ceramic bits generate significantly less conductive heat transfer than carbide alternatives due to lower thermal conductivity (2.5–3 vs. 100 W/mK). Intermittent contact…
Read more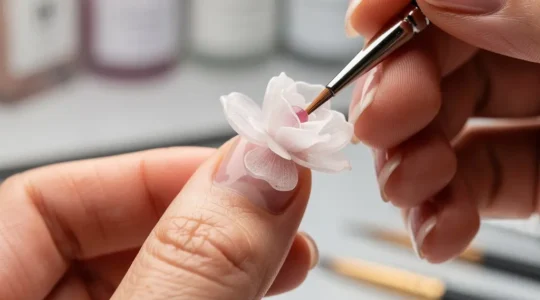
How to Mold 3D Flowers Before the Acrylic Sets Too Hard?
In summary: Mastering 3D acrylics is about controlling the polymerization “clock,” not just the physical motion. Choose a slow-setting monomer to buy yourself crucial molding time for complex designs. The “drain” technique and achieving the perfect bead consistency are non-negotiable…
Read more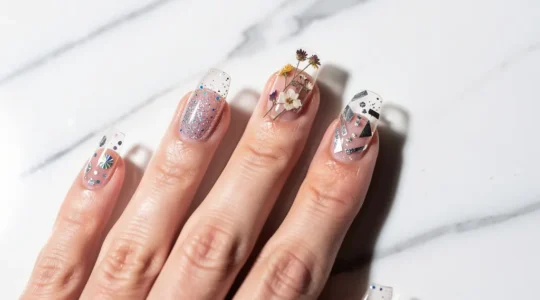
How to Create Deep Aquarium Effects in Clear Acrylic?
True aquarium nail artistry isn’t achieved by simply stacking layers, but by mastering the structural architecture and material science to create genuine optical depth. Dimension comes from a deliberate three-layer structure—background, mid-ground, and foreground—not random placement. A slender, elegant profile…
Read more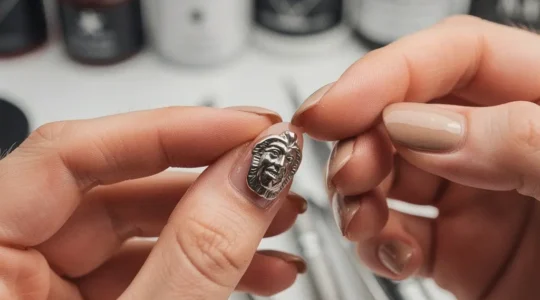
A Structural Engineer’s Guide: How to Secure Heavy 3D Charms That Never Snag
Securing large 3D charms isn’t about hope or more glue; it’s about applying structural engineering principles to your nail art. Combine rigid clear acrylic to create a solid, form-fitting foundation with flexible jewelry gel for shock absorption and edge sealing….
Read more
How to Remove Gel Polish at Home Without Scraping Layers off Your Nail?
You’re damaging your nails because you treat gel removal as a fight, resorting to peeling and scraping. This is a fundamental misunderstanding. The key to safe removal is not force, but science. This guide reframes the process as one of…
Read more
Primer, Bonder, or Dehydrator: Decoding the Chemistry of Perfect Nail Adhesion
Lasting nail adhesion isn’t about using more products; it’s about creating a precise “adhesion partnership” between the nail’s physical texture and the correct chemical bond. Mechanical buffing creates the physical anchor, while primers provide the chemical bridge. Skipping one compromises…
Read more
Polygel, Acrylic, or Soft Gel: Which Extension Method Truly Lasts 4 Weeks?
True 4-week nail extension wear isn’t about a single “best” product, but about building a compatible system of chemical prep, structural integrity, and targeted maintenance. Acrylic offers the lowest cost-per-week due to its rigidity but is the most difficult to…
Read more
How to Build a Structural Apex That Prevents Breakage on Long Nails?
The key to unbreakable long nails lies in treating the apex not as a simple mound of product, but as a feat of structural engineering designed to distribute stress. The durability of an enhancement is determined by a combination of…
Read more