True 4-week nail extension wear isn’t about a single “best” product, but about building a compatible system of chemical prep, structural integrity, and targeted maintenance.
- Acrylic offers the lowest cost-per-week due to its rigidity but is the most difficult to apply correctly.
- Soft Gel tips provide the most natural feel but are highly susceptible to water damage and have the highest long-term cost due to full removals.
- Polygel presents a balance of flexibility and beginner-friendly application, but its durability is entirely dependent on meticulous curing.
Recommendation: For maximum longevity, prioritize a perfectly sculpted structure and a matched primer/bonder system over the specific extension product itself.
The frustration is palpable. You invest time and money in a beautiful set of nail extensions, only to see them lifting, chipping, or breaking just 10 days later. The endless debate online—Polygel versus acrylic, soft gel versus hard gel—often creates more confusion than clarity. Most discussions focus on which product is “strongest,” but this oversimplifies the problem. True durability isn’t just about the material; it’s about the engineering behind the enhancement.
Common advice suggests it all “depends on your lifestyle” or “the skill of your technician.” While true, these are passive answers. They don’t empower you to understand why your extensions are failing. The real key to achieving a resilient, 4-week manicure lies not in choosing one product over another, but in understanding the entire durability matrix: the synergy between prep products, the structural integrity of the build, and the material’s reaction to daily stressors like water and impact.
This analysis moves beyond the surface-level pros and cons. We will dissect each extension method through the lens of a durability tester, examining the critical factors that determine whether a set will last one week or four. Instead of asking which product is best, we will ask: which system of application, maintenance, and removal provides the greatest structural longevity? We will explore everything from the science of adhesion to the long-term cost-effectiveness, giving you the technical knowledge to diagnose failures and choose a system built to last.
This guide provides a comprehensive technical comparison of the most popular nail extension methods. By examining their properties, application processes, and maintenance requirements, you will be equipped to select the system that best aligns with your durability needs and lifestyle.
Summary: A Technical Comparison of Nail Extension Durability
- Which Extension Method Feels Most Like Natural Nails?
- Why Is Polygel Considered Easier for Beginners Than Acrylic?
- Which Removal Process Is Least Damaging: Soak-Off or File-Off?
- Gel Tips vs. Sculpted Acrylic: Which Is More Cost-Effective over 6 Months?
- The Impact of Water Exposure on Soft Gel Tips vs. Hard Gel
- Paper Forms vs. Plastic Tips: Which Provides Better Structural Integrity?
- Using Silk Wraps to Save a Cracked Natural Nail During Growth
- Primer, Bonder, or Dehydrator: What Is Actually Essential for Adhesion?
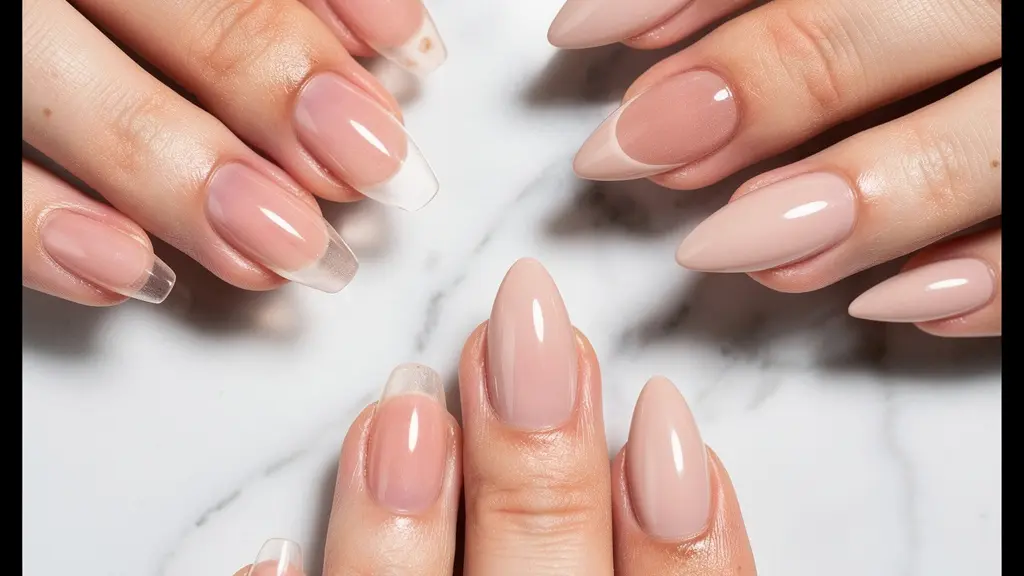
Which Extension Method Feels Most Like Natural Nails?
The sensation of an extension is a primary factor in client satisfaction. An overly heavy or rigid enhancement can feel foreign and cumbersome. From a technical standpoint, the “natural feel” is a function of two main properties: weight and flexibility. Soft gel tips are the clear winner in this category. They are exceptionally lightweight and designed to flex with the natural nail, closely mimicking its organic movement. This high flexibility reduces the feeling of having a rigid plate attached to your fingertip, leading to a more comfortable and less noticeable wear.
Polygel follows closely, engineered to be significantly lighter than traditional acrylic. It offers a moderate degree of flexibility, providing a sturdy structure without the complete rigidity of acrylic. This balance makes it a popular choice for those who want durability without the heavy feeling. Acrylic, being the densest and most rigid of the three, scores lowest on the natural-feel scale. Its inflexibility is its greatest strength for durability but also its biggest drawback for comfort, as it allows no give or bend.
The following table breaks down these characteristics, providing a clear comparison of the tactile experience each method offers.
| Extension Type | Weight | Flexibility | Natural Feel Score |
|---|---|---|---|
| Soft Gel Tips | Lightest | High flexibility | 9/10 |
| Polygel | 20% lighter than acrylic | Moderate flexibility | 8/10 |
| Acrylic | Heaviest | Rigid/No flex | 5/10 |
Ultimately, for clients whose primary concern is a lightweight and flexible enhancement that feels like an extension of their own nail, soft gel is the superior system. However, this comfort comes with trade-offs in other areas of the durability matrix, such as water resistance and structural strength.
Why Is Polygel Considered Easier for Beginners Than Acrylic?
The primary reason Polygel is more approachable for beginners than acrylic lies in one critical factor: unlimited working time. Acrylic is a two-part system (liquid monomer and powder polymer) that begins to cure, or air-dry, the moment the two components are mixed. This creates a high-pressure application window where the technician must sculpt the product into the desired shape before it hardens. For a novice, this race against the clock often leads to lumpy application, incorrect apex placement, and a high-stress experience.
Polygel, by contrast, is a premixed, putty-like gel that does not begin to cure until it is exposed to UV or LED light. This fundamental difference is a game-changer for beginners. It allows the user to place the product on the nail and take as much time as needed to pat, smooth, and perfect the shape and structure. There is no pressure to work quickly. If a mistake is made, the product can be moved and reshaped indefinitely until the technician is satisfied with the result. Only then is the nail placed in the lamp to cure, locking the perfected shape in place.
Beyond working time, Polygel offers several other beginner-friendly advantages:
- No Mixing Ratios: Unlike acrylic, which requires a precise liquid-to-powder ratio for proper strength, Polygel comes ready to use, eliminating the guesswork.
- Odor-Free Application: The strong chemical smell of acrylic monomer is a significant drawback for many. Polygel is virtually odorless, creating a more pleasant working environment.
- Heavier Dust Particles: During filing, Polygel dust is heavier and tends to fall directly down, rather than becoming airborne like finer acrylic dust, making for a cleaner workspace.
This combination of controlled curing and a more forgiving application process significantly lowers the barrier to entry, allowing beginners to focus on mastering shape and structure without the added pressure of a ticking clock.
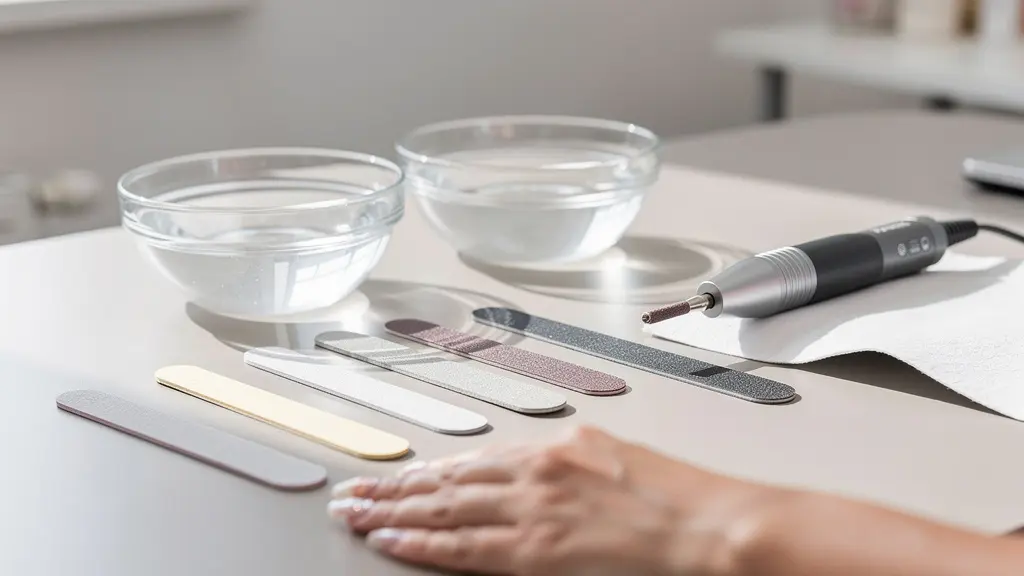
Which Removal Process Is Least Damaging: Soak-Off or File-Off?
The question of which removal process is less damaging—soaking in acetone or filing off—is a source of major debate, but the answer is nuanced. The potential for damage comes not from the method itself, but from its improper execution. Both methods can be perfectly safe when performed correctly, and both can be destructive when done incorrectly. A soak-off removal is primarily used for soft gels and some Polygels. The process involves gently filing the top coat to break the seal, then wrapping the nails in acetone-soaked cotton. The acetone breaks down the product, allowing it to be gently scraped away.
The primary risk of a soak-off is over-scraping. If the product isn’t fully dissolved, aggressively pushing it off can peel away layers of the natural nail plate. Furthermore, prolonged exposure to acetone is extremely dehydrating to the nail and surrounding skin. A file-off removal, typically required for acrylic and hard gels, uses an e-file or hand file to gently grind the product down. In a professional setting, the technician files the product down to a very thin base layer, which is left on the nail to protect it, and the new set is applied over it (a “fill”).
The danger here is over-filing into the natural nail, which can cause thinning, heat spikes, and “rings of fire” (red, painful marks). As noted by nail care experts, proper technique is paramount. In the hands of a skilled professional, a file-off is often considered safer because it avoids harsh chemicals and minimizes contact with the natural nail itself. For at-home removal, a soak-off is generally safer, as the risk of seriously damaging the nail plate with a file is much higher for an untrained individual. As NailSkillz Professional Education states in their guidelines, proper procedure is essential.
Correct application, touch-up and removal of an acrylic gel manicure is essential to prevent damage to the natural nail plate and to avoid contact allergies. If the nail matrix is damaged, irregularities in the nail plate can occur that are sometimes irreparable.
– NailSkillz Professional Education, Professional Nail Care Guidelines
Therefore, the “least damaging” method is not universal; it is situational. It depends entirely on who is performing the removal and their level of skill with the chosen technique. The goal is always to remove the product, not the natural nail.
Gel Tips vs. Sculpted Acrylic: Which Is More Cost-Effective over 6 Months?
When evaluating cost-effectiveness, looking beyond the initial appointment price is crucial. The true cost of a nail extension system emerges over its entire lifecycle, factoring in maintenance, removals, and reapplication. Over a six-month period, sculpted acrylic is generally the more cost-effective option, primarily due to its superior longevity and the lower cost of maintenance via fills.
A set of sculpted acrylics can be maintained for many months with regular fills (or “infills”) every 2-4 weeks. During a fill, only the new growth area is prepped and filled with new product, and the existing extension is re-shaped. This is less time-consuming and less expensive than a full removal and reapplication. Soft gel tips, on the other hand, are not designed to be filled. The standard procedure involves a full soak-off removal and a completely new set every 3-4 weeks. This process is more time-intensive and therefore more expensive per appointment.
A 6-month cost analysis illustrates this disparity clearly. While the initial cost of gel tips might sometimes be comparable to acrylics, the recurring cost of full reapplications quickly adds up, making the total expenditure significantly higher over time.
| Service Type | Initial Cost | Maintenance (6 months) | Total Cost | Cost per Week |
|---|---|---|---|---|
| Sculpted Acrylic | $35-95 | 5-6 fills @ $25-40 each | $160-335 | $6.15-12.88 |
| Gel Tips (Soft Gel) | $55-120 | 4 full removals & reapplications | $220-480 | $8.46-18.46 |
This financial advantage for acrylic is reinforced by its inherent durability. Industry data confirms that professionally applied acrylic nails can last 4-6 weeks between maintenance appointments, offering unmatched longevity that directly translates to lower long-term costs. While gel tips offer benefits in flexibility and feel, they lose the financial battle when measured over a typical six-month period.
For a client focused on budget and maximizing the time between salon visits, the acrylic system with regular fills presents the most economical and sustainable path to long-lasting nail enhancements.
The Impact of Water Exposure on Soft Gel Tips vs. Hard Gel
Water is the silent enemy of nail extension longevity. Prolonged or repeated exposure to water can cause the natural nail plate to expand and contract, placing stress on the adhesive bond and leading to lifting. However, not all extension systems react to this stress equally. The key difference lies in the material’s porosity and rigidity. Soft gel is more porous and flexible than hard gel or acrylic, making it more susceptible to water-related issues.
Soft gel tips are adhered with a soft gel adhesive. Because the entire system is flexible, it can move with the natural nail. However, its higher porosity means it can absorb trace amounts of moisture over time, which can weaken the product and the adhesive bond from within. This is why individuals who frequently have their hands in water (e.g., hairstylists, swimmers, or those who do frequent household cleaning) often experience premature lifting with soft gel systems. Hard gel, like acrylic, is a non-porous material. It creates a rigid, waterproof shell over the natural nail. It does not absorb water and is far more resistant to the weakening effects of chemicals and moisture.
This is why protecting extensions from water is a non-negotiable part of any aftercare routine. As nail experts emphasize, wearing gloves when cleaning or washing dishes is essential for maximizing the lifespan of any extension. For soft gel wearers, it is even more critical. The following action plan outlines key strategies to create a barrier against water damage.
Action Plan: How to Waterproof Your Nail Extensions
- Apply cuticle oil daily: This moisturizes the nail and surrounding skin, creating a hydrophobic barrier that repels water.
- Seal the free edge: Apply a small amount of oil under the free edge of the extension to prevent water from seeping underneath.
- Wear protective gloves: This is the most effective step. Wear gloves during all water-intensive activities like dishwashing or cleaning.
- Dry hands thoroughly: After washing hands or showering, pat them completely dry immediately to minimize water absorption.
- Reapply oil after washing: Replenish the protective oil barrier after each time you wash your hands to maintain the seal.
In summary, while hard gel and acrylic offer superior innate water resistance, all extension systems benefit from proactive waterproofing measures. For soft gel wearers, these steps are not just recommended—they are essential for achieving 4-week durability.
Paper Forms vs. Plastic Tips: Which Provides Better Structural Integrity?
The foundation of a durable nail extension is its structure, and that structure begins with either a plastic tip or a sculpted form. While plastic tips are faster to apply, paper forms allow for a fundamentally superior structure with greater integrity. The key difference is the creation of a monolithic, or single-piece, structure versus a two-piece structure.
A plastic tip is a pre-made piece of plastic glued onto the end of the natural nail. The extension product (acrylic or gel) is then applied over both the natural nail and the tip. This creates a seam—the junction where the tip is adhered to the nail. This seam is an inherent weak point in the system. Under stress, this is often the first place a break or lift will occur. Furthermore, as noted by sources like NAILSAMI Professional Education, tips are limited to the shapes and sizes provided, which may not be a perfect fit for every nail type, especially for wide, flat, or bitten nails.
Paper forms, conversely, are stickers placed under the free edge of the natural nail. The technician then “sculpts” the entire extension from scratch directly onto the natural nail and over the form. Once cured, the form is removed, leaving a single, continuous piece of enhancement material from the cuticle to the free edge. There is no seam, no glue, and therefore no built-in weak point. This method allows the technician to create a 100% customized structure, perfectly tailoring the C-curve and apex placement to the specific nail for optimal strength and a seamless look. The table below highlights these structural differences.
| Factor | Paper Forms | Plastic Tips |
|---|---|---|
| Customization | 100% customizable apex & C-curve | Pre-determined structure |
| Weak Point | None (monolithic structure) | Seam at natural nail junction |
| Problem Nails | Ideal for nail biters, wide/flat beds | Limited by available sizes |
| Application Time | Longer (requires sculpting skill) | Faster (pre-formed) |
While sculpting with forms requires a higher level of skill and takes more time, it is the undisputed champion for creating the strongest, most durable, and most customized nail extension possible. For a client whose primary goal is to prevent breakage, choosing a technician who sculpts with forms is a critical first step.
Using Silk Wraps to Save a Cracked Natural Nail During Growth
Before the advent of modern gels and acrylics, silk wraps were a primary method for creating extensions. Today, their role has shifted. While less common for full sets due to their lower durability, silk wraps serve an invaluable purpose as a repair tool for cracked or split natural nails. They allow a damaged nail to be saved and continue growing out without having to be cut down.
A silk wrap is a very thin piece of woven fabric (silk or fiberglass) that is cut to size and applied over a crack with a strong resin adhesive. The silk acts as a flexible, durable patch, almost like a cast for the nail. It holds the two sides of the crack together, preventing it from snagging or splitting further. Once the resin is dry, it can be filed and buffed smooth, becoming virtually invisible under a coat of polish or gel.
While they are gentle and natural-looking, their main drawback is a lack of strength compared to acrylic or Polygel, making them unsuitable for clients who are hard on their hands. However, for the specific purpose of mending a break, their thinness and flexibility are advantages. The process is straightforward for a professional:
- The cracked nail is thoroughly cleaned and dehydrated to ensure proper adhesion.
- A small piece of silk is cut to cover the crack with a slight overlap.
- A thin layer of resin is applied to the nail, and the silk is carefully placed on top, ensuring no air bubbles are trapped.
- Another coat of resin is applied over the silk to fully saturate and seal it.
- Once completely dry, the patch is filed and buffed flush with the natural nail, ready for a base coat and polish.
In the context of the durability matrix, silk wraps are not a primary extension method for longevity, but rather an essential emergency tool. They provide the structural support needed to nurse a damaged nail back to health, preserving length and preventing a minor crack from becoming a major break.
Key Takeaways
- System over Substance: True durability comes from a compatible system of prep, structure, and material, not just the product itself.
- Structure is Non-Negotiable: A sculpted extension using forms creates a stronger, monolithic structure than a glued-on plastic tip, eliminating inherent weak points.
- Adhesion is Science: Using a matched system of dehydrator, bonder, or primer designed for your specific extension product is the single most critical factor in preventing lifting.
Primer, Bonder, or Dehydrator: What Is Actually Essential for Adhesion?
This is the most critical and least understood part of the durability equation. A client can have the strongest acrylic or most flexible gel, but without proper adhesion, the extension is destined to lift. The three key products—dehydrator, primer, and bonder—are not interchangeable; they perform distinct chemical functions. Using the wrong one, or skipping one, is a primary cause of service breakdown. The one truly essential product for all systems is the dehydrator.
A dehydrator does exactly what its name implies: it temporarily removes moisture and oils from the surface of the nail plate. The nail is a porous surface, and these oils create a barrier that prevents any product from properly adhering. The dehydrator creates a clean, dry canvas. Its effect is temporary, so the product must be applied promptly afterward. Primer and bonder are where system synergy becomes critical. An acid-based primer is designed for acrylic systems. It microscopically etches the nail surface, creating a rougher texture for the acrylic to physically grip onto.
A bonder (or acid-free primer) is designed for gel systems. It does not etch the nail. Instead, it acts like double-sided tape, creating a chemical bridge. One side of its molecular structure bonds to the natural keratin in the nail, and the other side bonds to the gel product. Using an acid primer with a gel system is a common mistake that guarantees lifting, as gels are not formulated to grip an etched surface. As nail technicians confirm, improper preparation is the number one reason for extension failure. Mixing brands of prep products can also break this chemical synergy, as manufacturers formulate their liquids and gels to work together.
Therefore, the answer is not which one is essential, but that the *correct combination* is essential. Every service requires a dehydrator. After that, you must use the specific primer or bonder chemically engineered to work with your chosen extension material—acid-based primer for acrylic, and acid-free bonder for gels.
Frequently Asked Questions About Nail Extension Adhesion
Is dehydrator always necessary?
Yes, dehydrator is essential for all nail extension systems as it removes oils and moisture that prevent adhesion. It creates a clean, dry surface that is receptive to primers and bonders, forming the foundation of a long-lasting set.
Can I use acid primer with gel systems?
No, acid primers are specifically formulated for acrylic systems. They work by microscopically etching the nail plate to create a physical grip for the acrylic. Gel systems require acid-free bonders that work differently, creating a chemical bridge between the natural nail and the gel product. Using the wrong one will cause lifting.
What happens if I mix primer brands?
Mixing brands of prep products with an enhancement product from another brand can be a hidden cause of lifting. Manufacturers formulate their entire product line—dehydrators, primers, and gels/acrylics—to work together chemically. Breaking this “system synergy” can lead to unpredictable adhesion and service breakdown.