
Contrary to common belief, keeping a liner brush straight isn’t about gentle cleaning or a special solution. The real craft lies in molecular preservation—avoiding chemicals that dissolve bristles—and mastering the physics of the tool, from how you load the gel to how you fight gravity during storage. This guide reveals the professional techniques that separate a disposable tool from a precision instrument.
There is no greater frustration for a nail artist than a perfectly planned geometric design ruined by a single, errant bristle. A liner brush that once delivered razor-sharp lines now splays, hooks, or curves, turning precision work into a smudged mess. The common advice is to “clean it gently” or “reshape the tip,” but when these methods fail, it feels like the tool itself is betraying your craft. You’re left wondering if it’s simply the cost of doing business, destined to replace expensive brushes every few weeks.
This cycle of disappointment stems from a misunderstanding of the tool. A liner brush, especially a synthetic one, is not just hair on a stick; it’s a carefully engineered instrument. Its performance depends on the microscopic integrity of its bristles, the mechanics of how it picks up product, and even the way it rests when not in use. The secret to longevity isn’t found in a miracle cleaning fluid, but in a deeper respect for the material science at play.
What if the real solution wasn’t about cleaning, but about molecular preservation? What if the key to a perfect line was less about your hand stability and more about the physics of loading gel onto the brush? This guide moves beyond the superficial tips. We will deconstruct the science behind bristle damage, master the professional techniques for loading and storage, and analyze the very materials that make a superior brush. It’s time to stop fighting your tools and start mastering them as the precision instruments they are meant to be.
To navigate this deep dive into tool mastery, we have structured the information to build from foundational care to advanced application. The following summary outlines the key areas we will explore to transform your liner brush from a disposable item into a lifelong partner in your art.
Summary: Mastering the Precision Liner Brush
- Acetone vs. Alcohol: What Destroys Synthetic Brush Bristles?
- The “Rolling” Technique: How to Load Gel Paint for Long Lines?
- Cap on or off? How to Store Brushes to Prevent Gravity Damage?
- Should You Cut Your Brush Bristles to Make Them Thinner?
- Kolinsky or Nylon: Which Is Better for Gel Art Lines?
- How to Clean and Sanitize a Glass File to Last a Lifetime?
- How to Clean Up a Messy Smile Line Using a Brush and Acetone?
- How to Sketch Custom Sets During a 5-Minute Consultation?
Acetone vs. Alcohol: What Destroys Synthetic Brush Bristles?
The single most destructive act for a synthetic liner brush is cleaning it with acetone. While effective for removing gel polish from a nail, acetone is a powerful solvent that attacks the molecular bonds of nylon and other synthetic polymers. This chemical reaction doesn’t just clean the brush; it permanently melts and weakens the bristles, causing them to become brittle, frayed, and lose their ability to snap back into a sharp point. The damage is irreversible and is the primary reason why so many brushes meet a premature end.
The professional alternative is isopropyl alcohol, but the concentration matters. Using 99% alcohol can also be too harsh, stripping the bristles of their inherent moisture and making them brittle over time. The sweet spot is a solution between 70% and 90% isopropyl alcohol. This concentration is effective enough to break down uncured gel without being so aggressive that it damages the bristle structure. For routine cleaning between colors, a simple dry wipe is often sufficient. For heavily pigmented gels that cause staining, a wet wipe with the appropriate alcohol is necessary.
However, the ultimate artisan technique for cleaning and conditioning simultaneously is to use a clear gel. By flushing the bristles with a clear base or top coat on a palette, you use the viscosity of the gel to mechanically push out the pigment. This method not only cleans the brush but also leaves a fine coating on the bristles, preserving their moisture and shape. This practice embodies the principle of working with your materials, not against them.
Your Action Plan: Cleaning Liner Brushes for Longevity
- Never use acetone on synthetic bristles; it will permanently melt their molecular bonds.
- Use 70-90% isopropyl alcohol instead of 99% to clean without causing brittleness.
- Flush the brush with clear base gel to push out pigments while preserving moisture.
- Perform a dry wipe between colors and only use a wet wipe for heavily pigmented gels.
- Store brushes with a thin layer of clear gel on the bristles to maintain flexibility and shape.
The “Rolling” Technique: How to Load Gel Paint for Long Lines?
A perfectly straight line is born not just from a steady hand, but from a perfectly loaded brush. Simply dipping the tip into a pot of gel paint is a recipe for inconsistent, “skippy” lines. This method loads product only onto the very end of the brush, which runs out halfway through a stroke. The professional approach is the “rolling” technique, a deliberate method that ensures the entire “belly” of the brush is saturated evenly for a consistent, uninterrupted flow of product.
To execute this, place a small amount of gel paint on your palette. Lay the liner brush into the puddle and, applying gentle pressure, roll the handle between your thumb and forefinger. As you roll, pull the brush through the paint. This motion ensures the gel is absorbed 360 degrees around and into the core of the bristles. The goal is to create a long, needle-fine point that is uniformly coated. It’s crucial to only coat the first one-third to one-half of the bristles, keeping the gel away from the metal ferrule where it can build up, harden, and permanently splay the bristles from their base.
This technique transforms the brush from a simple applicator into a reservoir. The saturated belly acts as a paint reserve, feeding the tip as you draw your line. This allows you to pull long, consistent, and fully opaque lines in a single stroke, which is essential for crisp geometric designs and elegant French tips. Mastering this loading mechanic is a non-negotiable skill for any artist serious about precision.
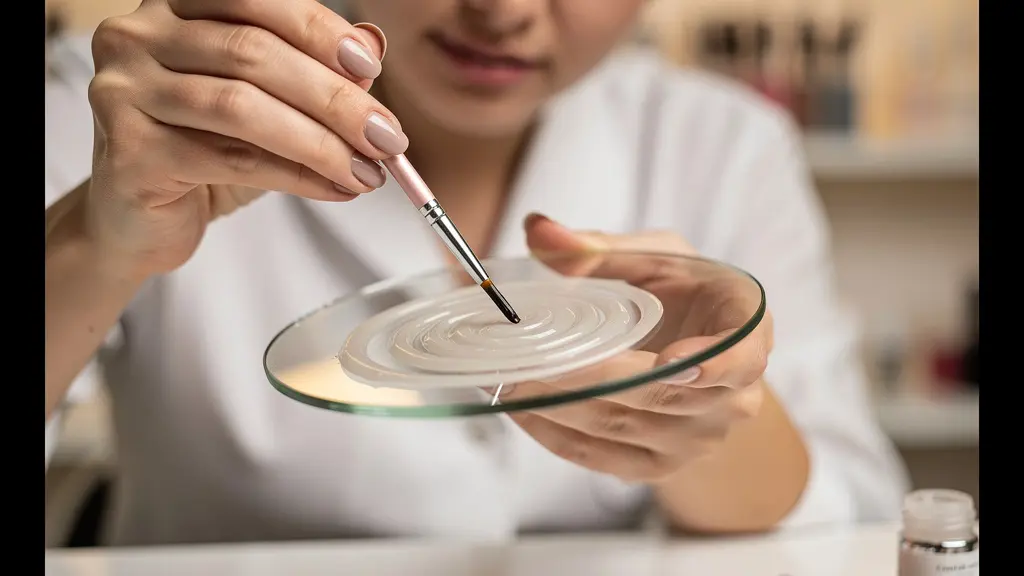
As the image demonstrates, the twisting motion creates a perfectly spiraled, needle-point tip. This control over product distribution is the mechanical foundation for achieving flawless line work. Without it, even the most expensive brush will fail to perform to its potential. It is a testament to the idea that the artist’s technique and the tool’s preparation are inextricably linked.
Cap on or off? How to Store Brushes to Prevent Gravity Damage?
A brush’s life is not only determined by how it’s used and cleaned, but also by how it rests. Storing a liner brush improperly can cause damage just as surely as using the wrong solvent. The main enemies during storage are gravity, dust, and stray UV light that can prematurely cure any residual gel. Each storage method offers a different balance of protection and convenience, and the right choice depends on how frequently the brush is used.
According to the professional guidance from Belle Beauty, the most common methods involve horizontal or vertical storage. Storing a brush vertically, with bristles pointing up, is excellent for quick access and prevents the tip from bending. However, it leaves the bristles exposed to dust, which can contaminate your gel. Using the factory cap is a good way to protect from both dust and UV light, but carelessly replacing the cap can easily catch and bend a stray bristle, creating a permanent flaw. The choice requires a careful cost-benefit analysis.
| Storage Method | Pros | Cons | Best For |
|---|---|---|---|
| Horizontal with Clear Gel | Maintains shape, prevents gel migration | Requires prep time | Long-term storage |
| Vertical Upright | Quick access, prevents bending | Dust accumulation risk | Daily use brushes |
| Cap On (Factory Style) | Protects from UV, maintains moisture | Can catch stray hairs if not careful | Occasional use brushes |
For long-term storage or for a prized brush, the horizontal method is superior. After cleaning, coat the bristles in a thin layer of clear base coat and lay the brush flat in a dedicated, dark drawer or case. This keeps the bristles perfectly aligned, moisturized, and safe from gravity’s pull. While it requires more prep time, it is the ultimate expression of care for a precision instrument, ensuring it is in perfect condition the next time you need it.
Should You Cut Your Brush Bristles to Make Them Thinner?
In a desperate attempt to achieve an ultra-fine line, some artists are tempted to take scissors to their liner brush, trimming away outer bristles to create a thinner point. This is a critical error that fundamentally misunderstands the physics of a brush. A liner brush is not just a random bundle of hairs; it’s a meticulously constructed tool where every single bristle plays a role. The outer bristles are not superfluous—they are the support structure for the central bristles.
When you cut these supporting hairs, the inner core of the brush becomes floppy and unstable. It loses its “snap” and its ability to hold a straight line under pressure. While the brush might look thinner, it will be unable to maintain a consistent line width during a stroke, leading to wobbly, uneven results. This is especially true when changing direction, as a flat or modified brush will drag and create jagged edges. You are, in effect, destroying the very engineering that allows the brush to function as a precision tool.
The Structural Integrity Study by Katie Barnes
In her detailed analysis of brush mechanics, professional educator Katie Barnes demonstrates that liner brushes have tightly packed bristles specifically designed for precision. Her work shows that the outer bristles provide the necessary tension and support to keep the tip sharp and stable. Cutting them causes the entire structure to lose its elastic memory, making it impossible for the brush to spring back to its original shape and maintain a consistent line width during application. The result is a floppy, unpredictable tool.
Instead of modifying a brush, the solution is to choose the right tool for the job from the start. Liner brushes come in various factory sizes, often denoted by a series of zeros (0, 00, 000). Counter-intuitively, the more zeros, the finer the brush. A size 0000 brush is designed by engineers for the finest possible detail work. Respecting the manufacturer’s design is paramount. An artisan does not break their tools; they select the correct one.
Kolinsky or Nylon: Which Is Better for Gel Art Lines?
The debate between natural hair (typically Kolinsky sable) and synthetic (nylon) bristles is a foundational one in the world of art, and nail art is no exception. Traditionally, Kolinsky has been revered for its softness and ability to hold product. However, when working with modern materials like gel paint, the calculus changes. The properties that make Kolinsky superior for watercolor or acrylic paint can become a liability with gel.
Kolinsky bristles are porous and absorbent. When used with gel systems, they can absorb the solvents within the gel, causing them to swell and lose their shape. They also require more delicate care and are significantly more expensive. Synthetic nylon bristles, on the other hand, are non-absorbent. They maintain their shape and stiffness when exposed to gel, providing a consistent and predictable performance. Their superior “snap” or elastic memory means they instantly spring back to a perfect point after each stroke, a critical attribute for crisp line work.
While a master artist can achieve great results with either, the material properties of nylon make it an objectively better-suited tool for the specific demands of gel art. An analysis of professional tools highlights these key differences, showing why the majority of high-end gel art brushes are now synthetic.
| Feature | Kolinsky Natural Hair | Synthetic/Nylon |
|---|---|---|
| Price | Premium (most expensive) | Affordable |
| Durability | Lasts longer with proper care | Wears faster but easier to replace |
| Gel Compatibility | Absorbs solvents, can swell | Non-absorbent, maintains shape |
| Elastic Memory | Soft, requires angle adjustment | Snaps back to shape instantly |
For the nail artist focused on geometric designs and sharp, clean lines, the choice is clear. The affordability, durability, and superior shape-retention of a high-quality nylon brush make it the ideal instrument. It is a tool engineered specifically for the medium, representing the perfect marriage of material science and artistic need.
How to Clean and Sanitize a Glass File to Last a Lifetime?
Glass files don’t ‘dull’ quickly, they ‘clog’ with keratin dust.
– Beetles Gel Polish Professional Guide
The artisan’s mindset extends to every tool on the desk, including the humble nail file. A high-quality glass or crystal file is a lifetime investment, but only if maintained correctly. Unlike emery boards that wear down and are discarded, a glass file’s abrasive surface is permanently etched. As the Beetles guide astutely points out, it doesn’t become dull; its microscopic teeth become clogged with keratin dust from the nail. Therefore, “cleaning” is not about rinsing; it’s about deep unclogging.
For routine cleaning, a simple wash with warm water, soap, and a stiff nylon brush (like a vegetable or dish brush) is essential to physically scrub the dust from the etched surface. For professional use requiring sanitization, glass files have a significant advantage: they are non-porous and can withstand high temperatures. They can be boiled or, for clinical-grade sterilization, placed in an autoclave. This level of sanitation is impossible with paper or wood files.
Over time, even with regular washing, very fine dust can become embedded in the surface, reducing the file’s grit. A little-known trick to restore it to brand-new condition is to use a simple gum eraser. Rubbing the eraser over the dry file’s surface works to pull the impacted dust out of the grooves, instantly restoring its texture and effectiveness. Storing files separately in a sleeve or case prevents the etched surfaces from scratching each other, preserving their integrity for decades of use.
How to Clean Up a Messy Smile Line Using a Brush and Acetone?
Creating a flawless French tip smile line is one of the ultimate tests of an artist’s precision. Even with a steady hand, polish can sometimes bleed, creating a fuzzy or uneven edge. The cleanup process is as much an art as the initial application, and it requires the right tool and technique. The common instinct is to dip a brush in acetone for a quick fix, but this is often too aggressive, flooding the area and dissolving more gel than intended.
A more controlled and professional method is the “dry swipe” technique. Before curing the white tip, take a clean, dry, flat, or angled brush and use it to mechanically “cut” into the smile line, physically pushing the gel back into a crisp, sharp curve. This gives you maximum control without introducing any solvents that could compromise the surrounding product. As demonstrated by guides for professional French tips, this method prevents bleeding and ensures an even, balanced line.
If a solvent is absolutely necessary for a minor correction, the key is control. Instead of dipping your brush into a pot of acetone, lightly dampen it and then wipe almost all of the liquid off on the bottle neck or a lint-free wipe. The brush should be barely damp, not wet. The goal is to have just enough solvent to soften the very edge of the gel, not to flood it. For this delicate work, the size of your instrument is critical. Many professional nail technicians recommend a 5mm or 7mm ultra-fine brush, as it offers the perfect balance of firmness and precision for drawing and correcting smile lines with surgical accuracy.
Key Takeaways
- Never use acetone on synthetic brushes; it causes irreversible molecular damage. Use 70-90% alcohol or clear gel instead.
- Master the “rolling” technique to fully load the brush belly for long, consistent lines, preventing product buildup at the ferrule.
- Do not cut brush bristles. This destroys their engineered support structure, making them floppy and unable to hold a straight line.
How to Sketch Custom Sets During a 5-Minute Consultation?
The pinnacle of tool mastery is not just precision, but also speed and confidence. A well-maintained liner brush becomes an extension of your hand, allowing you to translate a client’s idea into a tangible design in minutes. During a 5-minute consultation, the ability to quickly sketch a custom set on a practice tip or mat can seal the deal, manage expectations, and showcase your artistic vision. This is where all the previous principles of tool care and technique converge.
A liner brush is the perfect tool for this rapid prototyping. Use it with a sheer or lightly pigmented gel to “blueprint” the design. This allows you to map out the placement of geometric shapes, swirls, or characters without committing to an opaque color. A key technique for ensuring symmetry is to place three anchor dots—for the start, apex, and end of a curve or line—before connecting them. This simple trick dramatically improves the balance and flow of the design. Once the sketch is approved, flash-cure it for just 5-10 seconds. This locks the blueprint in place, providing a perfect guide for you to trace over with your final, opaque colors.
This skill is built on confidence, and confidence is built on practice. As nail educator Katie Barnes notes, spending just five minutes practicing your line work on a nail art mat before your first appointment can dramatically improve your stability and control. This warm-up prepares your muscles and reinforces the connection between your hand and your trusted instrument. It’s the final step in elevating a liner brush from a mere tool to a partner in your creative process, enabling you to bring custom artistry to life with both speed and precision.
By treating your brushes not as disposable goods but as precision instruments deserving of scientific care, you elevate your craft from a service to an art form. Begin today by implementing these maintenance and technique principles to transform your results.