Applying top coat over a genuine crystal is not a finishing touch; it is an act of optical sabotage that nullifies the investment in a premium embellishment.
- A crystal’s brilliance comes from its precisely cut facets refracting light, a quality that a layer of top coat completely obscures.
- True longevity is achieved not with surface sealants, but with a structural “gel prong” technique that secures the stone mechanically without covering it.
Recommendation: Shift your methodology from ‘sealing over’ to ‘securing around’ to preserve the crystal’s material integrity and deliver a true luxury result.
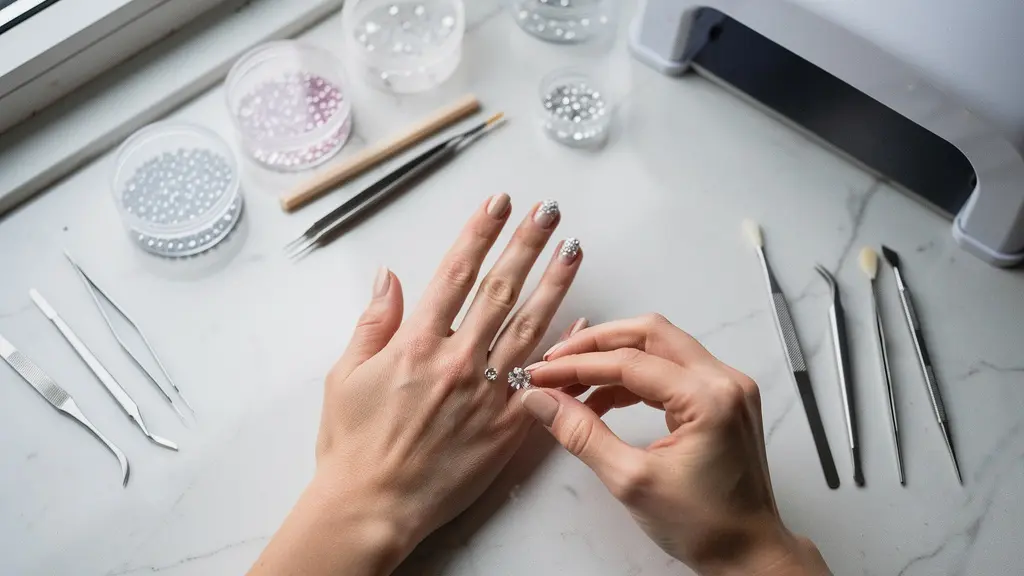
The scenario is painfully familiar for any nail artist dedicated to their craft. You invest in premium, lead-free Swarovski crystals, celebrated for their unparalleled fire and sparkle. You execute a flawless design, placing each gem with precision. Then, in the final, seemingly logical step of applying a high-gloss top coat for durability, the magic vanishes. The once-dazzling crystals now appear muted, cloudy, and disappointingly similar to cheap plastic alternatives. This frustrating outcome is not a failure of your skill, but a misunderstanding of the fundamental material science at play.
Common advice often stops at a simple directive: “Don’t put top coat over crystals.” While correct, this instruction is incomplete. It fails to explain the critical ‘why’ and, more importantly, neglects to provide the professional alternative for achieving multi-week adhesion. The secret to a lasting, brilliant embellishment lies not in a single product, but in a holistic system that honors the crystal’s optical properties and employs structural adhesion techniques. It requires a shift in mindset—from that of a painter to that of a jeweler.
This is where the expertise of a luxury embellishment specialist becomes paramount. The distinction between a standard manicure and a “couture” nail service is found in these microscopic details. It involves understanding the optical performance of glass versus plastic, the physics of gel polymerization, and the ergonomics of application tools. It’s about creating a mechanical lock for the gem, rather than suffocating it under a film of gel.
This guide will deconstruct the entire process, moving beyond simplistic rules to provide an expert methodology. We will explore the science of crystal brilliance, compare the structural integrity of different adhesives, and outline the quality control protocols that define a high-end client experience. By the end, you will not only understand why your crystals were losing their shine but will be equipped with the techniques to ensure they never do again.
To master the art of crystal application, it is essential to deconstruct each stage of the process, from tool selection to the final client-facing quality check. The following sections provide a structured path to elevating your technique.
Summary: Why Top Coat Mutes Swarovski Brilliance: A Specialist’s Explanation
- Wax Pencil vs. Tweezers: Which Is Faster for Intricate Rhinestone Work?
- Resin or Gel: What Keeps Crystals on for 4+ Weeks?
- How to Plan a Crystal Design That Fits Small Nail Beds?
- Glass vs. Plastic Rhinestones: Is the Price Difference Visible?
- How to Check for Sharp Edges Around Crystals Before the Client Leaves?
- Gold or Silver: How to Match Your Hardware to Your Nail Art?
- Jewelry Gel vs. Clear Acrylic: Which Bonds Large Charms Better?
- How to Up-Sell “Couture” Hand-Painted Art to High-End Clients?
Wax Pencil vs. Tweezers: Which Is Faster for Intricate Rhinestone Work?
The choice of application tool is not a matter of mere preference but a strategic decision impacting both speed and precision. The debate between a wax-tipped pencil and fine-point tweezers is best settled by analyzing the task’s specific demands—what we call application ergonomics. For intricate work involving many small stones (SS3-SS5), speed is paramount. A wax pencil or a professional tool like the Crystal Katana offers unparalleled efficiency. Its slightly tacky tip allows for the rapid pickup and placement of micro-crystals without the need for precise grasping, dramatically reducing the time required for scatter patterns or delicate crystal fades.
As noted by the experts at Crystal Parade UK, a quality wax tool is a versatile workhorse for the professional nail artist. They highlight its effectiveness, stating:
The crystal katana will pick up any nail art embellishment, from crystals, pearls, pointy backs, glitter flakes and decals
– Crystal Parade UK, Ultimate Guide: How to apply rhinestones to nails
However, when the design calls for the exact positioning of larger, statement stones (SS7 and up) or crystals with unique shapes, precision tweezers regain the advantage. They allow for meticulous angle adjustments and ensure the stone is perfectly seated in the gel base without smudging. A dual-ended tool, featuring both a wax tip and a metal poker, offers the best of both worlds. The wax tip is used for swift placement, while the metal end provides the ability to nudge stones into their final position with surgical accuracy or to apply micro-dots of adhesive.
Ultimately, a professional workflow incorporates both. The wax pencil is the tool for volume and speed, ideal for building the foundation of a design. Tweezers are the tool for refinement and structural placement, ensuring the larger, focal-point crystals are perfectly aligned. The ability to switch between these tools seamlessly is a hallmark of an experienced technician who values both efficiency and flawless execution.
Resin or Gel: What Keeps Crystals on for 4+ Weeks?
The key to multi-week crystal retention is not found in traditional nail glue or resin, but in the sophisticated use of UV/LED curable gels. The primary failure point of many adhesives is their lack of structural integrity and inability to compensate for the forces exerted on a nail. Gels, particularly those formulated for embellishments, offer a superior bonding solution due to their viscosity, working time, and cured strength. However, even with gel, a critical factor is often overlooked: polymerization shrinkage. During the curing process, research on polymerization effects shows that a 3-20% shrinkage occurs in nail coatings. This shrinkage can pull the gel away from the base of the crystal, compromising the bond before the client even leaves the salon.
To counteract this and achieve true longevity, advanced technicians employ a two-step “gel prong” or mechanical lock method. This technique treats the crystal like a diamond in a jewelry setting, using the gel to create a physical support structure rather than just an adhesive layer.
Professional Gel Application Method for Large Gems
Nail artist Gina Silvestro recommends a two-step gel process for ultimate durability. First, a thick, stiff gel is used to place the gem, providing a solid cushion. During the initial cure, she has the client pivot their hand to ensure UV light penetrates all sides, especially under the pavilion of the stone. Second, after the main cure, she uses a fine liner brush and a medium-thin viscosity gel to meticulously trace around the base of the crystal, creating a “gel prong.” This delicate bezel comes up onto the girdle (the widest edge) of the stone, locking it in place mechanically. A significant benefit of this method is that it preserves the crystal’s material integrity, allowing for the glass gems to be gently soaked off and reused—a powerful value proposition for clients investing in high-end embellishments.
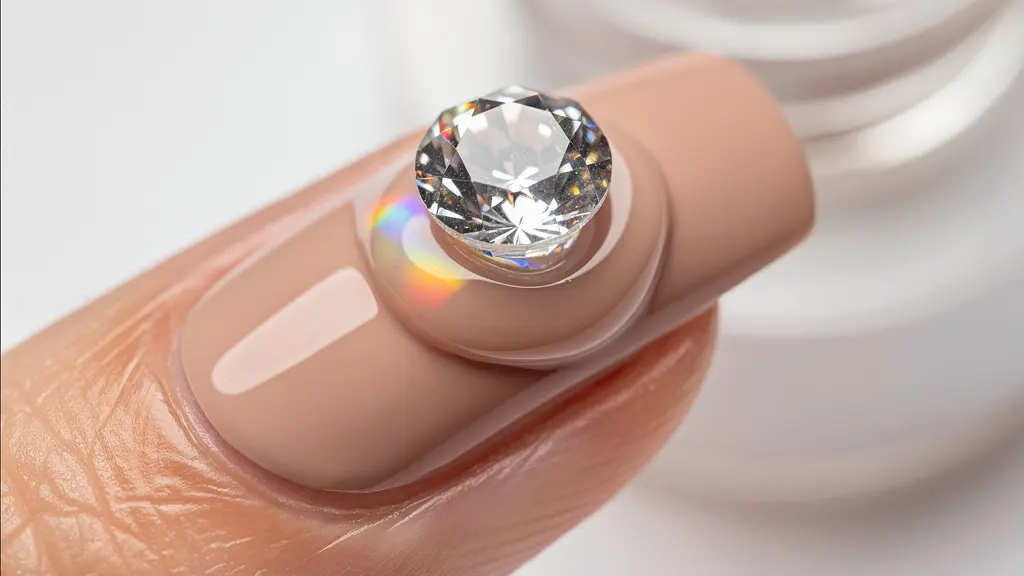
This technique, as visualized above, is what separates an amateur application from a professional one. It respects the crystal’s facets by leaving them fully exposed to light while creating a robust, flexible bond that can withstand daily wear. The gel absorbs micro-shocks that would cause a rigid adhesive like resin to crack and fail. Flash curing every 2-3 stones during placement is also crucial to lock their position and prevent them from shifting due to gel’s self-leveling properties before the final full cure.
How to Plan a Crystal Design That Fits Small Nail Beds?
Applying crystals to small or short nail beds presents a unique design challenge: the goal is to enhance and elongate, not to overwhelm and shorten. The principles of bespoke placement are crucial here, transforming a simple add-on into a couture design element that flatters the client’s hand. The most common mistake is scattering crystals randomly, which creates visual clutter and can make a small nail appear wider and stumpier. The professional approach is deliberate and architectural, using crystals to create an illusion of length and elegance.
The first principle is the strategic use of vertical lines. A “cascade” design, starting with a tiny SS3 crystal near the cuticle and gradually increasing to an SS5 or SS7 towards the free edge, draws the eye upward and creates a powerful elongating effect. This is far more effective than a horizontal arrangement or a large central stone that occupies too much surface area. The second principle is the masterful use of negative space. A truly high-end design does not cover the entire nail. By limiting embellishments to roughly 30-40% of the nail surface and focusing them along the central third of the nail plate, you create a sophisticated balance that feels intentional and airy, not crowded.
Furthermore, every nail should have a single focal point. Instead of placing several medium-sized stones, consider one perfectly placed larger crystal (relative to the nail size) accented by a few micro-crystals. This creates a clear point of interest and prevents the design from looking busy. Graduated sizing is your most powerful tool. A delicate arc of crystals framing the lunula or a subtle sweep along one side of the nail, using a gradient of sizes from SS3 to SS7, demonstrates a high level of skill and artistic consideration that clients will notice and appreciate.
Glass vs. Plastic Rhinestones: Is the Price Difference Visible?
Yes, the price difference is not only visible—it is quantifiable and scientifically demonstrable. The reason a top coat destroys the brilliance of a Swarovski crystal is rooted in the physics of light, and the difference between genuine glass crystal and plastic or acrylic rhinestones is the difference between a precision optical instrument and a simple piece of molded plastic. A crystal’s “sparkle” is a function of its high refractive index and the precise geometry of its facets, which are designed to capture, refract, and reflect light in a dazzling display. When you apply a layer of top coat, you are filling in these microscopic facets and creating a smooth, uniform surface. This film of gel has a much lower refractive index, effectively preventing light from entering the crystal and refracting properly. The result is a muted, dull appearance, as the stone’s primary function has been nullified.
The superior optical performance and material integrity of glass crystals become evident when subjected to the realities of a 3-week manicure, as a recent analysis from beauty professionals demonstrates.
| Feature | Glass Crystals (Swarovski) | Plastic/Acrylic Rhinestones |
|---|---|---|
| Facet Count | 14-16 facets creating star pattern | 8-12 facets, basic cut |
| Top Coat Resistance | Inert to solvents, maintains clarity | Surface degradation, dulls within days |
| Scratch Resistance | Maintains brilliance 3+ weeks | Visible micro-scratches after 1 week |
| Refractive Index | 1.7-2.0 (high brilliance) | 1.49 (low shine) |
| Professional Perception | Premium service indicator | Budget service marker |
The difference in facet count is particularly telling. As nail experts Malin Schlott and Emelie Westin note, the highest quality cuts offer a visible mark of distinction:
If you’re lucky to get your hands on a 16 faceted crystal, you can see the shape of a star when looking at it from the top. This is by far our favorite crystal cut.
– Malin Schlott & Emelie Westin, Beauty Launchpad – Crystal Application Guide
This “star” is a testament to the precision engineering that you pay for with a premium crystal—and it is precisely this engineering that a top coat erases. Plastic stones, which already have fewer and less precise facets, are also susceptible to surface degradation from the solvents in gels and top coats, causing them to become cloudy and scratched over time, even without being coated over.
How to Check for Sharp Edges Around Crystals Before the Client Leaves?
The final quality check is a non-negotiable step that elevates a service from “good” to “luxurious.” A stunning crystal design is instantly ruined for the client if it constantly snags on clothing, tangles in their hair, or feels rough to the touch. Ensuring a perfectly smooth, sealed finish without compromising the crystal’s brilliance requires a meticulous inspection protocol. This is the last point of contact you have with your work before the client lives with it for weeks, and it must be flawless. Relying on a quick visual check is insufficient; you must use tactile and multi-angle methods to detect any potential issues.
The first and most effective test is to gently run a new, lint-free wipe over the entire nail surface from multiple directions. Any lifted edge of the gel or a tiny gap around the crystal’s base will immediately snag the wipe’s fibers, revealing the problem area. Another critical test involves using your own gloved finger to simulate daily activities, running it across the nails and around the crystal edges. A more client-involved approach is to have them carefully run their own fingers through their hair. This is the ultimate real-world test for snagging and provides immediate, tangible feedback.
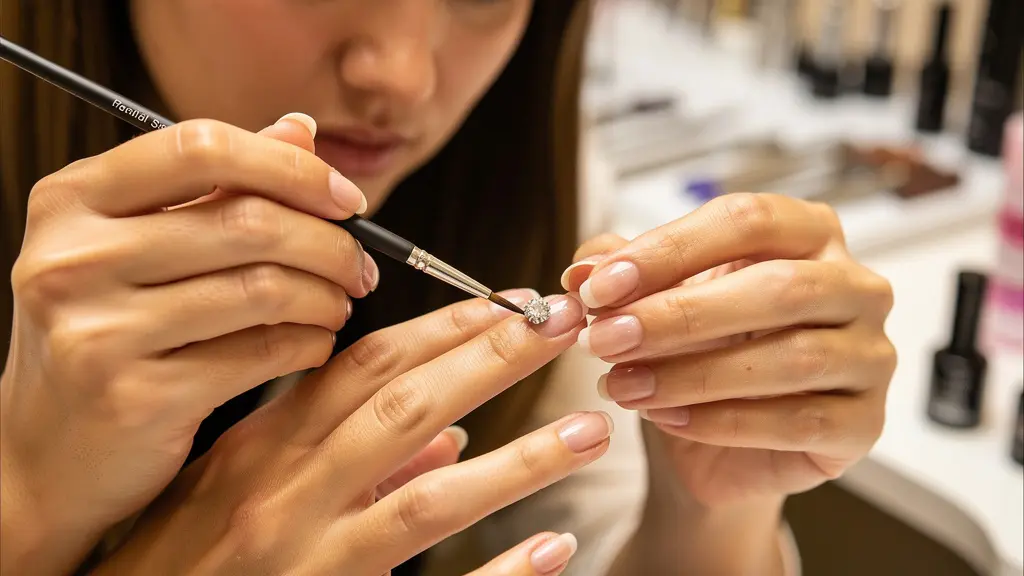
If an edge is detected, the correction must be precise. Using an ultra-fine liner brush, apply a minuscule amount of thin, self-leveling gel to create a smooth “bezel” or “fillet” in the gap between the existing gel and the crystal’s girdle. It’s crucial not to let this gel flow onto the top of the crystal. Once the repair is made, perform a final cure. This final inspection and finishing protocol is what defines a true professional service and ensures client satisfaction.
Your Final Quality Control Checklist: Ensuring a Snag-Free Finish
- Lint-Free Wipe Test: Run a wipe across all nail surfaces. Any snagging immediately indicates unsealed or sharp edges that need correction.
- Gloved Finger Simulation: Test the smoothness from multiple angles using a nitrile glove to mimic contact with fabrics and hair.
- Visual Light Inspection: Use an LED flashlight held at a 45-degree angle to the nail. This low-angle light will cast shadows and reveal any microscopic lifted edges that are invisible under direct overhead lighting.
- Client Hair Test: As the ultimate real-world check, ask the client to gently run their fingers through their hair to confirm a completely smooth finish.
- Precision Bezel Application: If a flaw is found, apply a thin bead of gel around the crystal base with a liner brush before the final cure to create a perfect, seamless seal.
Gold or Silver: How to Match Your Hardware to Your Nail Art?
A couture nail design extends beyond the crystals themselves to encompass a holistic aesthetic vision where every element is in harmony. Matching the “hardware”—the metallic finishes of charms, foil, or the crystals themselves—to the overall nail art and the client’s own characteristics is a mark of a true artist. The choice between gold and silver is not arbitrary; it’s a deliberate decision that can elevate the entire look. The most fundamental guideline is to consider the client’s skin undertone. Cool undertones with pink or blue hints are magnificently complemented by silver, platinum, and cool-toned crystals. Conversely, warm undertones with yellow or peach hues are best paired with gold, rose gold, and warmer metallic accents.
The crystal’s coating also dictates the hardware pairing. The iconic “Crystal AB” (Aurora Borealis) finish, with its flashes of blue and pink, should be exclusively paired with silver hardware to complement its cool iridescence. Pairing it with gold can create a jarring, mismatched effect. In contrast, crystals with coatings like “Golden Shadow” or other champagne effects demand gold hardware to enhance their warm, sunny brilliance. As the professional nail industry evolves and access to premium materials like Swarovski crystals expanded for professionals in August 2023, this level of detailed artistry becomes a key differentiator.
Beyond skin tone and crystal type, the overall design context matters. Consult with your client about the jewelry they plan to wear for a specific event to ensure a cohesive metallic palette from fingertip to earring. Even the top coat finish should be considered. A high-gloss top coat pairs beautifully with polished, reflective silver, while a trendy velvet matte top coat can create a stunningly sophisticated contrast with brushed or matte gold hardware. This comprehensive approach demonstrates a level of personalized service that goes far beyond simply applying an embellishment.
Jewelry Gel vs. Clear Acrylic: Which Bonds Large Charms Better?
When graduating from small, flat-backed crystals to larger 3D charms, the adhesive system must evolve as well. The forces of leverage and torque on a large, heavy charm are exponentially greater, and the choice between a jewelry gel and clear acrylic becomes a critical engineering decision. While acrylic can offer a hard, rigid bond, its rapid setting time and lack of flexibility make it a less-than-ideal choice for sizable embellishments. Jewelry gel, a thicker viscosity UV/LED gel, provides a far superior solution for several reasons.
The most significant advantage of jewelry gel is its extended working time. You have several minutes to position, reposition, and perfect the placement of a large charm before curing, whereas acrylic begins to set in under a minute. This is crucial for ensuring the charm is balanced and aesthetically pleasing. Furthermore, jewelry gel’s self-leveling properties allow it to flow into and fill the irregular gaps often found on the underside of 3D charms, creating a wider, more stable base that distributes weight and stress more effectively. Acrylic requires precise sculpting to fill these gaps, a time-consuming and difficult process.
This comparison highlights the superior engineering of jewelry gel for this specific, demanding application.
| Factor | Jewelry Gel | Clear Acrylic |
|---|---|---|
| Working Time | 2-3 minutes repositioning window | 30-60 seconds before setting |
| Gap Filling Ability | Self-levels into irregular bases | Requires precise sculpting |
| Removal Safety | Files down smoothly, less nail damage | Difficult soak-off, potential trauma |
| Weight Distribution | Creates wider base for stability | Point adhesion, leverage issues |
| Flexibility | Absorbs micro-shocks | Rigid, prone to cracking |
Some professionals even advocate for a hybrid approach to maximize the benefits of different materials, especially for very large or irregularly shaped charms.
Professional Large Charm Application Comparison
California-based nail artist Yvett Garcia advises caution with size, recommending that even flat-backed stones be limited to 8mm or less to prevent snagging. For larger 3D charms, she employs a hybrid method. She first uses a thick hard gel for initial adhesion and positioning, taking advantage of its long working time. After curing, she then uses a fast-setting resin to fill any remaining micro-gaps around the base. This technique combines the repositioning ease of gel with the superior gap-filling properties of resin, providing a robust and secure bond for even the most challenging charm bases.
Key takeaways
- The core reason top coats dull crystals is optical: the gel film smooths over the precision-cut facets, preventing light from refracting and destroying the stone’s brilliance.
- Lasting adhesion (4+ weeks) is achieved through a “gel prong” technique, where gel is used to create a mechanical lock around the crystal’s base, not by covering its surface.
- The visible difference between glass and plastic is scientific, based on facet count, scratch resistance, and a higher refractive index in glass, making it a superior investment for professional results.
How to Up-Sell “Couture” Hand-Painted Art to High-End Clients?
Transitioning your skills into a higher-priced, “couture” service requires more than just technical ability; it demands a strategic approach to client communication and value articulation. You are no longer selling “crystals as an add-on”; you are offering a bespoke embellishment service. The language you use is critical. Instead of asking, “Do you want to add some crystals?”, you should state, “For this design, I recommend a bespoke crystal placement to elongate your nail shape and complement the artwork.” This reframes the conversation from a cheap upgrade to an integral part of the artistic design process.
Education is your most powerful upselling tool. High-end clients appreciate and are willing to pay for superior quality, but only if they understand what they are paying for. Create an exclusive lookbook of your most intricate crystal work, reserved for in-person consultations, to create a sense of exclusivity. During the consultation, explain the difference between plastic and genuine Swarovski crystals. As expert Emelie Westin points out, quality is also a matter of safety:
Using crystals that are lead-free is extremely important. Some crystals may contain lead oxide to give the glass a more reflective appearance
– Emelie Westin, Beauty Launchpad – Crystal Quality Standards
Mentioning the lead-free composition of your premium crystals and their potential for reuse after professional removal positions you as a responsible expert and justifies the premium price. Implement tiered pricing to make the upsell accessible: a “Deluxe” tier with a few mixed-size stones, and a “Couture” tier for fully custom patterns, perhaps priced hourly to reflect the intensive labor. Develop a signature crystal effect, like a unique gradient or cluster pattern, that you can market as your exclusive “Artist’s Touch” add-on, making it a desirable status symbol for your clientele.
By mastering this holistic system—from tool ergonomics and material science to bespoke design and client education—you elevate your craft from a simple manicure to the realm of wearable art. This commitment to excellence not only preserves the brilliant potential of every crystal but also solidifies your status as a true specialist in the luxury nail industry. Start implementing these professional standards today to transform both your work and your business.