Your stunning nail art isn’t getting engagement because you’re thinking like an artist, not a content strategist.
- Success on social media is driven by technical execution (lighting physics, photo science) and psychological triggers (storytelling, natural posing), not just artistic skill.
- Every post must be a ‘content asset’ with a clear job, from attracting saves to funneling clients into a frictionless booking process.
Recommendation: Shift your focus from simply showcasing art to building a strategic content engine that generates measurable business results.
You are a phenomenal nail artist. Your lines are crisp, your shaping is impeccable, and your color theory is on point. Yet, when you post your work on social media, the response is underwhelming. A smattering of likes, a few comments from fellow techs, but crickets from potential clients. The frustration is real, and it leads to a dispiriting conclusion: the algorithm must hate you. The common advice— »use good lighting, » « post consistently »—feels hollow because you’re already doing that. You’re producing high-quality work, but it’s not translating into high-quality engagement or, more importantly, a fully booked schedule.
The truth is, the algorithm doesn’t hate your art; it’s indifferent to it. Social media platforms are not digital art galleries; they are engagement-driven ecosystems. Your failure isn’t artistic, it’s strategic. The key isn’t to create better art, but to create better content assets. This means moving beyond just a pretty picture and understanding the mechanics behind what makes an image or video stop a scroll, earn a save, and convert a viewer into a paying client. It’s about mastering the physics of light to eliminate glare, the psychology of hand-posing to create an aspirational feel, and the structure of a caption to trigger a ‘save’ action.
This article is your social media audit. We will dissect the strategic layers that separate a simple photo from a high-performing content asset. We will move from the technicalities of lighting and editing to the psychology of storytelling and the business acumen of pricing your work effectively. Prepare to shift your mindset from a nail artist who posts online to a content strategist who happens to create incredible nail art.
This guide breaks down the core strategic pillars that will transform your social media presence. Explore each section to build a comprehensive content engine that works for your business.
Summary: Unlocking Engagement: A Strategic Guide for Nail Artists
- Ring Light vs. Softbox: Reducing Glare on Glossy Top Coats
- The « Claw » Hand: How to Coach Clients to Relax Their Fingers?
- Storytelling vs. Emojis: What Makes People Save Your Post?
- Reels Transition: How to Edit a Transformation Video in 5 Minutes?
- Link in Bio: Directing Traffic to Booking Without Friction
- Why « Stark White » Might Look Blue in Professional Wedding Photos?
- Retouched Photos: How to Know If an Educator’s Work Is Real?
- How to Price Your Nail Art to Earn $50/Hour as a Freelancer?
Ring Light vs. Softbox: Reducing Glare on Glossy Top Coats
The number one technical mistake that undermines beautiful nail art is harsh, direct lighting. You’ve likely noticed the tell-tale sign: a bright, distracting ring of light reflected on the glossy surface of the nail. This is the signature of a ring light used as a primary light source. While excellent for makeup application where the face is the subject, its small, circular shape creates specular highlights—sharp, mirror-like reflections that obscure detail, wash out color, and cheapen the overall look of your work. Your intricate line work or subtle chrome effect is lost beneath a glaring circle.
The solution lies in understanding the physics of light. To minimize glare, you must increase the *size* of your light source relative to your subject (the hand). This is where a softbox becomes a non-negotiable tool for professional nail photography. A softbox takes a small, harsh light bulb and diffuses its output across a large, white panel. This creates a soft, wrapping light that produces smooth, graduated highlights instead of sharp, distracting ones. The reflection on the nail becomes a gentle, wide gradient that enhances the nail’s shape and shine without competing with the art itself.
Think of it this way: a ring light is like the sun on a clear day, creating harsh shadows and bright spots. A softbox is like the sky on an overcast day—a massive, even light source that illuminates everything softly and beautifully. For a minimal investment, positioning a single softbox at a 45-degree angle to the hand will instantly elevate your photos from amateur to editorial quality. It demonstrates a control over your environment that is as important as your control over your brush. Stop fighting glare; eliminate it by changing the quality of your light.
The « Claw » Hand: How to Coach Clients to Relax Their Fingers?
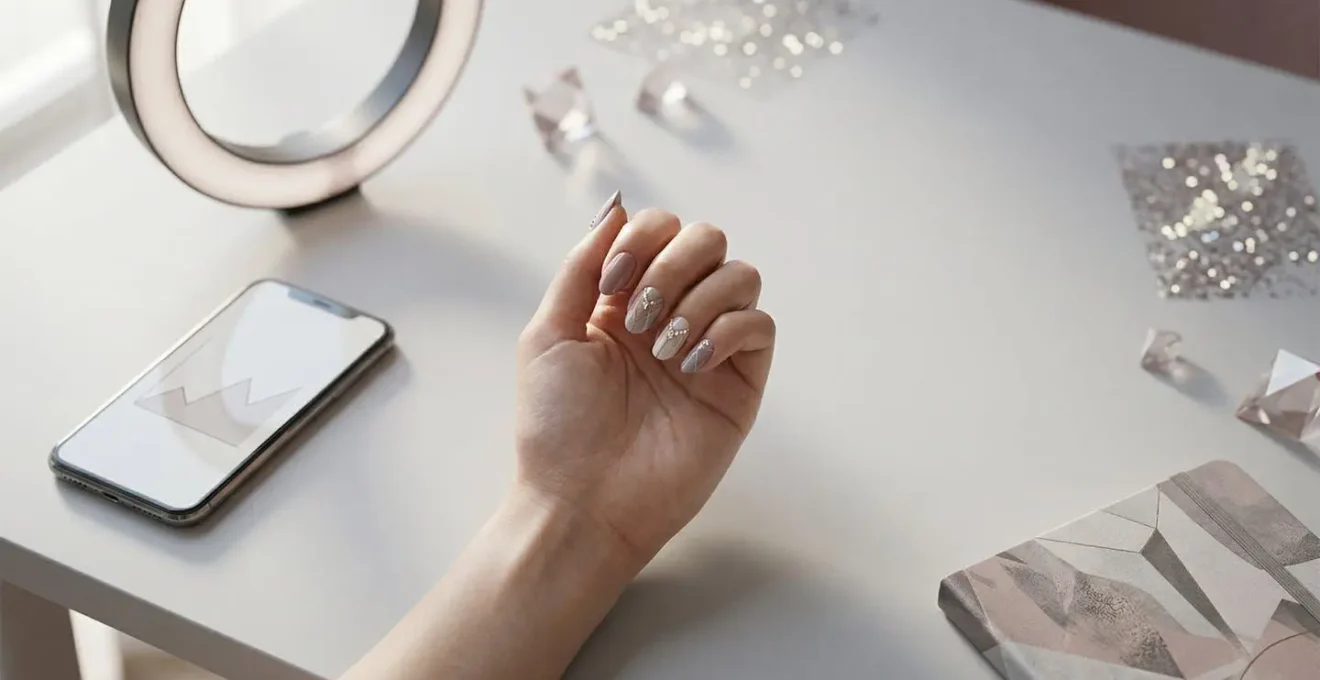
You’ve finished a perfect set, but when you ask your client to pose for a photo, their hand tenses into an unnatural, stiff position often called « the claw. » The fingers are spread too far apart, the knuckles are white, and the entire hand looks awkward and uncomfortable. This tension instantly distracts from your beautiful work. Asking a client to « just relax » is often counterproductive, as it makes them more self-conscious. The problem isn’t the client; it’s the direction. You need to give their hand a purpose, not a pose.
The most effective strategy is the « Prop Method. » Instead of asking for an abstract pose, give the client a lightweight object to interact with naturally. This shifts their focus from « how does my hand look? » to the simple task of holding something. The object provides a physical anchor, and the hand will naturally curve around it in a more graceful and relaxed way. The right prop should complement the nail art, not overpower it.
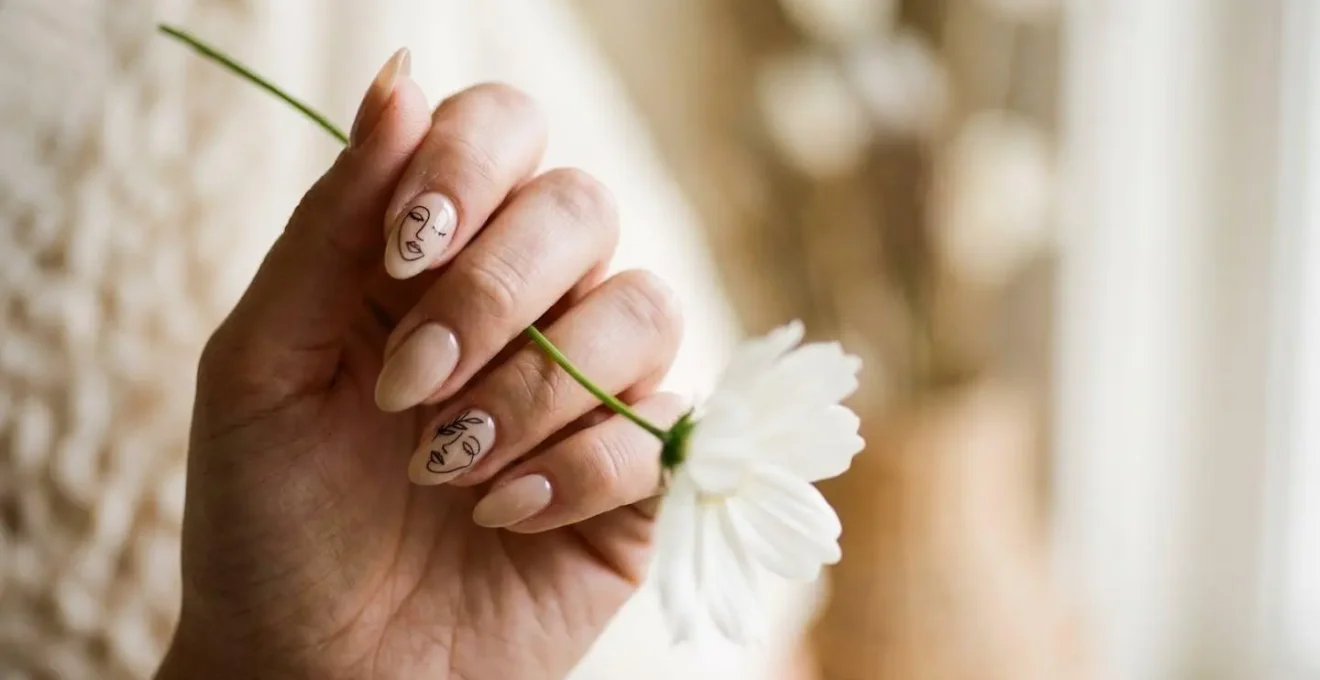
As you can see in the image, a delicate object encourages a soft, natural grip. Excellent props include a single flower stem, a piece of silk fabric, the cap of the polish bottle you used, or even their own sweater sleeve. By giving the hand a « job, » you bypass the client’s self-awareness and capture an image that feels aspirational and authentic, not staged and stiff.
Prop Method Implementation: Transforming Tense Hand Photos
A UK-based nail technician implemented the ‘Prop Method’ after noticing that 60% of her client photos showed tension in hand positioning. She introduced lightweight props including silk scarves, single flower stems, and polish bottles into her photo sessions. By giving clients’ hands a ‘job’ rather than asking them to ‘relax,’ she observed an immediate improvement in natural hand curvature and finger positioning. Within three weeks, her engagement rate increased from 2.1% to 3.8% as the photos appeared more authentic and aspirational. Client feedback revealed they felt less self-conscious when holding an object, which translated into more confident and elegant final images.
Storytelling vs. Emojis: What Makes People Save Your Post?
Many nail techs treat the caption as an afterthought, stuffing it with a string of emojis and a generic « new set for this lovely client! » But in the world of content strategy, the caption is as important as the photo. Its job isn’t just to describe the image, but to provide value that triggers a specific, high-value action: the « Save. » While likes are a fleeting form of validation, saves are a powerful signal to the algorithm. They indicate that your content is so useful or inspiring that a user wants to return to it later. It tells the platform that you are an authority providing evergreen value.
To generate saves, you must move from decoration (emojis) to education and storytelling. Use a « Micro-Story » formula in your caption to provide context and value. A great micro-story has three parts:
- The Hook: Start with the inspiration or the problem. « My client came in with a photo of a sunset and said, ‘Can you put this on my nails?' » or « We were looking for the perfect ‘not-quite-nude’ for her job interview. »
- The Process: Briefly describe a key element of the creation. « I used a three-color ombre with a sheer chrome powder to get that perfect glow. » or « The key was finding a shade with a warm undertone to complement her skin. »
- The Value Statement: End with a takeaway for the reader. « Pro Tip: a touch of chrome over a classic French manicure is the perfect modern update. » or « Save this post for your next appointment if you’re looking for elegant, work-appropriate nail inspo! »
This formula transforms your post from a simple showcase into a valuable piece of educational content. As marketing expert Fizza Batool explains, the psychology behind this metric is profound.
A save shows long-term value. When a post is saved, it means the viewer found something worth returning to an idea, a tip, or a reminder they don’t want to lose.
– Fizza Batool, Marketing Strategy Guide
By consistently providing this level of value, you train your audience to see your posts as resources, not just pictures. This is how you build a loyal following and signal to the algorithm that your content deserves to be seen by more people.
Reels Transition: How to Edit a Transformation Video in 5 Minutes?
In today’s fast-paced digital landscape, video content, particularly short-form Reels, is the most powerful tool for capturing attention. The « before and after » transformation is a classic for a reason: it’s a compelling narrative packed into a few seconds. However, many techs avoid creating them, assuming the editing process is too complex and time-consuming. With a streamlined workflow, you can create a high-impact, professional-looking transformation Reel in just five minutes, turning one client appointment into a powerful content asset.
The key is to think like a video editor *while* you work, not after. Film short, 1-2 second clips throughout the appointment. Don’t try to film everything; focus on the key moments that tell a story of transformation. The goal is efficiency, not a feature-length film. By focusing on a structured workflow, you can create compelling content consistently without it eating into your day.
Here is a proven workflow using popular free apps like CapCut or InShot:
- Minute 1: Film Key Moments: Shoot 1-2 second clips of the « before » state (bare nails/grown-out mani), intriguing process close-ups (a satisfying glitter pour, precise cuticle work), and the final « reveal » from multiple angles.
- Minute 2: Arrange in 3-Act Structure: Import your clips and arrange them logically: Act 1 (The Problem: Before), Act 2 (The Magic: Intriguing Process), Act 3 (The Resolution: The Reveal).
- Minute 3: Add Trending Audio: Scroll Instagram’s Reels audio tab for trending sounds (look for the green arrow). Choose a track that matches the mood of your nail art—dramatic for intricate designs, upbeat for colorful work.
- Minute 4: Create a Pattern Interrupt Hook: Start your video with an extreme macro shot of a final detail (like a single crystal or the satisfying cure under a lamp) for 0.5 seconds before cutting to the « before » shot. This hook grabs attention immediately.
- Minute 5: Add Value & Export: Add a simple text overlay with a value statement (e.g., « From grown-out to glowing »). Export in high-quality 1080p vertical format (9:16) and post with a save-worthy caption using the Micro-Story formula.
This five-minute investment creates a dynamic asset that showcases your skill far more effectively than a static photo. It demonstrates your process, highlights your attention to detail, and delivers the satisfying payoff that algorithms and viewers love.
Link in Bio: Directing Traffic to Booking Without Friction
Your social media content has one primary business goal: to fill your appointment book. A beautiful feed that doesn’t convert viewers into clients is a failed marketing strategy. The bridge between a captivated viewer and a booked client is your « link in bio. » Too often, this is a single, clunky link to a website homepage, forcing the user to hunt for your booking page. Every extra click is a point of friction where you can lose a potential client. Your goal is to create a frictionless funnel that makes booking an appointment effortless and immediate.
Instead of a single link, use a « link in bio » tool like Linktree, Lnk.Bio, or Carrd. This creates a simple, mobile-optimized landing page that acts as a central hub for your business. This page should be clean, on-brand, and offer a few clear, direct calls to action. Don’t overwhelm users with dozens of options. The most important buttons should be at the top:
- « Book Now » / « Check Availability »: This should be the most prominent button, linking directly to your booking software (e.g., Acuity, Fresha, GlossGenius).
- « View Price List / Services »: For users who need more information before committing.
- « Waitlist Sign-Up »: If you’re fully booked, this is a crucial tool for capturing leads.
The impact of this simple optimization is significant. By removing unnecessary steps and guiding the user directly to the desired action, you dramatically increase your chances of conversion. In fact, research on link-in-bio optimization reveals that optimized bio links can increase click-through rates by up to 350% compared to a traditional single link. This isn’t just about being organized; it’s about respecting your client’s time and making it as easy as possible for them to give you their business.
Why « Stark White » Might Look Blue in Professional Wedding Photos?
A bride-to-be requests a « classic, stark white » manicure for her wedding day. It looks perfect in your salon. But a month later, she sends you a professional photo where her nails have a noticeable, unflattering blue or gray cast, clashing with her warm-toned ivory dress. This common issue isn’t your fault, but understanding the science behind it positions you as a true expert. The culprit is color temperature and the use of professional photography flashes.
Stark white polishes often have cool, blue undertones to make them appear brighter and crisper. In the controlled, often warm lighting of your salon, this isn’t apparent. However, a professional photographer’s flash emits a very clean, daylight-balanced light (around 5500K). Under this intense, neutral light, the subtle blue undertones in the polish are revealed and even exaggerated by the camera’s sensor. The result is nails that look cool and detached, rather than soft and bridal.
The strategic solution is to proactively educate your bridal clients. Position yourself as a « photography-aware » nail technician. Instead of defaulting to pure white, recommend shades that are specifically formulated to photograph well. These are typically soft whites, ivories, or off-whites with a subtle warm (yellow or pink) undertone. These shades absorb and reflect flash photography more neutrally, ensuring they look like a clean, soft white in the final images without shifting to blue. This consultation process adds immense value and prevents post-wedding disappointment.
Bridal Nail Color Photography Consultation Framework
A salon specializing in bridal services developed a pre-wedding consultation protocol after receiving feedback that several brides’ ‘pure white’ manicures appeared blue-toned in professional wedding photos. The salon created a physical swatch card showing how five different white/ivory polish shades appeared under various lighting conditions: indoor salon lighting, natural daylight, and a photographer’s flash. During consultations, technicians photograph the bride’s hand wearing each shade under simulated flash conditions using a ring light. This visual comparison allows brides to make an informed decision. The salon now recommends warm-toned ivory or soft pink shades for 90% of brides, which photograph consistently. This proactive education has eliminated post-wedding disappointment and positioned the salon as photography-aware experts.
Retouched Photos: How to Know If an Educator’s Work Is Real?
The nail industry is filled with incredible educators, but it’s also rife with overly retouched photos that set unrealistic standards. As a technician looking to invest in education, you need to be able to distinguish between an artist with masterful skill and an artist with masterful photo editing. Relying on work that has been digitally perfected can lead to frustration when you can’t replicate the flawless, « liquid skin » look in real life. Developing an eye for digital alteration is a critical business skill; it’s a form of digital forensics that protects your investment and your sanity.
Authentic work, even at the highest level, retains signs of humanity. Heavily retouched photos often remove these signs. The most common manipulation is « skin smoothing, » which removes all pores, fine lines, and natural texture from the fingers and cuticles, creating a plastic-like appearance. Another red flag is distorted backgrounds. If the lines on the client’s finger or the nail itself have been digitally reshaped (using a « liquify » tool), it can cause subtle warping or blurring in the background pattern directly behind the altered edge.
True masters of their craft are proud to show their work in its natural state. They often post raw, unedited video clips alongside their photos, showing the nails from different angles and in different lighting. This transparency is a hallmark of a confident and authentic educator. Before investing your time and money, perform your own audit. Scrutinize the work not just for its beauty, but for its authenticity. This critical eye will help you choose mentors who teach real-world skill, not digital illusion.
Your Action Plan: Digital Forensic Checklist for Nail Photo Authenticity
- Examine Background Edges: Look for blurry, warped, or distorted lines near the nail, indicating excessive smoothing or shape alteration.
- Inspect Skin Texture: Natural skin should show visible pores and fine lines; completely smooth, poreless skin signals heavy retouching.
- Analyze Light Reflections: Reflections on the nail surface should be organic and match the environment; perfectly geometric or oddly placed highlights may be digitally painted.
- Seek Raw Video Content: Authentic artists regularly post short, unedited video clips showing the same work from multiple angles, proving it exists in the real world.
- Compare for Consistency: Check if all photos show the same level of « perfection » or if some appear more realistic, indicating selective heavy editing on hero shots.
Key Takeaways
- Your content is a business asset; its success is measured by engagement and conversions, not just aesthetics.
- Technical mastery of lighting (soft vs. hard) and posing (the Prop Method) is as important as your nail application skills.
- Focus on high-value actions: write captions that earn « Saves » and build a frictionless « link in bio » funnel that leads directly to bookings.
How to Price Your Nail Art to Earn $50/Hour as a Freelancer?
Pricing your nail art is one of the most challenging aspects of running your business. Many technicians undercharge, pricing based on emotion or what they see competitors doing. This is a flawed approach. A strategic pricing model is not based on feelings; it’s based on a target income and the time it takes to execute a service. Your goal should be to achieve a specific Effective Hourly Rate (EHR). An EHR of $50/hour is a solid benchmark for a skilled, independent technician to cover costs, pay taxes, and earn a professional wage.
To calculate your pricing, you must stop thinking in terms of « price per set » and start thinking in terms of « price per minute. » First, accurately time your services. How long does a Level 2 art set *really* take you, from prep to top coat? If a set takes 90 minutes (1.5 hours) and your target EHR is $50/hour, the service price should be at least $75 (1.5 x $50). This data-driven approach removes the guesswork and ensures you are compensated fairly for your time and skill. This method also allows you to see which services are most and least profitable, helping you refine your menu. Your pricing communicates the value of your work, and your social media is the platform to justify that value. In an industry where beauty brands see a 3.5% average engagement rate on Instagram, high-value content directly supports premium pricing.
Structuring your services into tiers is an effective way to communicate this pricing to clients. It simplifies the booking process and clearly outlines what is included at each price point. A tiered system frames your pricing as a reflection of time and complexity, not an arbitrary number. The following table provides a clear framework for how to structure your service tiers to consistently hit your target EHR.
| Service Tier | Complexity | Time Required | Price Range | Effective Hourly Rate | Content Value |
|---|---|---|---|---|---|
| Level 1-2 (Basic) | Solid colors, simple French | 45-60 min | $35-$50 | $42-$50/hr | Medium – Good for Stories/quick posts |
| Level 3 (Standard Art) | Simple nail art, ombre | 75-90 min | $65-$80 | $52-$64/hr | High – Instagram feed worthy |
| Level 4 (Advanced) | Detailed designs, hand-painted | 2-2.5 hrs | $100-$140 | $50-$70/hr | Very High – Reels transformation content |
| Level 5 (Showcase) | Competition-level, 3D elements | 3-4 hrs | $180-$250 | $60-$83/hr | Exceptional – Portfolio anchor, viral potential |
By adopting a strategic, tier-based pricing model, you take control of your income. You are no longer just an artist; you are a business owner pricing your time and expertise for sustainable, profitable growth.
Start implementing these strategies today. Audit your lighting, coach your next client with a prop, write one save-worthy caption, and calculate the true Effective Hourly Rate for your most popular service. Transforming your social media is not about one viral post; it’s about a consistent, strategic approach that turns your artistic talent into a thriving business.