In summary:
- Replace chaotic searching with structured design frameworks to quickly merge multiple inspiration photos into a single, cohesive concept.
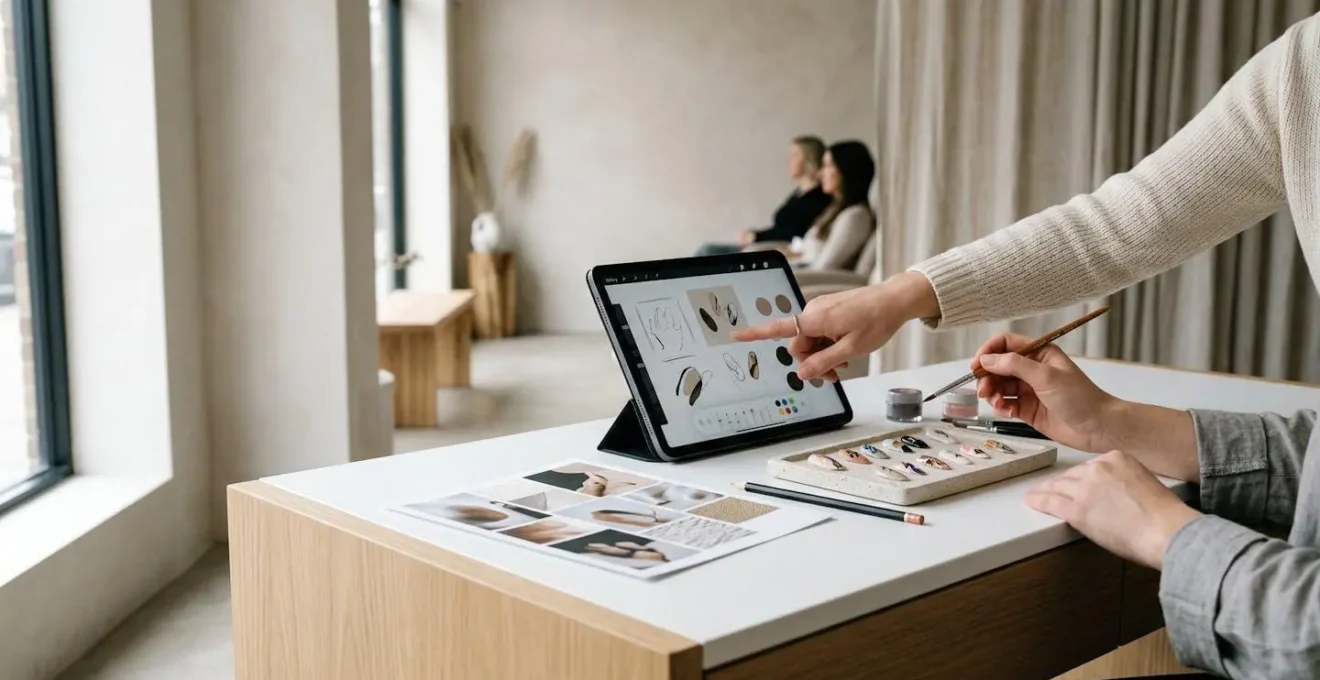
- Leverage digital tools like Procreate on an iPad to create rapid, realistic mockups that allow for real-time client approval.
- Implement a transparent, unit-based pricing system to quote custom work accurately and confidently before you start, eliminating awkward money conversations.
- Use proactive communication checkpoints, like the one-nail shape approval, to build trust and prevent costly rework.
The timer starts the moment a client sits down and pulls out their phone. They show you three different, often conflicting, Pinterest photos. « I want this color, but with this pattern, and maybe the vibe of this one? » For many nail technicians, this is where the 5-minute countdown to a rushed decision and potential disappointment begins. The pressure to decipher, design, and price a unique creation on the spot can turn a creative opportunity into a source of anxiety, often leading to longer appointment times and uncertain profits.
The common advice— »just communicate » or « look at Pinterest together »—falls short because it doesn’t address the core issue: the lack of a system. You don’t need to be a faster artist; you need to be a more efficient creative director. The secret isn’t to race against the clock, but to transform the consultation from a frantic scramble into a structured, predictable, and even luxurious creative ritual.
But what if the key wasn’t about finding more time, but about fundamentally changing how you use it? This guide moves beyond generic tips to provide concrete frameworks and systems. We will explore how to merge inspiration methodically, leverage technology for rapid visualization, price custom work with confidence, and establish communication boundaries that empower both you and your client. It’s time to stop letting the five-minute window dictate your artistry and start using it to build trust and showcase your expertise.
This article provides a complete workflow, from initial idea to final price quote, designed to make every 5-minute consultation a masterpiece of efficiency and creativity. The following sections break down each crucial step into actionable systems you can implement immediately.
Summary: A Tech’s Guide to Mastering the 5-Minute Custom Nail Design
- Combining Pinterest Inspo: How to Merge Three Photos into One Design?
- iPad Apps for Nail Art: visualizing Ideas Before Painting
- The « Trust Me » Service: How to Convince Clients to Let You Freestyle?
- How to Quote a Custom Price Before You Start Painting?
- When to Say No: Identifying Designs Beyond Your Skill Level
- Champagne and Sketches: Elevating the Pre-Service Ritual
- How to Tell Your Tech You Hate the Shape Without Being Rude?
- « More is More »: How to Layer Prints Without Looking Messy?
Combining Pinterest Inspo: How to Merge Three Photos into One Design?
The « Pinterest puzzle » is the number one consultation bottleneck. A client presents a collage of ideas—a color from one, a pattern from another, a finish from a third—and expects you to be a mind-reading artist. Instead of guessing, you need a system. The key is to move from abstract « vibes » to concrete design pillars within seconds. This establishes you as the expert and directs the creative process, rather than being led by it.
A powerful method is the Anchor-Accent-Atmosphere framework. This structured approach breaks down the decision-making process into three simple steps, turning a confusing request into a clear artistic brief. It’s a formula for creative synthesis that you can execute in under two minutes.
- Step 1: Designate your Anchor. Select one photo as the primary theme. This will be the foundation for your color story and overall mood.
- Step 2: Identify your Accent. Choose the second photo for a specific, transferable motif—a chrome line, a floral detail, a geometric shape—that will become the design’s signature element.
- Step 3: Define your Atmosphere. Use the third photo to determine the finish and texture. Will it be matte or glossy? What is the glitter density? This final layer ties the entire design together.
This process is demonstrated visually below, showing how distinct elements can be extracted and combined to form a new, cohesive whole. The final, crucial step is the 60-second visual test: quickly sketch the merged elements on a single practice tip. This instantly reveals if the combination works, securing client buy-in before a single finger is prepped.

By using a repeatable framework, you stop being a passive recipient of ideas and become the active architect of the design. You guide the client through a logical creative process, building confidence and ensuring the final result is a deliberate fusion of their desires and your professional skill.
iPad Apps for Nail Art: visualizing Ideas Before Painting
Words are often inadequate for describing visual art. The gap between what a client says they want and what they’re actually picturing is where misunderstandings happen. Bridging this gap quickly is the essence of an efficient consultation. While physical sketching is an option, digital tools offer a level of speed, flexibility, and realism that can be a game-changer, especially on an iPad.
Using an app like Procreate allows you to create a « digital dress rehearsal » for the nail set. Instead of committing to polish, you can layer colors, patterns, and effects digitally, making changes with a simple tap. This visual confirmation is the fastest way to get an enthusiastic « Yes, that’s it! » from a client.
Procreate for Nail Design: Professional Digital Workflow
Top nail artists are increasingly turning to Procreate on the iPad to streamline their consultations. A key strategy is creating custom digital brush kits that mimic specific nail art textures like sugar glitter, blooming gel, or chrome powder. As detailed in a breakdown of professional digital workflows, the app’s layer-based system is perfect for this. Techs structure sketches with separate layers for base color, line art, and effects. This enables real-time client approval by simply toggling options on and off. The « Photo Bash » technique—importing inspo photos, cutting out elements, and overlaying them on hand/nail templates—creates ultra-fast, realistic mockups that are ideal for the 5-minute consultation format.
While Procreate is a powerful, one-time purchase for detailed work, other apps serve different functions in a tech’s digital toolkit:
- GoodNotes: Ideal for creating organized, searchable client portfolios and design libraries.
- Concepts: Perfect for initial brainstorming on an infinite canvas, allowing you to explore multiple compositions quickly.
- YouCam Nails: Offers a live AR try-on feature, letting clients see potential designs on their actual hands in real-time for an instant preview.
By integrating these tools, the consultation becomes a collaborative digital design session. You’re not just talking about an idea; you’re building it together, visually, ensuring complete alignment before the first coat of polish is applied. This dramatically reduces the risk of post-service dissatisfaction and wasted time.
The « Trust Me » Service: How to Convince Clients to Let You Freestyle?
The « freestyle » or « trust me » set is the holy grail for many creative nail techs—a chance to push boundaries without the constraints of a specific request. Yet, for clients, it can be a terrifying leap of faith. The key to selling this service isn’t just asking for trust; it’s engineering a system that makes clients feel safe and excited to grant it. The goal is to create structured spontaneity, giving you creative freedom within a framework the client has approved.
Instead of offering a complete blank slate, which can be overwhelming, successful techs offer tiered freestyle options. This approach incrementally builds trust and gives the client a sense of control, even while handing over the creative reins.
Building Trust Through the Freestyle Menu Strategy
Professional techs significantly reduce client anxiety around freestyle services by using a structured « Freestyle Menu. » Instead of a vague « let me do what I want, » they present concrete choices like ‘Tier 1: You choose the color palette, I design the art’ or ‘Tier 2: You provide a theme/mood (e.g., ‘oceanic,’ ‘celestial’), I execute the vision.’ This strategy transforms an intimidating request into a collaborative game. It is often combined with a dedicated portfolio showcasing only the tech’s best freestyle transformations, proving their ability to turn vague ideas into stunning sets and dramatically increasing freestyle bookings.
This process of guided choice demonstrates that you’ve listened to their core desires, even if they aren’t dictating the final details. As industry experts note, the foundation of a great service is this feeling of being heard and understood.
A perfect consultation includes the client feeling comfortable with you enough to express their concerns to you. When I know what the client’s desires are, I’m better equipped to help them reach their goals.
– Industry Expert, Milady Training – Smart Strategies for Successful Client Consultations
Ultimately, convincing a client to trust you with a freestyle set is a testament to the strength of your consultation process. When they feel you have a system, understand their taste, and respect their boundaries, letting go becomes an exciting prospect rather than a scary one.
How to Quote a Custom Price Before You Start Painting?
The awkward silence that follows the question, « So, how much will this be? » can derail the creative energy of a consultation. Under-quoting eats your profit, while over-quoting can scare a client away. The solution is pricing transparency: a clear, logical system that allows you to build a price in front of the client, justifying every dollar. This shifts the conversation from a negotiation to a simple calculation.
Moving away from a single, flat nail art price is the first step. According to industry research, nail techs using tiered ‘Good-Better-Best’ pricing strategies report higher average ticket values and greater client satisfaction because it gives clients control over their budget.
The most effective way to achieve this is with an « Art Units » system. You assign a unit value to different design elements based on their complexity and the time they take to execute. During the consultation, as you and the client decide on the design, you are simply adding up the units. It’s like building a custom meal at a restaurant—everyone sees how the final bill is calculated.
| Design Element | Art Units (per nail) | Estimated Time | Example Price (@$5/unit) |
|---|---|---|---|
| Simple line art / dots | 1 unit | 2-3 min | $5/nail |
| Full chrome / cat eye | 2 units | 5 min | $10/nail |
| Hand-painted florals | 3-4 units | 10-12 min | $15-20/nail |
| Intricate character art | 5+ units | 15+ min | $25+/nail |
| 3D embellishments + crystals | Add 1-2 units | Variable | +$5-10/nail |
With this system, the 5-minute consultation becomes a collaborative budgeting session. You can say, « We can do the hand-painted florals for 3 units per nail, or we can create a similar vibe with simpler line art for 1 unit to stay within your budget. » This empowers the client, demonstrates your value, and ensures you are always compensated fairly for your time and skill.
When to Say No: Identifying Designs Beyond Your Skill Level
Honesty is a cornerstone of a trusted client relationship. Saying « no » to a design that is beyond your current skill level isn’t a sign of failure; it’s a mark of professionalism. It shows that you prioritize the quality of the final product and the client’s satisfaction over your own ego. However, a blunt « I can’t do that » can feel like a rejection. The art is in the confident pivot: acknowledging the client’s desire while expertly redirecting them towards a design you can execute flawlessly.
The first step is to quickly and dispassionately assess the request against your own abilities. Hesitation breeds awkwardness. Having a clear internal inventory of what you can and cannot do allows for an instant, confident response. The goal is to control the narrative, framing the pivot as a creative collaboration rather than a refusal.
This is where pre-planned scripts and strategies become invaluable. They provide a professional framework for navigating these delicate conversations, ensuring the client feels heard and respected, even when their initial request cannot be met.
Your Action Plan: The ‘Pivot, Don’t Reject’ Method
- Identify the Core Appeal: When a client asks for a design you can’t do (e.g., hyper-realistic portrait), ask yourself: what is the true appeal? Is it the subject, the color palette, or the boldness? Focus on what you *can* capture.
- Offer a Confident Pivot: Use a script to redirect. Example: « That hyper-realistic style is a specialty I’m still perfecting, but I can transform its beautiful color palette and bold feeling into a stunning abstract design that I excel at. Would you like to see a quick sketch? »
- Build a Referral Network: Frame the « no » as a premium service. Example: « For that specific advanced technique, my colleague [Tech Name] is the absolute expert. For the perfect result you deserve, I recommend booking with her. My priority is you getting the best nails. »
- Maintain a Skill Inventory: Keep a personal, private list of techniques categorized as ‘Mastered,’ ‘Practicing,’ or ‘Won’t Offer.’ This enables instant, confident decisions during consultations without emotional hesitation.
By mastering the pivot, as detailed by platforms like TwentyPro in their consultation guides, you maintain your expert status. You’re not just a pair of hands; you’re a creative consultant guiding the client to the best possible outcome, which sometimes means recommending a different path—or even a different artist—to achieve perfection.
Champagne and Sketches: Elevating the Pre-Service Ritual
The 5-minute consultation doesn’t have to feel rushed or transactional. With the right framing, this brief window of time can be transformed into a signature part of your service—a premium consultation ritual. The perception of luxury isn’t about spending more time; it’s about making the time spent feel intentional, exclusive, and curated. It’s about shifting the client’s mindset from « Are we done yet? » to « This is part of the experience. »
High-end salons excel at this by creating multi-sensory experiences that engage the client from the moment they sit down. By pairing simple, low-cost offerings with the design process, they reframe the entire interaction. The consultation is no longer a hurdle to overcome before the service begins; it *is* the beginning of a luxury service.
Transforming Time Constraints into Premium Rituals
Top-tier nail salons successfully combat the feeling of being rushed by creating an exclusive ‘Sensory Menu’ for the consultation. This ritual pairs a beverage choice with design mood categories. For instance, a client might be offered ‘The Energizer: Espresso & vibrant mood boards’ or ‘The Relaxer: Herbal Tea & minimalist design lookbooks.’ This elegant framing turns time pressure into a premium, focused creative session. The tech can say, « For the next five minutes, while you enjoy your tea, we will design your unique set together. » This makes clients feel they’re receiving an exclusive, concentrated experience rather than a hurried one.
This approach does more than just enhance the client experience; it also helps direct the creative process. Associating moods and visuals with sensory inputs (like the taste of tea or the aroma of coffee) can help a client better articulate the « feeling » they’re after. It’s a sophisticated form of the same question— »what do you want? »—but packaged as a moment of indulgence.
By curating a ritual, you take control of the consultation’s atmosphere. You demonstrate that every minute with you is valuable and considered, turning a potential point of stress into a memorable signature touch that clients will talk about.
How to Tell Your Tech You Hate the Shape Without Being Rude?
While this question is framed from the client’s perspective, for a nail tech, the real question is: « How do I create an environment where a client feels comfortable telling me they hate the shape before it’s too late? » The shape is the foundation of the entire manicure. If it’s wrong, nothing else matters. A client leaving with a shape they secretly dislike is a client who may not return. Your job is to proactively prevent this disaster by implementing a non-negotiable communication checkpoint.
The power lies in making feedback not just welcome, but an explicit, required part of your process. This removes the social awkwardness for the client and positions you as a perfectionist who is committed to getting it right. You must be the one to initiate the conversation and make it clear that adjustments are a normal, expected part of the professional service.
The most effective strategy is the Mandatory One-Nail Checkpoint. Before you touch any other finger, you shape one nail completely and present it for approval. This single step can save you 30 minutes of rework and an untold amount of client dissatisfaction. It’s a proactive measure that builds immense trust. Equip yourself with calm, de-personalized scripts for both initiating feedback and receiving it.
- Pre-emptive Feedback Coaching (for new clients): « My goal is for you to love your nails, so please speak up! If the shape or length is even slightly off, just say ‘let’s make it a bit more tapered’ or ‘a little shorter.’ I want you to be picky! »
- The One-Nail Checkpoint Script: « Here is the shape and length we agreed on. Is this absolutely perfect for you before I match the other nine? »
- The Rescue & Reframe Script (if they hesitate): « Thank you for telling me! It’s so important we get this foundation right. Is it the length, the curve on the sides, or the tip that we need to adjust? »
This isn’t just about good customer service; it’s a proven client retention strategy. As salon management research confirms, nail consultations that include visual confirmation checkpoints significantly reduce post-service dissatisfaction and improve long-term loyalty. By making feedback a mandatory part of your workflow, you take the burden off the client and guarantee you’re both always on the same page.
Key takeaways
- Use structured design systems like the Anchor-Accent-Atmosphere framework to quickly translate jumbled client inspiration into a cohesive plan.
- Implement a transparent « Art Unit » pricing model to quote custom work confidently and avoid awkward budget conversations at the end of a service.
- Establish non-negotiable communication checkpoints, like the one-nail shape approval, to build trust, prevent errors, and guarantee client satisfaction.
« More is More »: How to Layer Prints Without Looking Messy?
Maximalism is an art form, but in the small canvas of a fingernail, the line between « boldly layered » and « chaotic mess » is razor-thin. When a client requests a « more is more » design, they want complexity and visual interest, not clutter. Your role as the artist is to be the editor, using principles of design to orchestrate the chaos into a harmonious composition. Just like with merging ideas, a framework is your best friend for achieving structured maximalism.
The most accessible and effective framework is the classic interior design principle, the 60-30-10 Rule, adapted for nail art. This rule provides a simple mathematical structure for balancing colors, patterns, and textures, ensuring that even the busiest designs have a clear visual hierarchy and a place for the eye to rest.
Applying this rule to a ten-nail set is straightforward:
- 60% Dominant Print/Color: This is your main event. It should cover the majority of the nail surfaces, appearing on roughly 6 out of 10 nails to establish the primary theme.
- 30% Secondary Print/Color: This is your supporting act. It complements the dominant element without competing, appearing on 3 out of 10 nails or as significant accent areas.
- 10% Accent Element: This is the final « pop. » A high-contrast metallic, glitter, or bold color that ties the design together, used sparingly on just one nail or as tiny, strategic details across the set.
Beyond this ratio, two other techniques are crucial for taming maximalist designs. First, always create a negative space path—an intentional « river » of solid base color or clear space that flows through the layered prints. This gives the eye a resting place and prevents visual fatigue. Second, layer texture over pattern instead of just pattern over pattern. For example, pair a floral print with a matte top coat and a single, glossy line. This creates sophisticated depth that feels rich, not just busy.
By replacing guesswork with these structured systems, you transform the five-minute consultation from a source of stress into your most powerful tool for client loyalty and creative expression. Start implementing one of these frameworks today and watch your confidence—and your revenue—grow.